
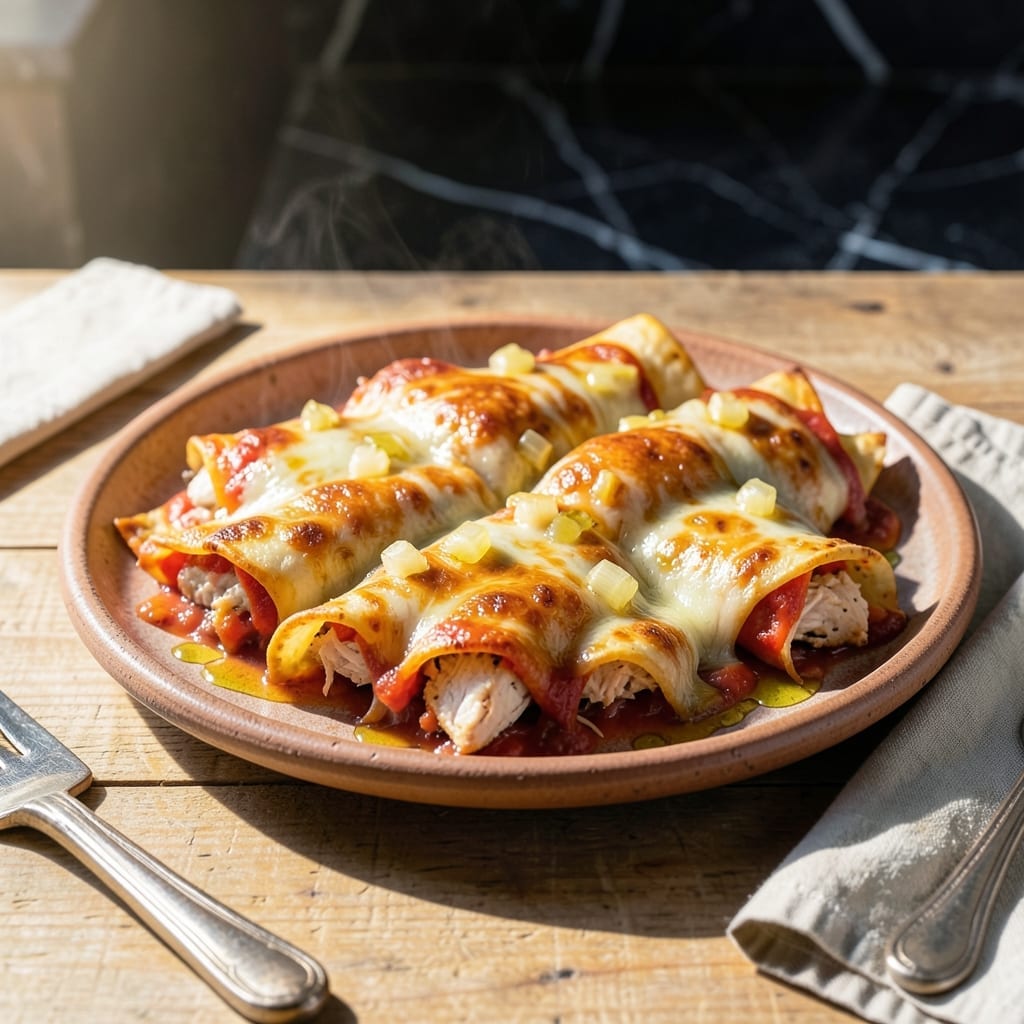
This baked chicken enchilada recipe delivers restaurant-quality results with layers of tender chicken, melted cheese, and a rich red sauce. The key is in the sauce preparation and proper layering technique.
I developed this method after years of testing to achieve the perfect balance of textures and flavors. The enchiladas bake until bubbly and golden, with each bite offering a harmonious blend of savory chicken, tangy sauce, and gooey cheese.
What sets this dish apart is the homemade red sauce, which adds depth that store-bought versions can’t match. The recipe comes together in under an hour, making it ideal for weeknight dinners or feeding a crowd.
The final result is a pan of perfectly baked enchiladas with crisp edges and a creamy, cheesy interior that’s impossible to resist.
Ingredients for Baked Chicken Enchiladas
Restaurant-quality layers start with these carefully selected, flavor-packed components for the perfect dish.
| Ingredient | Amount | Notes |
|---|---|---|
| Boneless Skinless Chicken Breasts 🍗 | 1 ½ lb | Cooked and shredded |
| Corn Tortillas 🌮 | 12 pieces | 6-inch size for proper rolling |
| Shredded Monterey Jack Cheese 🧀 | 2 cups | Divided for layering and topping |
| Shredded Cheddar Cheese 🧀 | 2 cups | Sharp for best flavor |
| Olive Oil 🫒 | 2 tbsp | For sautéing onions |
| Yellow Onion 🧅 | 1 whole | Medium size, finely diced |
| Garlic Cloves 🧄 | 3 cloves | Minced for sauce |
| Tomato Sauce 🍅 | 2 cups | Plain, unsweetened variety |
| Chili Powder 🌶️ | 2 tbsp | Mild or medium heat |
| Ground Cumin 🌿 | 1 tsp | Toasted for depth |
| Dried Oregano 🍃 | 1 tsp | Mexican oregano preferred |
| Salt 🧂 | 1 tsp | Kosher or sea salt |
| Black Pepper 🌶️ | ½ tsp | Freshly ground preferred |
| Chicken Broth 💧 | ½ cup | Low-sodium for sauce control |
| Fresh Cilantro 🌿 | ¼ cup | Chopped, for garnish |
The chicken is the foundation. Boneless, skinless breasts shred beautifully after poaching—avoid overcooking to maintain moisture. For tortillas, corn is traditional and holds up better than flour under the sauce. Cheese selection matters: Monterey Jack melts smoothly, while sharp cheddar adds the tangy punch. Source these from Whole Foods or Trader Joe’s for consistent quality.
No Monterey Jack? Pepper Jack adds a nice kick. Fresh out of corn tortillas? Flour works but may get soggy. For the sauce, San Marzano canned tomatoes blended smooth make an excellent base if you prefer a chunkier texture. The chili powder can be adjusted—half the amount for milder flavor. Cumin is essential; don’t substitute. Fresh cilantro can be swapped with parsley in a pinch.
Assemble enchiladas just before baking for best texture. Leftovers keep 4-5 days refrigerated, freeze for 3 months. Reheat covered with foil to prevent cheese from drying out. The sauce thickens upon standing, so thin with a splash of broth when reheating.
Why You’ll Love This Recipe
- No-Fuss Assembly: I just roll, stuff, and bake—no fancy techniques, just layering the shredded chicken, tortillas, and that melty Monterey Jack with cheddar.
- Cheesy Heaven: The combo of Monterey Jack and sharp cheddar creates this gooey, golden blanket over the enchiladas. Honestly, it’s the reason my kids clean their plates.
- Feeds a Crowd: I make a big pan on Sunday and we’re set for lunch all week—great for busy families or when friends drop by.
- Stretches the Budget: Chicken breasts and corn tortillas are affordable staples, and this dish turns them into something way more exciting than takeout.
Step-by-Step Instructions for Baked Chicken Enchiladas
Here is the professional method for assembling and baking these layered enchiladas to perfection.
Step 1: Prepare the Filling with Sautéed Aromatics
Heat the 2 tbsp olive oil in a large skillet over medium heat. Add the diced yellow onion and sauté for 5-6 minutes until translucent and just beginning to caramelize at the edges. This builds the flavor foundation for your filling.
Add the minced garlic cloves and cook for 30 seconds until fragrant but not browned. Stir in the 2 tbsp chili powder, 1 tsp ground cumin, 1 tsp dried oregano, 1 tsp salt, and 0.5 tsp black pepper. Toast the spices for 20 seconds to bloom their aromas before adding the cooked shredded chicken breasts and 0.5 cup chicken broth.
Step 2: Create the Enchilada Sauce
Pour the 2 cups tomato sauce into the skillet with the chicken mixture. Stir well to combine all ingredients, ensuring the chicken is thoroughly coated. Simmer the mixture over medium-low heat for 5 minutes until slightly thickened.
The sauce should be rich and fragrant, with the spices evenly distributed. Taste and adjust seasoning if needed, though the initial measurements should provide perfect balance. Remove from heat and set aside to cool slightly before assembly.
Step 3: Assemble the Enchiladas Layer by Layer
Preheat your oven to 375°F. Spread ½ cup of the chicken and sauce mixture on the bottom of a 9×13-inch baking dish. This prevents sticking and adds flavor to every bite.
Dip each corn tortilla briefly in the remaining sauce to soften, then fill with about ¼ cup of the chicken mixture and a sprinkle of both shredded Monterey Jack cheese and shredded cheddar cheese. Roll tightly and place seam-side down in the baking dish. Repeat with all 12 corn tortillas.
Step 4: Add Cheese and Bake to Bubbling Perfection
Pour any remaining sauce over the assembled enchiladas, then distribute the remaining shredded Monterey Jack cheese and shredded cheddar cheese evenly over the top. The cheese should form a complete, even layer that will melt into a golden blanket.
Bake uncovered for 20-25 minutes until the cheese is fully melted and beginning to bubble at the edges. The enchiladas are done when the cheese is golden brown in spots and the sauce is bubbling around the edges of the dish.
Step 5: Rest and Garnish Before Serving
Remove from the oven and let rest for 5-10 minutes. This allows the filling to set slightly, making the enchiladas easier to serve. The resting period also lets the flavors meld together for optimal taste.
Garnish with the 0.25 cup chopped fresh cilantro just before serving. The bright green cilantro adds a fresh contrast to the rich, cheesy dish. Serve warm with any remaining sauce spooned over the top.
Pro Tips For Making Baked Chicken Enchiladas
- Precook the Chicken: Poach the boneless chicken breasts in broth for 15-20 minutes until they reach 165°F—this keeps them juicy and makes shredding effortless with two forks.
- Warm the Tortillas: I learned this the hard way—heat corn tortillas for 10-15 seconds per side in a dry skillet or microwave between damp towels to prevent them from cracking when rolling.
- Skip Dry Cheese: Use freshly shredded Monterey Jack and cheddar instead of pre-shredded; the anti-caking agents in bagged cheese make your enchiladas grainy instead of melty.
- Sauce Before Baking: After rolling, ladle a thin layer of enchilada sauce over the tortillas before adding cheese—this stops them from drying out in the oven, even if they sit a few extra minutes.
Common Mistakes When Making This Dish
Overfilling Tortillas
One of the most common mistakes is using too much filling, which causes the enchiladas to burst open during baking. Stick to about ¼ cup of chicken mixture per corn tortilla. I’ve found that less filling actually results in a tighter, more secure roll. 💡
Skipping the Sauce Dip
Dipping each tortilla in the sauce before filling is crucial—it prevents dry, crumbly textures. Skip this step and you’ll end up with enchiladas that fall apart. Use warm sauce for best results, as it softens the tortillas just enough without making them soggy.
Underseasoning the Sauce
Taste your sauce before assembly. If it seems flat, add a pinch more chili powder or salt. The sauce is the flavor backbone of this dish, so it needs to be bold enough to stand up to the cheese and chicken. I always adjust mine with ½ tsp salt at a time.
Overbaking the Enchiladas
Bake just until the cheese is bubbly and golden brown—usually 20-25 minutes at 375°F. Overbaking dries out the filling and makes the tortillas tough. Watch for the edges to pull away slightly from the dish as a sign they’re done.
Not Letting Them Rest
Resist the urge to serve immediately. Let the enchiladas rest for 5-10 minutes after baking so the filling sets and the flavors meld. Cutting too soon results in a runny, messy plate. This short wait makes all the difference. 🔥
Using Cold Fillings
Always use room-temperature or warm fillings. Cold chicken or cheese can create a temperature shock that affects even baking. I take my shredded cheese out of the fridge 30 minutes before assembling to ensure even melting.
Nutrition Facts
Frequently Asked Questions
Can I make this ahead of time?
Yes! Assemble completely, cover with foil, and refrigerate for up to 24 hours. Bake as directed, adding 5-10 minutes to the cooking time since it’ll be cold.
Why did my tortillas tear when rolling?
They were likely too dry. Warm tortillas in a damp towel for 30 seconds before dipping in sauce to make them pliable. This prevents cracking.
Can I use flour tortillas instead?
You can, but they may get soggier. For best results, use corn tortillas as they hold up better to the sauce and baking process.
How do I know when they’re done?
Look for bubbling sauce at the edges and golden brown cheese on top. The internal temperature should reach 165°F if checked.

- Jollof Rice Sauce Recipe: West African Tomato and Spice Infusion - September 25, 2026
- Japanese Rice Soup Recipe: Umami-Rich Comfort in a Bowl - September 25, 2026
- Homemade Cream Of Rice Recipe: Silk-Smooth Breakfast in Minutes - September 25, 2026