
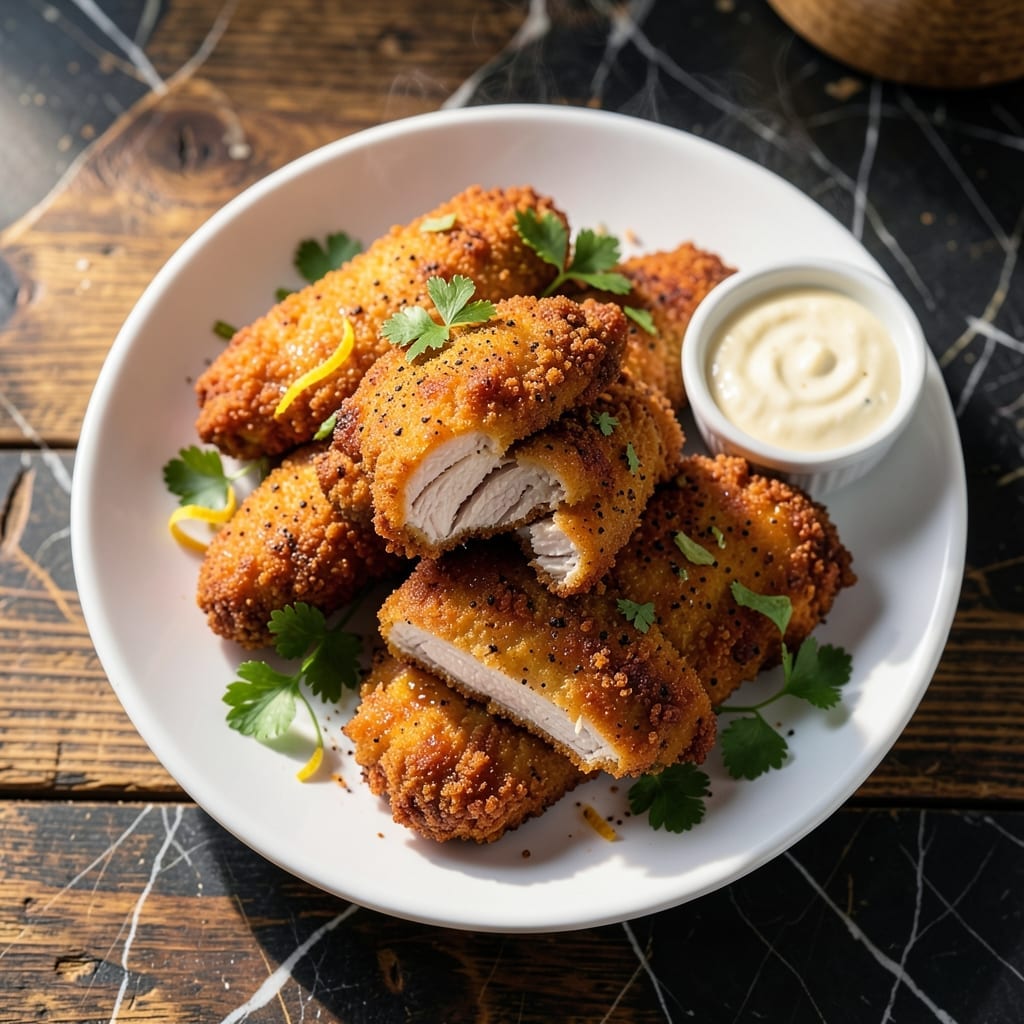
This copycat recipe delivers the crispy, golden tenders you love from Publix right in your own kitchen. The secret lies in a precise seasoning blend and the right cooking method to achieve that signature crunch.
Using simple pantry staples and a two-step breading process, this method ensures tender chicken with a coating that stays crispy long after cooking. Whether you bake, fry, or air-fry, the results will rival the original.
Each bite offers that familiar flavor and texture combination that makes these tenders so addictive. The seasoning blend captures the restaurant-quality taste without any guesswork.
Serve with your favorite dipping sauces for a meal that tastes just like takeout night, but better. This version lets you control the ingredients while achieving the same satisfaction.
Ingredients for Publix Chicken Tenders
Simple pantry staples and a few key spices create that signature crispy, golden coating.
| Ingredient | Amount | Notes |
|---|---|---|
| Boneless Skinless Chicken Breasts 🍗 | 1 ½ lb | Cut into 1-inch strips |
| All-Purpose Flour 🌾 | 1 cup | For initial dredging |
| Large Eggs 🥚 | 2 whole | Beaten for egg wash |
| Buttermilk 🥛 | ½ cup | For tenderizing chicken |
| Panko Breadcrumbs 🍞 | 2 cups | For crispy coating |
| Cornstarch 🌽 | ¼ cup | For extra crunch |
| Garlic Powder 🧄 | 1 tsp | For seasoning blend |
| Onion Powder 🧅 | 1 tsp | For seasoning blend |
| Paprika 🌶️ | 1 tsp | Sweet or smoked variety |
| Salt 🧂 | 1 tsp | Diamond Crystal preferred |
| Black Pepper 🌶️ | ½ tsp | Freshly ground preferred |
| Cayenne Pepper 🔥 | ¼ tsp | For subtle heat |
| Vegetable Oil 🫒 | 2 cups | For deep frying |
| Dried Parsley 🌿 | 1 tsp | For color and flavor |
The chicken is the foundation—boneless, skinless breasts give you the right texture. Publix sells pre-cut tenders if you’re short on time, but cutting your own lets you control the thickness. For the breading, panko breadcrumbs are non-negotiable for that restaurant-level crunch. I get mine in bulk from Whole Foods, but any grocery store brand works. The buttermilk is what keeps the chicken tender underneath all that crispy coating.
No buttermilk? Whole milk plus a tablespoon of vinegar gets you close. Swap panko for regular breadcrumbs, but expect a slightly softer texture. The seasoning blend is flexible—add a pinch of celery salt if you want that classic deli flavor. For frying, peanut oil works as well as vegetable oil (higher smoke point). If baking, use a wire rack so the tenders crisp up on all sides.
Fry in batches to avoid crowding—keeps them crispy. Leftovers? Store in the fridge for 3-4 days (they lose some crunch). Reheat in the air fryer or oven to revive the texture. Freeze uncooked breaded tenders for up to 3 months—perfect for quick weeknight meals.
Why You’ll Love This Recipe
- Weeknight Hero: I can get these from fridge to table in 20 minutes flat—just dip, dredge, and bake.
- Crispy Perfection: That panko crust with the buttermilk soak? Ridiculously good, every single time.
- Kid-Approved Meal: Honestly, even my pickiest eater asks for seconds of these tenders.
- Budget Stretcher: One pound of chicken breasts makes four generous servings without breaking the bank.
Step-by-Step Instructions for Copycat Crispy Chicken Tenders
This method delivers that signature crunch and juicy interior you crave from the original.
Step 1: Prep and Season the Chicken
Cut the 1.5 lb Boneless Skinless Chicken Breasts into 1-inch strips. I like to keep them uniform so they cook evenly. Pat each piece dry with paper towels—this ensures the coating adheres properly and prevents splattering during frying.
In a shallow dish, combine the 1 cup All-Purpose Flour, 1 tsp Salt, 0.5 tsp Black Pepper, 1 tsp Garlic Powder, 1 tsp Onion Powder, 1 tsp Paprika, and 0.25 tsp Cayenne Pepper. This seasoning blend gives the tenders that familiar, well-balanced flavor.
Step 2: Create the Breading Station
In a separate bowl, whisk together the 2 whole Large Eggs and 0.5 cup Buttermilk until smooth. This egg wash adds moisture and helps the coating cling to the chicken. In a third dish, mix the 2 cups Panko Breadcrumbs and 0.25 cup Cornstarch—the cornstarch is the secret to extra crispiness.
Dredge each piece of chicken in the seasoned flour, shaking off any excess. Then dip it into the egg wash, allowing any excess to drip off. Finally, press the chicken into the panko mixture, ensuring it’s fully coated on all sides. Place the breaded tenders on a wire rack to rest for 5 minutes—this helps the coating set.
Step 3: Fry to Golden Perfection
Heat the 2 cups Vegetable Oil in a deep, heavy-bottomed skillet or Dutch oven over medium-high heat until it reaches 350-375°F. Use a kitchen thermometer for accuracy—oil that’s too cool will make the tenders greasy, while oil that’s too hot can burn the coating before the chicken cooks through.
Working in batches to avoid overcrowding, carefully place the breaded tenders into the hot oil. Fry for 3-4 minutes per side until they’re golden brown and the internal temperature reaches 165°F. Transfer the cooked tenders to a paper towel-lined plate to drain excess oil.
Step 4: Finish and Serve Immediately
While the tenders are still hot, sprinkle them with the 1 tsp Dried Parsley for a pop of color and a subtle herbal note. Serve immediately—they’re best straight from the fryer when the coating is at its crispiest.
For that true copycat experience, pair them with your favorite dipping sauce. The contrast of the tender, juicy chicken inside and the shatteringly crisp exterior is what makes these tenders so irresistible. Don’t let them sit too long, or the coating will lose its crunch.
Pro Tips For Making Publix Chicken Tenders
- Cut Evenly: Slice the chicken breasts into uniform 1-inch thick strips—this guarantees even cooking and prevents dry, overdone edges while the centers finish.
- Soak in Buttermilk: Let the chicken strips bathe in the buttermilk for at least 30 minutes. I learned this the hard way—skipping it leaves the tenders less tender and the coating prone to falling off.
- Use Cold Panko: sounds weird, but it works: Chill the panko breadcrumbs in the freezer for 10 minutes before breading—they stick better and create a crisper crust.
- Double Dip: After the initial flour-egg-panko dredge, dip the tenders back in the egg and panko once more. This extra layer is what makes them stay crunchy even after sitting a few minutes.
Serving Suggestions for This Dish
Classic Dipping Sauces
You can’t go wrong with honey mustard—mix 3 tbsp mayonnaise with 2 tbsp Dijon mustard and 1 tbsp honey. For a Southern touch, come-back sauce with its tangy-sweet flavor is my personal favorite. These pair perfectly with the crispy texture. 💛
Fresh Side Pairings
Crisp coleslaw cuts through the richness beautifully. I toss 4 cups shredded cabbage with ¼ cup buttermilk dressing and 1 tbsp apple cider vinegar. Sweet potato fries make another great side that complements the meal.
Lighter Options
A simple green salad with mixed greens, cherry tomatoes, and ranch dressing balances the meal. For something different, try pickle spears and potato chips for that classic diner experience.
Family-Style Serving
Arrange tenders on a large platter with small bowls of dipping sauces in the center. I like to add lemon wedges for a bright, fresh contrast. This setup makes it easy for everyone to grab what they want. 🔥
Kid-Friendly Touches
Cut tenders into bite-sized pieces for little hands. Serve with ketchup and BBQ sauce for dipping. Add carrot sticks and celery to make the meal more balanced.
Nutrition Facts
Frequently Asked Questions
Can I bake these instead of frying?
Yes! Bake at 400°F for 15-20 minutes on a wire rack. Spray with oil first for extra crispiness. The texture won’t be identical but still delicious.
Why use buttermilk in the recipe?
Buttermilk tenderizes the chicken and helps the coating adhere better. Its acidity also adds subtle tang. No buttermilk? Use 1/2 cup milk + 1 tbsp vinegar.
How do I keep them crispy after cooking?
Drain on a wire rack, not paper towels, to prevent steam buildup. Keep warm in a 200°F oven if serving later. Avoid stacking until ready to eat.
Can I make these gluten-free?
Swap all-purpose flour for 1 cup gluten-free flour blend. Use gluten-free panko and ensure all spices are certified GF. The method stays the same.

- Jollof Rice Sauce Recipe: West African Tomato and Spice Infusion - September 25, 2026
- Japanese Rice Soup Recipe: Umami-Rich Comfort in a Bowl - September 25, 2026
- Homemade Cream Of Rice Recipe: Silk-Smooth Breakfast in Minutes - September 25, 2026