
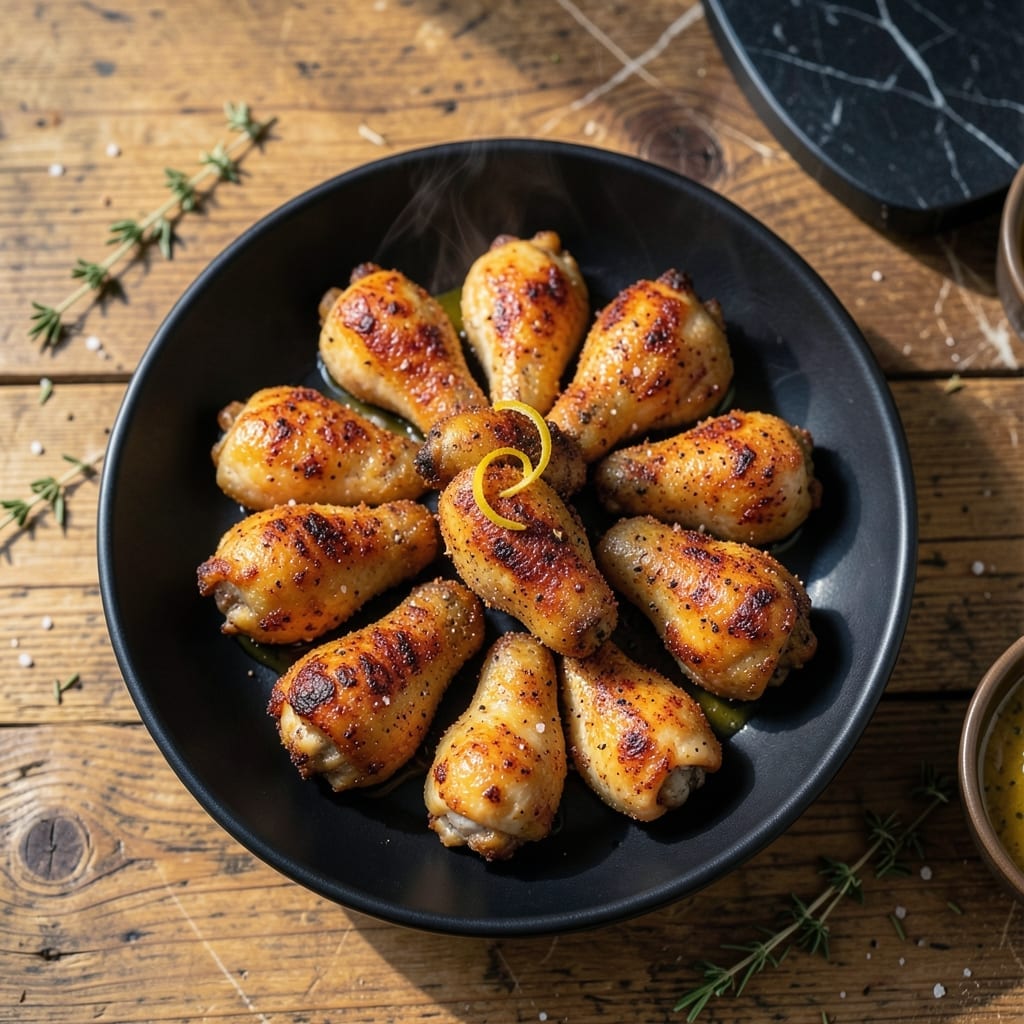
Achieve crispy oven-baked chicken drumettes that rival any deep-fried version. This proven method delivers perfectly golden skin and juicy meat every time.
The secret lies in a two-step process: first patting the drumettes completely dry, then coating them with a light layer of oil and seasoning. This ensures maximum crispiness without any frying.
Baking at 425°F for 40 minutes transforms the skin into a shatteringly crisp coating while keeping the meat moist and tender. The high heat mimics frying results with far less effort.
Serve these as an appetizer or main dish. The technique works for any quantity, making it ideal for gatherings or meal prep.
Ingredients for Baked Chicken Drummies
A handful of pantry staples transforms these drumettes into crispy perfection without frying.
| Ingredient | Amount | Notes |
|---|---|---|
| Chicken Drumettes 🍗 | 2 lb | Patted completely dry |
| Olive Oil 🫒 | 2 tbsp | Divided for coating |
| Kosher Salt 🧂 | 1 ½ tsp | Diamond Crystal preferred |
| Black Pepper 🌶️ | 1 tsp | Freshly ground |
| Garlic Powder 🧄 | 1 tsp | Not garlic salt |
| Smoked Paprika 🌶️ | 1 tsp | For depth of flavor |
| Onion Powder 🧅 | 1 tsp | Balanced seasoning |
| Dried Oregano 🍃 | ½ tsp | Mediterranean oregano |
| Cayenne Pepper 🔥 | ¼ tsp | Adjust to spice preference |
| Baking Powder 🧂 | 1 tsp | For extra crispiness |
| Cornstarch 🌾 | 2 tbsp | Light coating for crunch |
| Fresh Parsley 🌿 | ¼ cup | Chopped, for garnish |
The chicken is the foundation. Drumettes with skin on yield the best crispiness—look for plump pieces with even coloring at Whole Foods or your local butcher. Patting them completely dry is non-negotiable (use paper towels, not cloth). The baking powder might seem unusual, but it’s the professional trick for that shatteringly crisp texture without deep-frying.
No smoked paprika? Regular paprika plus a pinch of liquid smoke works. Out of cayenne? Crushed red pepper at half the amount. The cornstarch can be swapped for arrowroot powder if needed. For extra flavor, add a teaspoon of lemon zest to the seasoning mix. Fresh drumettes are ideal, but thawed frozen ones work too (pat them extra dry).
Cook immediately after seasoning for best results. Leftovers keep in the fridge for 3-4 days but are best eaten fresh. Reheat in the oven at 375°F for 10 minutes to restore crispiness. Not suitable for freezing after cooking.
Why You’ll Love This Recipe
- One Pan Wonder: I toss the drumettes with olive oil and spices, then bake—no flipping, no fuss, just crispy results.
- Garlic Lovers Dream: The garlic powder works its magic in the oven, giving every bite that warm, savory depth I crave.
- Crowd Pleaser: I’ve served these at game nights and weeknight dinners alike—everyone from picky kids to foodie friends asks for more.
- Budget Stretcher: Honestly, drumettes are cheap, and this recipe turns a humble ingredient into something ridiculously good without breaking the bank.
Step-by-Step Instructions for Oven-Crisped Chicken Drumettes
This method guarantees crispy, golden drumettes with juicy interiors every time.
Step 1: Prepare and Season the Drumettes
Pat the 2 lb Chicken Drumettes completely dry with paper towels. I emphasize this step because any moisture prevents proper browning. Transfer the drumettes to a large bowl and drizzle with 1 tbsp Olive Oil, tossing to coat evenly.
In a separate bowl, combine 1.5 tsp Kosher Salt, 1 tsp Black Pepper, 1 tsp Garlic Powder, 1 tsp Smoked Paprika, 1 tsp Onion Powder, 0.5 tsp Dried Oregano, and 0.25 tsp Cayenne Pepper. Sprinkle this mixture over the drumettes and toss until every piece is uniformly coated.
Step 2: Create the Crispy Coating
In a small bowl, whisk together 1 tsp Baking Powder and 2 tbsp Cornstarch until no lumps remain. This combination is the secret to achieving that coveted crunch without frying.
Sprinkle the cornstarch mixture over the seasoned drumettes and toss gently but thoroughly. You want a light, even dusting on all surfaces. The baking powder will create tiny bubbles as it cooks, enhancing the texture. Let the coated drumettes rest for 5 minutes to allow the coating to adhere.
Step 3: Bake at High Temperature
Preheat your oven to 425°F and line a large baking sheet with parchment paper. Arrange the drumettes in a single layer, ensuring they don’t touch each other. This spacing allows hot air to circulate and crisp all sides evenly.
Bake on the middle rack for 20 minutes, then flip each piece and bake for an additional 15-20 minutes until deep golden brown and crispy. The internal temperature should reach 165°F when tested with an instant-read thermometer. Watch for the edges to become slightly darker—this indicates maximum crispiness.
Step 4: Finish and Serve
Remove the drumettes from the oven and let them rest on the baking sheet for 5 minutes. This brief rest period allows the juices to redistribute while maintaining the crispy exterior.
Transfer to a serving platter and drizzle with the remaining 1 tbsp Olive Oil. Sprinkle with 0.25 cup Fresh Parsley, chopped, for a pop of color and freshness. Serve immediately while hot and crispy for the best texture and flavor.
Pro Tips For Making Baked Chicken Drummies
- Pat Them Dry: I learned this the hard way—drumettes straight from the package have too much moisture, so pat them dry with paper towels first for crispier skin.
- High Heat First: Crank the oven to 425°F for the first 15 minutes to get that golden crust, then drop to 375°F to cook through without burning.
- Double Season: Toss the drumettes in olive oil, salt, pepper, and garlic powder twice—once before baking and again halfway through for maximum flavor.
- Skip the Crowding: After burning three batches, I finally figured out that leaving space between pieces on the tray guarantees even browning instead of steaming.
Regional Styles of This baked chicken drummies
Buffalo Style
Toss your baked drumettes in ½ cup Frank’s RedHot sauce mixed with 2 tbsp melted butter as soon as they come out of the oven. This classic Buffalo approach delivers that signature tangy heat New York is famous for. Serve with celery sticks and blue cheese dressing. 🔥
Southern BBQ
After baking, brush the drumettes with ½ cup Sweet Baby Ray’s BBQ sauce and return to the oven for 5 minutes at 400°F. This Carolina-style finish creates a sticky, caramelized coating. I love adding a sprinkle of chopped scallions before serving.
Asian Glaze
Whisk ¼ cup soy sauce, 2 tbsp honey, 1 tbsp rice vinegar, and 1 minced garlic clove. Toss the baked drumettes in this glaze and broil for 2-3 minutes for a Korean-inspired sticky coating. Garnish with sesame seeds.
Lemon Pepper
Mix 2 tbsp lemon zest with 1 tbsp coarsely ground black pepper and 1 tsp salt. Toss this mixture with the hot drumettes right after baking. This California-style version is bright and zesty with no sauce needed. ✨
Honey Garlic
Combine ¼ cup honey, 3 minced garlic cloves, and 1 tbsp apple cider vinegar. Simmer for 2 minutes, then toss with the baked drumettes. This Canadian favorite is sweet, sticky, and irresistibly garlicky.
Nutrition Facts
Frequently Asked Questions
Why is patting the drumettes dry so important?
Drying removes moisture that would steam instead of crisp. Even a little water creates a barrier between the seasoning and skin, preventing that perfect golden-brown finish. Always use paper towels for best results.
Can I use frozen drumettes for this recipe?
Yes, but thaw completely and pat extra dry. Frozen pieces release more water, so you’ll need to be thorough. Expect the baking time to increase by 5-10 minutes.
What can I use instead of baking powder?
For a similar crispy effect, use 1 tsp cornstarch plus ½ tsp baking soda. The chemistry isn’t identical, but it still creates a light, airy texture. Avoid skipping this step entirely.
How do I keep them crispy after baking?
Serve immediately on a wire rack to prevent steam buildup. If storing, reheat in an oven at 375°F for 10 minutes to restore the crunch. Avoid microwaving, as it will make them soggy.

- Jollof Rice Sauce Recipe: West African Tomato and Spice Infusion - September 25, 2026
- Japanese Rice Soup Recipe: Umami-Rich Comfort in a Bowl - September 25, 2026
- Homemade Cream Of Rice Recipe: Silk-Smooth Breakfast in Minutes - September 25, 2026