
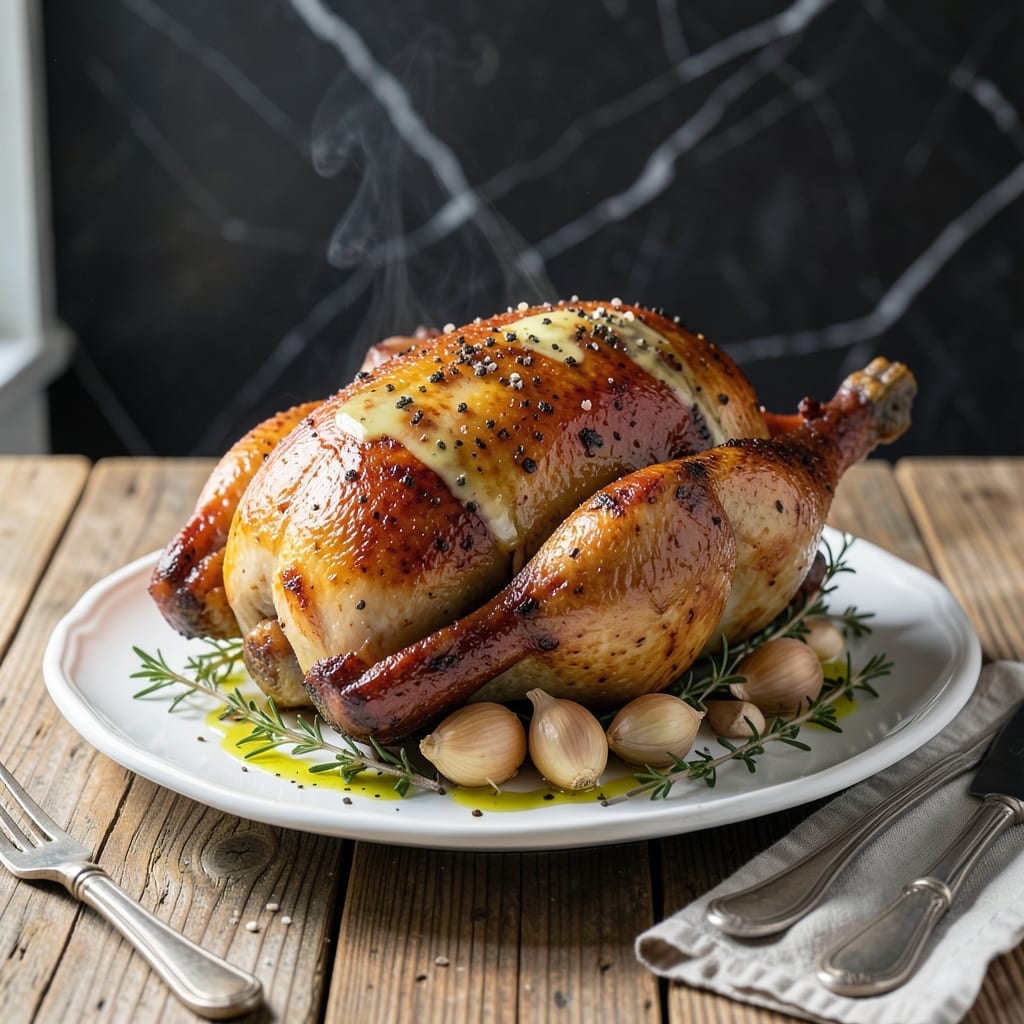
I’ve tested countless roast chicken methods, but this technique stands apart for its simplicity and perfectly even doneness every time. The key lies in a high-heat start followed by gentle finishing.
This approach delivers crispy golden skin and juicy meat without complicated steps. A well-seasoned bird and proper oven temperature do most of the work.
You’ll end up with a chicken that’s tender throughout, with a deep mahogany crust and rich pan juices for gravy. It’s a method that elevates a classic to new heights.
Serve with roasted vegetables or a simple salad. Here’s how to achieve these results in your own kitchen.
Ingredients for Keller Roast Chicken
A whole bird, fresh herbs, and butter create this foolproof roast with mahogany skin and juicy meat.
| Ingredient | Amount | Notes |
|---|---|---|
| Whole Chicken 🍗 | 1 whole | 3-4 lb, patted dry inside and out |
| Kosher Salt 🧂 | 2 tsp | Diamond Crystal preferred for even seasoning |
| Freshly Ground Black Pepper 🌶️ | 1 tsp | Coarse grind for texture |
| Unsalted Butter 🧈 | 4 tbsp | Room temperature, high-fat European style |
| Garlic Cloves 🧄 | 4 cloves | Smashed but left whole |
| Fresh Thyme Sprigs 🌿 | 4 sprigs | Plus extra for garnish |
| Fresh Rosemary Sprigs 🌿 | 2 sprigs | Sturdy stems for flavor infusion |
| Lemon 🍋 | 1 whole | Halved for cavity stuffing |
| Yellow Onion 🧅 | 1 whole | Quartered for aromatic base |
| Carrots 🥕 | 2 whole | Peeled, cut into 2-inch chunks |
| Celery Stalks 🥬 | 2 stalks | Cut into 2-inch pieces |
| Olive Oil 🫒 | 1 tbsp | Neutral flavor for high-heat searing |
The chicken quality is non-negotiable here. Air-chilled birds from Whole Foods or local butchers yield superior crispness and moisture retention. Look for 3-4 lb specimens—large enough for even cooking, small enough to avoid drying. Diamond Crystal kosher salt is the professional standard for its clean, consistent grain size. The butter should be European-style (82-85% fat) for optimal browning without burning.
No fresh herbs? Dried at one-third the amount, but fresh delivers the aromatic complexity Keller’s method demands. Skip the lemon? A splash of white wine in the cavity works. The onion and celery form the classic mirepoix base—swap leeks for a milder allium note. For the carrots, parsnips or fennel add interesting variations without compromising the fundamental flavor profile.
Roast immediately or refrigerate the seasoned bird uncovered for up to 24 hours (this dries the skin for extra crispiness). Leftovers keep 4 days refrigerated, though the skin softens. The rendered fat is liquid gold—strain and store in the fridge for 2 weeks to use in other dishes.
Why You’ll Love This Recipe
- One Pan Wonder: I just toss the chicken with butter, garlic, salt, and pepper—no fancy prep, no extra dishes.
- Buttery Garlic Magic: The butter and garlic melt into the meat, creating a golden, flavorful crust that’s honestly irresistible.
- Sunday or Tuesday: I serve it for family dinners, then use the leftovers in sandwiches or salads all week.
- Leftovers Gold: One roast chicken gives me meals for days, and the bones make the best stock for soups.
Step-by-Step Instructions for Keller Roast Chicken
Master this refined technique for consistently perfect results with crisp skin and juicy meat.
Step 1: Prepare and Season the Chicken
Begin by thoroughly patting the whole chicken dry inside and out with paper towels. This critical step ensures crispy skin by removing surface moisture that would otherwise steam the bird. Season the cavity and exterior generously with the 2 tsp Kosher Salt and 1 tsp Freshly Ground Black Pepper, making sure to get into all the crevices.
The Diamond Crystal salt distributes evenly, while the coarse black pepper adds subtle texture. I always let the seasoned chicken rest uncovered in the refrigerator for 1 hour to allow the skin to dry further—this is the secret to that coveted golden, crackling exterior.
Step 2: Create the Aromatic Base
Preheat your oven to 450°F. While it heats, prepare your aromatics: halve the lemon, quarter the yellow onion, peel and cut the 2 whole Carrots into 2-inch chunks, and trim the 2 stalks Celery Stalks into similar pieces. These vegetables will form a flavorful bed for the chicken and infuse the pan drippings.
Place the 4 cloves Garlic Cloves (smashed but left whole), 4 sprigs Fresh Thyme Sprigs, and 2 sprigs Fresh Rosemary Sprigs in the cavity of the chicken along with the lemon halves. This internal seasoning perfumes the meat from within as it roasts.
Step 3: Truss and Begin Roasting
Truss the chicken legs together with kitchen twine to create a compact shape, which promotes even cooking and presentation. Rub the entire exterior with 1 tbsp Olive Oil—this helps the skin brown and crisp uniformly. Place the chicken breast-side up on the prepared vegetable bed in a roasting pan.
Roast the chicken for 15 minutes at 450°F to jumpstart the browning process. At this point, the skin should already be taking on a light golden hue. Reduce the oven temperature to 400°F and continue roasting.
Step 4: Baste and Finish
After 30 minutes of total roasting time, carefully baste the chicken with the accumulated pan juices and melted 4 tbsp Unsalted Butter. I add the butter in chunks directly to the pan, allowing it to melt and mingle with the drippings. Baste again every 10-15 minutes until the chicken is done.
The chicken is finished when an instant-read thermometer inserted into the thickest part of the thigh (avoiding the bone) registers 165°F and the juices run clear. The skin should be a deep golden brown and crisp to the touch.
Step 5: Rest and Serve
Transfer the chicken to a cutting board and let it rest for 15-20 minutes. This crucial step allows the juices to redistribute throughout the meat, ensuring each serving is moist and flavorful. Tent loosely with foil to keep it warm.
Carve the chicken and arrange on a platter with the roasted vegetables. Spoon any pan juices over the top for added richness. The result should be tender meat with a perfectly crisp, mahogany-colored skin that shatters at the touch of a fork.
Pro Tips For Making Keller Roast Chicken
- Dry the Chicken: Pat the chicken completely dry with paper towels before seasoning—I learned this the hard way after my first few attempts came out steamed rather than crisp.
- Use Room-Temp Butter: Take the unsalted butter out 30 minutes before starting so it softens enough to mix easily with the garlic and herbs.
- Skip the Overcrowding: Give the chicken space in the pan, or the skin won’t crisp properly—yes, even if it means using a bigger roasting dish.
- Rest Before Carving: Let the chicken rest 10-15 minutes after roasting, or all those juices you worked for will end up on the cutting board.
Best Sauces and Condiments for These Flavors
Classic Pan Gravy
After removing the chicken, pour the pan drippings into a saucepan. Skim off 2 tbsp fat and return to heat. Whisk in 2 tbsp flour and cook for 2 minutes to create a roux. Gradually add 1 cup chicken broth and simmer until thickened. 💛
Herb Butter Sauce
Melt 4 tbsp unsalted butter in a small pan with 1 tbsp chopped fresh thyme and 1 minced garlic clove. Drizzle over carved chicken for an extra layer of richness. I use European-style butter for superior flavor.
Lemon-Thyme Jus
Deglaze the roasting pan with ½ cup white wine and ½ cup chicken stock. Reduce by half, then stir in 1 tbsp cold butter and 1 tsp lemon juice. Strain before serving for a bright, elegant finish.
Spicy Harissa Paste
Mix 2 tbsp harissa paste with 1 tbsp olive oil and a pinch of salt. Brush onto chicken pieces before serving for a North African twist. I love Dea brand harissa for its balanced heat and complexity. 🔥
Creamy Garlic Aioli
Combine ½ cup mayonnaise, 1 minced garlic clove, 1 tbsp lemon juice, and 1 tsp Dijon mustard. This cool, creamy sauce pairs perfectly with the crispy skin and juicy meat.
Chimichurri Sauce
Blend 1 cup parsley, ¼ cup cilantro, 3 garlic cloves, ¼ cup olive oil, 2 tbsp red wine vinegar, and ½ tsp red pepper flakes. The fresh herbal notes complement the roasted flavors beautifully.
Nutrition Facts
Frequently Asked Questions
Why start at such a high temperature?
The initial 450°F blast jumpstarts browning and crisping. This creates a perfect golden crust before the heat reduces to 400°F for even cooking.
Can I use dried herbs instead of fresh?
Yes, but use 1/3 the amount since dried herbs are more concentrated. Fresh herbs provide better aromatic complexity, but dried work in a pinch.
How do I know when it’s done?
Use a thermometer—the thickest part of the thigh should read 165°F. The juices should run clear, and the skin should be deep golden brown.
What if my skin isn’t crispy?
Pat the chicken extremely dry before seasoning, and let it rest uncovered in the fridge for 1 hour before roasting. This removes moisture for maximum crispiness.

- Jollof Rice Sauce Recipe: West African Tomato and Spice Infusion - September 25, 2026
- Japanese Rice Soup Recipe: Umami-Rich Comfort in a Bowl - September 25, 2026
- Homemade Cream Of Rice Recipe: Silk-Smooth Breakfast in Minutes - September 25, 2026