
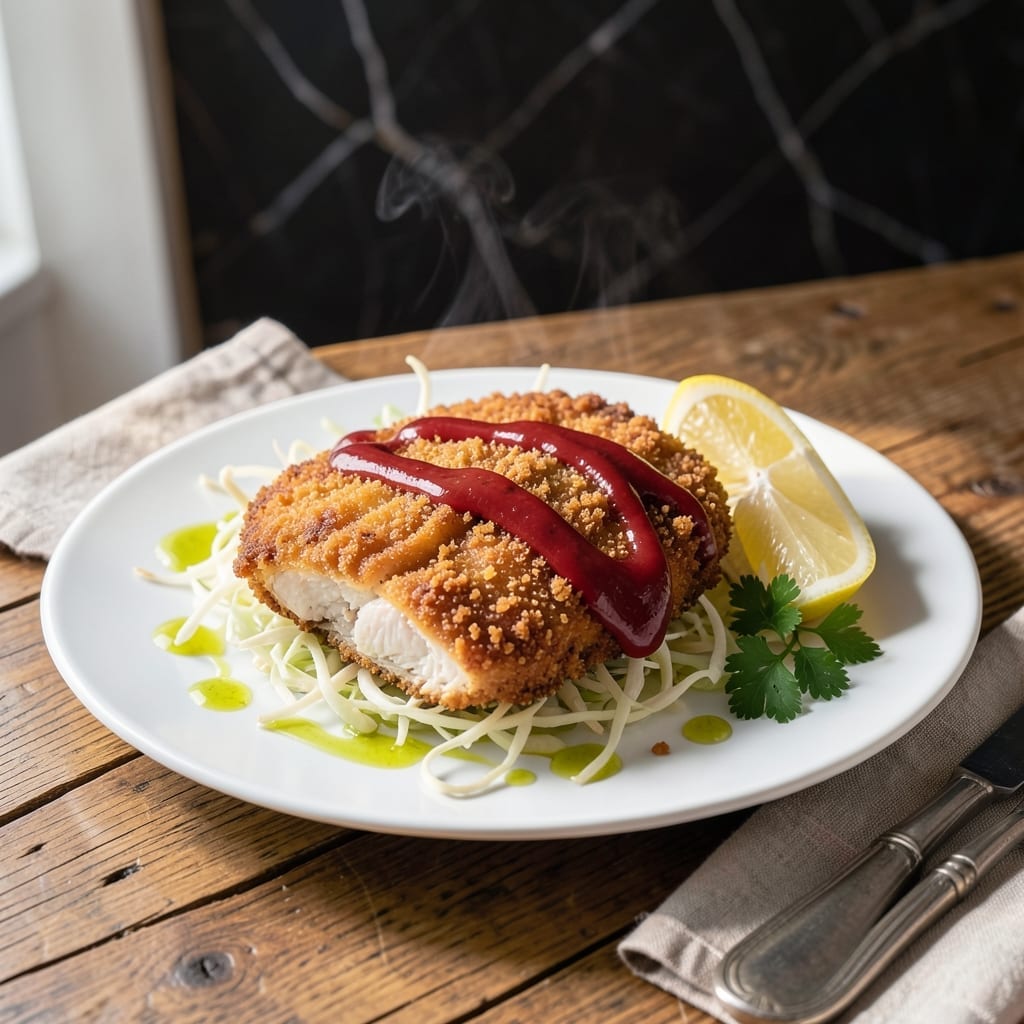
This baked chicken katsu delivers the same crispy texture as the traditional fried version without the mess or guilt. The secret lies in a double-dipping method that ensures maximum panko adhesion for that signature crunch.
By using the oven instead of oil, we achieve evenly golden results while keeping the chicken juicy inside. The panko breadcrumbs create an extra-thick coating that bakes up shatteringly crispy – just like your favorite Japanese restaurant.
Each bite offers tender chicken encased in a golden, flaky crust that stays crunchy long after baking. The method is straightforward yet delivers restaurant-quality results every time.
Serve with tonkatsu sauce and shredded cabbage for the complete experience. Here’s how to make this crowd-pleasing dish.
Ingredients for Baked Chicken Katsu
Pantry staples plus chicken and panko create that signature crispy crunch at home.
| Ingredient | Amount | Notes |
|---|---|---|
| Chicken Breast Cutlets 🍗 | 1 ½ lb | Pounded to 1/2-inch thickness |
| All-Purpose Flour 🌾 | ½ cup | For initial dredging layer |
| Large Eggs 🥚 | 2 whole | Beaten for binding |
| Panko Breadcrumbs 🍞 | 2 cups | Japanese-style for maximum crunch |
| Neutral Oil 🫒 | 2 tbsp | Avocado or vegetable oil |
| Salt 🧂 | 1 tsp | Diamond Crystal kosher preferred |
| Black Pepper 🌶️ | ½ tsp | Freshly cracked for best flavor |
| Garlic Powder 🧄 | ½ tsp | Enhances savory depth |
| Onion Powder 🧅 | ½ tsp | Balances seasoning blend |
| Green Cabbage 🥬 | 4 cups | Thinly shredded for serving |
| Tonkatsu Sauce 🍯 | ½ cup | Store-bought or homemade |
| Mayonnaise 🥄 | ¼ cup | For optional dipping sauce |
| Sriracha 🌶️ | 1 tbsp | For spicy mayo option |
The panko is non-negotiable here—Kikkoman or Progresso brands give that authentic Japanese texture. Look for the largest flakes you can find (the good stuff, not the fine breadcrumbs). Chicken cutlets work best, but thin-sliced chicken breasts from the store save time. I usually grab mine from Whole Foods since their meat quality is consistently good. Pound them yourself if they’re thick—uniform size = even cooking.
No panko? Crushed cornflakes at a 1:1 ratio works in a pinch. Out of tonkatsu? Worcestershire plus ketchup gets you 80% there. The cabbage can be bagged coleslaw mix (don’t skip this part)—it adds the perfect crunchy contrast. For the mayo dip, regular or light both work, but full-fat for creaminess (trust me on the full-fat version).
Bread the chicken right before baking—it loses crunch if it sits. Leftovers keep 3-4 days in the fridge, but the coating softens. Re-crisp in a 400°F oven for 10 minutes to revive. Panko freezes well, so stock up when you find the good stuff.
Why You’ll Love This Recipe
- No-Fuss Breading: I love that it’s just flour, egg, and panko—no complicated steps, just dip and coat.
- Crispy Perfection: The panko gives it that golden crunch without deep frying, and the chicken stays juicy every time.
- Weeknight Hero: I throw it together on busy evenings, and it’s ready before the rice finishes cooking.
- Leftovers Win: Honestly, it tastes just as good cold the next day in a sandwich or salad.
Step-by-Step Instructions for Baked Chicken Katsu
Here’s my foolproof method for achieving that signature crispy texture without the deep fryer.
Step 1: Season and Set Up the Breading Station
Pat the 1.5 lb chicken breast cutlets dry with paper towels—this is crucial for the coating to adhere properly. Season both sides lightly with 1 tsp salt, 0.5 tsp black pepper, 0.5 tsp garlic powder, and 0.5 tsp onion powder. The seasoning should be visible but not overwhelming.
Set up three shallow dishes in a row. Place the 0.5 cup all-purpose flour in the first, beat the 2 whole large eggs in the second, and put the 2 cups panko breadcrumbs in the third. This assembly line approach keeps the process clean and efficient. I always use a rimmed baking sheet to catch any stray crumbs.
Step 2: Double-Coat for Maximum Crunch
Dredge each cutlet in the flour, pressing lightly to create an even, thin layer. Shake off any excess—you want just enough to create a base for the egg to cling to. Then dip it into the beaten eggs, letting any excess drip off for 5 seconds before moving to the panko.
Press the cutlet firmly into the panko, turning it over and pressing again to ensure complete coverage. The panko should form a thick, even layer that looks almost snow-covered. Place the coated cutlets on a wire rack set over a baking sheet. Real talk: this double-dredging is what creates that restaurant-quality crunch.
Step 3: Bake to Golden Perfection
Preheat your oven to 400°F and position a rack in the upper third. Drizzle the 2 tbsp neutral oil over the breaded cutlets—just enough to help them crisp up in the oven. This is the secret to getting that deep-fried texture without the fryer.
Bake for 15-18 minutes, then carefully flip each piece. Continue baking for another 8-10 minutes until the coating is deep golden brown and the internal temperature reaches 165°F. The panko should be crispy to the touch and the cutlets should feel firm when pressed lightly.
Step 4: Rest and Serve with Cabbage and Sauce
Transfer the baked katsu to a wire rack and let rest for 5 minutes. This allows the juices to redistribute and the coating to set. Meanwhile, thinly shred the 4 cups green cabbage—I like to use a mandoline for paper-thin slices that wilt slightly under the hot chicken.
Slice the katsu against the grain into ½-inch strips and serve immediately with the shredded cabbage, 0.5 cup tonkatsu sauce, and a side of spicy mayo made by mixing 0.25 cup mayonnaise with 1 tbsp sriracha. The contrast of the crispy coating, tender chicken, and cool cabbage is what makes this dish so satisfying.
Pro Tips For Making Baked Chicken Katsu
- Pound the Chicken: Use a meat mallet or rolling pin to pound the chicken cutlets to an even 1/2-inch thickness—this guarantees even cooking and prevents dry, overdone edges while the center catches up.
- Chill Before Baking: After breading, pop the cutlets in the fridge for 15 minutes to set the coating. I learned this the hard way after my first batch lost half its panko in the oven.
- Use an Oil Spray: Skip the brushing and lightly mist the breaded cutlets with neutral oil spray instead—it’s faster, more even, and uses less oil while still getting that golden crust.
- Flip Halfway Through: At the 10-minute mark, flip each piece to ensure both sides crisp up evenly. Sounds simple, but I burned three batches before I started doing this religiously.
Creative Variations of This Recipe
Spicy Sriracha Crust
Add 1 tbsp sriracha directly to your beaten eggs for a spicy kick that bakes right into the coating. The heat balances beautifully with the sweet tonkatsu sauce. I also add ½ tsp cayenne to the panko for extra warmth. 🌶️
Honey Mustard Twist
Swap the tonkatsu sauce for a honey mustard glaze—whisk 3 tbsp Dijon with 2 tbsp honey and 1 tbsp rice vinegar. Brush it on the baked katsu in the last 2 minutes of baking for a sticky, tangy finish.
Parmesan Herb Crunch
Mix ½ cup grated Parmesan and 1 tbsp dried Italian herbs into your panko. The cheese creates extra crispy bits while the herbs add an aromatic layer. This version reminds me of chicken Parmesan but with that signature katsu crunch.
Sesame Ginger Variation
Add 2 tbsp toasted sesame seeds and 1 tsp ground ginger to your panko mixture. The nutty, warm flavors pair perfectly with the cabbage. I like to serve this with a drizzle of eel sauce for depth. ✨
Air Fryer Method
For even crispier results, cook at 375°F for 12-14 minutes in an air fryer, flipping halfway. The hot air circulates more efficiently than an oven. Use 1 tbsp oil sprayed lightly on the coating before cooking.
Gluten-Free Option
Replace flour with cornstarch and use gluten-free panko—Kikkoman makes a great version. The texture remains remarkably similar to the original. I’ve tested this with almond flour too, but panko-style GF breadcrumbs work best.
Nutrition Facts
Frequently Asked Questions
Can I use chicken thighs instead of breasts?
Yes! Use boneless, skinless thighs pounded to ½-inch thickness. They stay juicier and need 2-3 minutes less baking time.
Why did my coating fall off during baking?
This usually happens if the chicken wasn’t dry before breading or if you skipped the 5-minute rest after coating. Press firmly into the panko for better adhesion.
How do I keep it crispy when serving a crowd?
Bake on a wire rack and hold in a 200°F oven for up to 30 minutes. Avoid stacking—the steam will soften the coating.
What’s the best oil for extra crispiness?
Avocado oil has the highest smoke point. Brush it lightly over the panko before baking for a golden, shatteringly crisp finish.

- Jollof Rice Sauce Recipe: West African Tomato and Spice Infusion - September 25, 2026
- Japanese Rice Soup Recipe: Umami-Rich Comfort in a Bowl - September 25, 2026
- Homemade Cream Of Rice Recipe: Silk-Smooth Breakfast in Minutes - September 25, 2026