
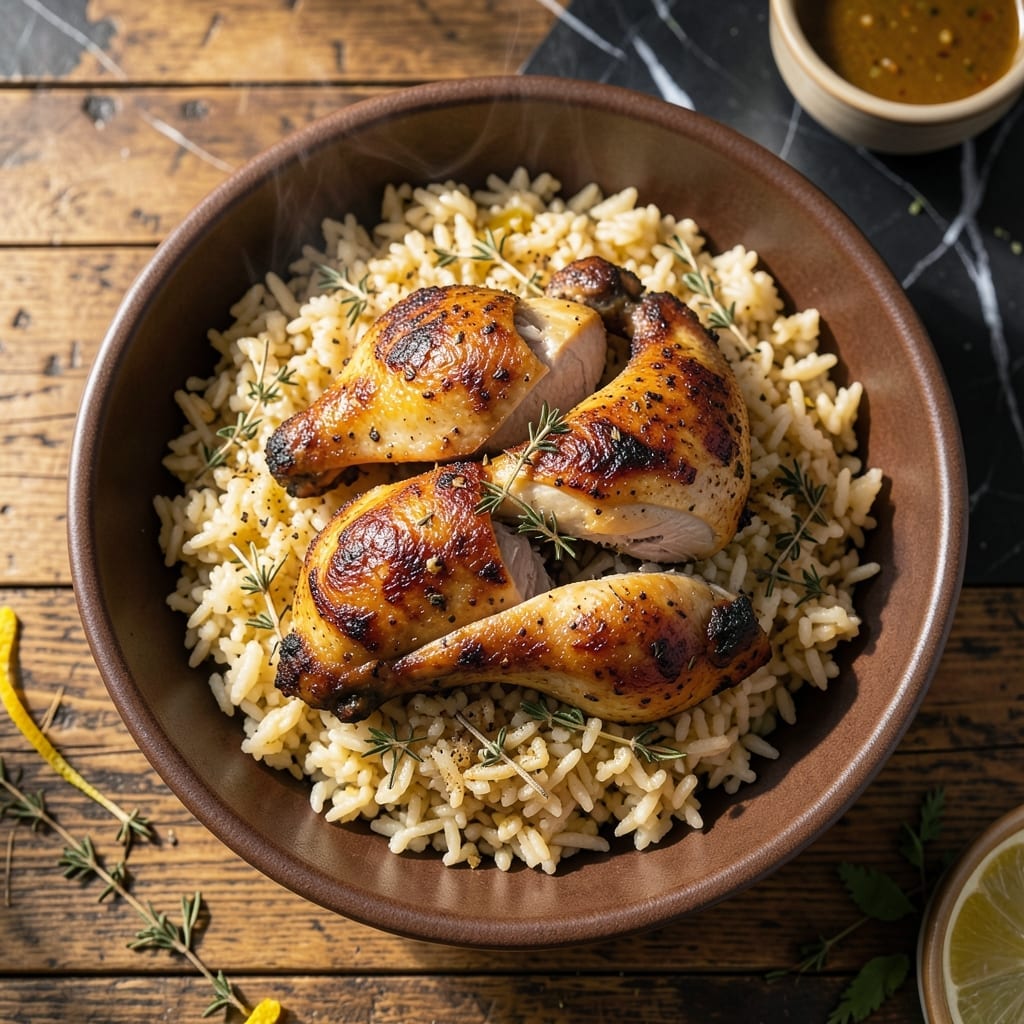
This one-pan recipe combines tender baked chicken with savory Knorr rice for a complete meal with minimal cleanup. The chicken and rice cook together, allowing the juices to infuse every grain with rich flavor.
I developed this method to simplify dinner without sacrificing taste. The chicken emerges perfectly juicy while the rice absorbs all the savory drippings, creating a side dish that’s anything but boring.
You’ll love how the seasonings from the chicken complement the rice’s built-in herbs and spices. It’s a foolproof way to get dinner on the table with just one dish to wash.
Ready in under an hour, this dish delivers restaurant-quality results with everyday ingredients.
Ingredients for Baked Chicken Knorr Rice
Everyday ingredients transform into a restaurant-quality one-pan meal with minimal effort.
| Ingredient | Amount | Notes |
|---|---|---|
| Chicken Thighs 🍗 | 1 ½ lb | Boneless, skinless preferred |
| Knorr Rice Sides 🍚 | 1 package | Savory flavor variety |
| Olive Oil 🫒 | 2 tbsp | Divided for chicken and rice |
| Garlic Powder 🧄 | 1 tsp | For chicken seasoning |
| Onion Powder 🧅 | 1 tsp | For chicken seasoning |
| Dried Thyme 🌿 | ½ tsp | For chicken seasoning |
| Paprika 🌶️ | ½ tsp | Sweet or smoked variety |
| Salt 🧂 | ½ tsp | Kosher or sea salt |
| Black Pepper 🌶️ | ¼ tsp | Freshly ground preferred |
| Chicken Broth 🥣 | 1 ¾ cups | Low-sodium preferred |
| Butter 🧈 | 1 tbsp | Optional for extra richness |
| Fresh Parsley 🌿 | 2 tbsp | Chopped, for garnish |
The chicken thighs are non-negotiable for juiciness—boneless, skinless ensures even cooking without drying out. Costco or Sam’s Club offer bulk packages at the best price per pound. For the Knorr rice, any savory flavor works, but the chicken or herb varieties complement the dish best. Look for packages with visible herbs and spices—avoid those that look dusty or faded.
No chicken thighs? Drumsticks work too, but increase cooking time by 10 minutes. Out of Knorr? Uncle Ben’s or Rice-A-Roni can substitute—just adjust broth to match package instructions. Garlic powder can be replaced with fresh minced garlic at triple the amount. Butter isn’t essential, but it adds a luxurious finish to the rice.
Leftovers keep beautifully. Store in an airtight container for up to 4 days in the fridge or freeze for 3 months. Reheat gently with a splash of broth to restore moisture. The parsley garnish is best added fresh—skip it if storing.
Why You’ll Love This Recipe
- One Pan Magic: I toss the chicken thighs with olive oil and spices, dump the Knorr rice in the same pan, and let the oven do the rest.
- Flavor Explosion: The garlic and onion powder in the Knorr mix make the chicken skin so crispy and the rice so savory, it’s ridiculous.
- Weeknight Hero: I’ve served this for Sunday dinner and packed leftovers for lunch—works every time.
- Budget Friendly: Chicken thighs and a rice side stretch far, and honestly, it tastes better than takeout.
Step-by-Step Instructions for Baked Chicken Knorr Rice
This streamlined method delivers a complete meal with minimal effort and maximum flavor.
Step 1: Season and Sear the Chicken Thighs
Pat the 1.5 lb chicken thighs dry with paper towels to ensure proper browning. In a small bowl, combine the 1 tsp garlic powder, 1 tsp onion powder, 0.5 tsp dried thyme, 0.5 tsp paprika, 0.5 tsp salt, and 0.25 tsp black pepper.
Rub this seasoning mixture evenly over all surfaces of the chicken. Heat 1 tbsp olive oil in a large oven-safe skillet over medium-high heat. Add the chicken and sear for 3-4 minutes per side until golden brown and easily released from the pan. Remove the chicken and set aside.
Step 2: Prepare the Rice Mixture
In the same skillet, add the remaining 1 tbsp olive oil and the contents of the 1 package Knorr Rice Sides. Stir for 1-2 minutes to lightly toast the rice and activate the seasoning blend. This step enhances the savory depth of the final dish.
Carefully pour in the 1.75 cups chicken broth, scraping up any browned bits from the bottom of the pan. Add the 1 tbsp butter and stir until melted. The liquid should come to a gentle simmer with small bubbles breaking the surface consistently.
Step 3: Combine and Bake
Return the seared chicken thighs to the skillet, nesting them into the rice mixture. The liquid should mostly cover the rice but leave the chicken partially exposed. This arrangement allows the chicken to steam gently while the rice absorbs the flavors.
Cover the skillet tightly with foil or a lid and transfer to a preheated 375°F oven. Bake for 25-30 minutes until the rice is tender and has absorbed most of the liquid, and the chicken reaches an internal temperature of 165°F. The rice grains should be plump with no chalky centers.
Step 4: Rest and Garnish
Remove the skillet from the oven and let it rest, covered, for 5-10 minutes. This allows the rice to finish absorbing any remaining liquid and the chicken juices to redistribute, ensuring moist, tender meat throughout.
Uncover and sprinkle with the 2 tbsp fresh parsley just before serving. The parsley adds a bright, fresh contrast to the rich, savory flavors of the dish. Serve directly from the skillet for a rustic presentation that highlights the one-pan simplicity of this meal.
Pro Tips For Making Baked Chicken Knorr Rice
- Sear Chicken First: I learned this the hard way—browning the chicken thighs in olive oil for 3-4 minutes per side before baking locks in juices and adds depth to the Knorr rice flavor.
- Use Bone-In Thighs: Skip the boneless cuts; bone-in thighs stay moister during baking and the fat renders into the rice, making it richer.
- Don’t Overcrowd the Pan: After burning three batches, I finally figured out that giving the chicken space in the pan prevents steaming and ensures crispy skin.
- Double Season the Rice: Sounds weird, but it works: stir an extra ½ teaspoon each of garlic and onion powder into the Knorr rice packet before adding water—boosts the flavor noticeably.
Storing and Reheating This Dish
Refrigerator Storage
Let this dish cool for no more than 2 hours before transferring to airtight containers. I use glass containers with locking lids for best results. Store at 40°F or below for up to 4 days—the flavors actually deepen as they meld together. ❄️
Freezer Storage
For longer storage, freeze portions in heavy-duty freezer bags for up to 3 months. Squeeze out excess air to prevent freezer burn. I recommend flat bags for efficient stacking. Label with the date so you can track freshness.
Oven Reheating
Preheat your oven to 350°F and transfer the portion to an oven-safe dish. Add 2 tbsp chicken broth to prevent drying, then cover with foil. Heat for 15-20 minutes until reaching 165°F internally. This method preserves the dish’s original texture best. 🔥
Microwave Reheating
For quick meals, microwave individual portions covered with a damp paper towel. Use 70% power for 2-3 minutes, stir, then continue in 30-second intervals until hot. Add a splash of water if the rice seems dry.
Serving Tip
Always garnish with fresh parsley after reheating—it loses its vibrancy when stored. I like to revive the dish with a squeeze of lemon juice for brightness. The parsley adds that fresh pop of color and flavor.
Nutrition Facts
Frequently Asked Questions
Can I use chicken breasts instead of thighs?
Yes, but reduce baking time to 20-25 minutes to prevent dryness. Chicken breasts cook faster and can overcook easily. For best results, pound them to even thickness.
Should I use water or broth for the rice?
Always use chicken broth for maximum flavor. The Knorr seasoning pairs perfectly with broth’s rich base. Water works in a pinch but dilutes the taste.
Can I make this ahead of time?
Prepare the dish up to searing the chicken, then refrigerate. Add 5-10 minutes to baking time if cooking from cold. This makes it perfect for meal prep.
Why did my rice turn out mushy?
Mushy rice usually means too much liquid or over-stirring. Use exactly 1.75 cups broth and avoid stirring once baking begins. Let it rest covered after cooking.

- Jollof Rice Sauce Recipe: West African Tomato and Spice Infusion - September 25, 2026
- Japanese Rice Soup Recipe: Umami-Rich Comfort in a Bowl - September 25, 2026
- Homemade Cream Of Rice Recipe: Silk-Smooth Breakfast in Minutes - September 25, 2026