
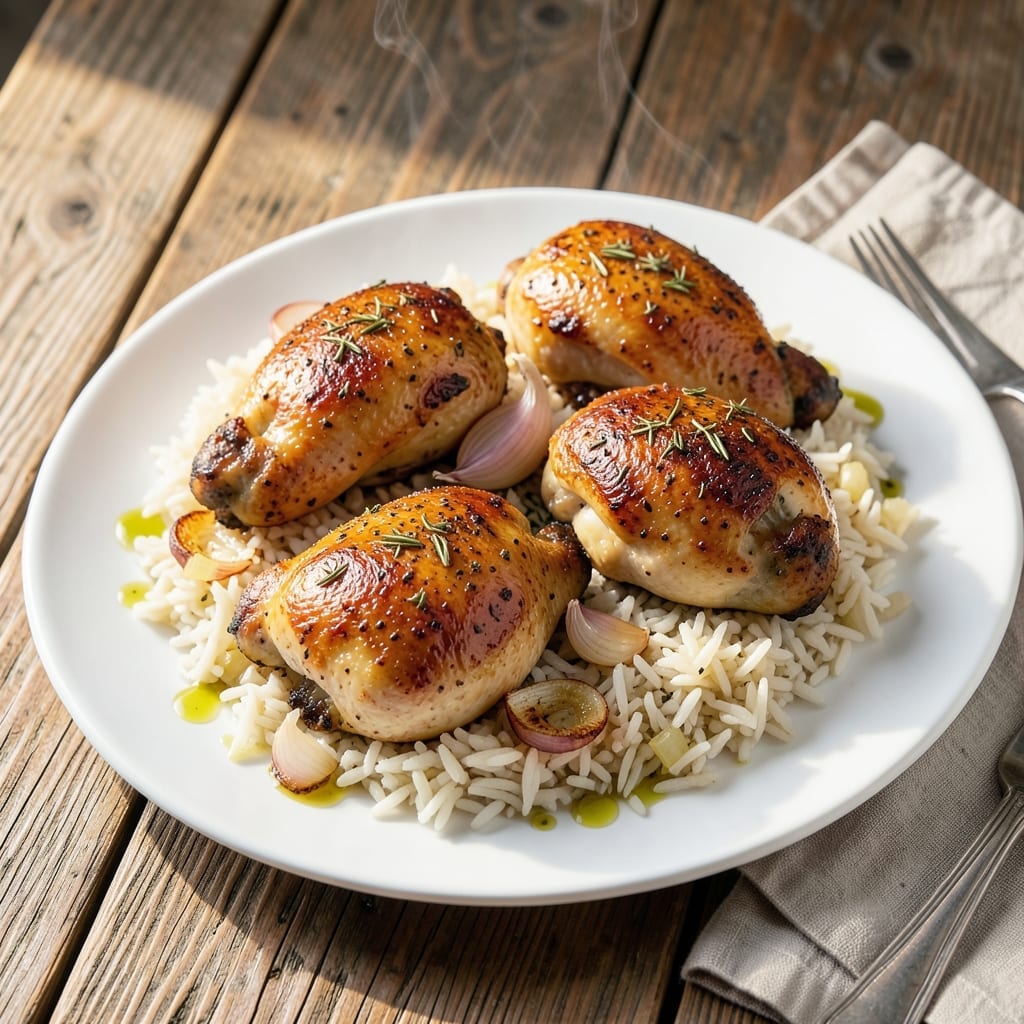
There’s something deeply satisfying about the simplicity of baked chicken and rice coming together in one pan. This method delivers savory comfort with minimal effort and maximum flavor, making it a go-to for busy weeknights.
The chicken quarters roast until golden and juicy, while the rice absorbs all the rich, savory drippings as it cooks. It’s a hands-off approach that ensures every bite is packed with taste, without the need for constant attention.
What you get is tender, fall-off-the-bone chicken paired with perfectly seasoned rice, all infused with the same delicious flavors. The result is a hearty, complete meal that feels like a warm hug on a plate.
This dish is as practical as it is delicious, leaving you with just one pan to clean.
Ingredients for Baked Chicken Quarters and Rice
Simple pantry staples transform into this hearty one-pan wonder with minimal effort.
| Ingredient | Amount | Notes |
|---|---|---|
| Chicken Quarters 🍗 | 4 whole | Skin-on, bone-in for best flavor |
| Long-Grain White Rice 🍚 | 1 ½ cups | Uncooked, rinsed before use |
| Chicken Stock 🥣 | 2 ½ cups | Low-sodium preferred for control |
| Olive Oil 🫒 | 2 tbsp | Extra-virgin for depth of flavor |
| Garlic Cloves 🧄 | 4 cloves | Minced for even distribution |
| Yellow Onion 🧅 | 1 whole | Medium, finely diced |
| Dried Thyme 🌿 | 1 tsp | Crushed between fingers to release oils |
| Dried Rosemary 🍃 | 1 tsp | Crushed for better aroma |
| Paprika 🌶️ | 1 tsp | Sweet or smoked variety |
| Kosher Salt 🧂 | 1 ½ tsp | Diamond Crystal preferred for even seasoning |
| Black Pepper 🌶️ | 1 tsp | Freshly cracked for best results |
| Bay Leaves 🌿 | 2 whole | Dried, removed before serving |
| Fresh Parsley 🌿 | ¼ cup | Chopped, for garnish |
| Lemon 🍋 | 1 whole | Zested and juiced for brightness |
The chicken quarters are the star here—skin-on, bone-in gives you that golden, crispy finish and juicy interior. I grab mine from Whole Foods or the local butcher when I want the best quality, but any supermarket will do. Look for pieces that feel plump and have smooth, unbroken skin. The rice? Basic long-grain white absorbs all those savory drippings beautifully (or whatever you’ve got in the cupboard).
No fresh parsley? Dried works at half the amount, though it won’t have that fresh pop of color. Out of chicken stock? Water plus bouillon cubes in a pinch. Prefer brown rice? Use 1.75 cups liquid per cup of rice and add 15 minutes to the bake time. The herbs can be swapped too—sage or oregano instead of thyme or rosemary if that’s what you’ve got.
Leftovers keep in the fridge for 4 days—the rice soaks up even more flavor overnight. Freeze portions for up to 3 months (thaw in the fridge before reheating). Pro tip: The bay leaves lose their punch after a few months, so check the date on the jar.
Why You’ll Love This Recipe
- One Pan Magic: I toss everything—chicken, rice, stock, garlic—into one dish and let the oven do the work. Honestly, cleanup’s a breeze.
- Garlic-Infused Goodness: The garlic cloves roast right alongside the chicken, infusing every bite with that rich, savory depth I crave.
- Feeds the Family: Between us, this stretches to cover dinner for four with leftovers for lunch the next day. And it’s kid-approved.
- Budget Hero: Chicken quarters are cheap, rice is a pantry staple, and it still tastes like a million bucks. I’ll be real: it’s my wallet’s best friend.
Step-by-Step Instructions for Baked Chicken Quarters and Rice
Here’s my trusted method for perfect one-pan comfort every single time.
Step 1: Season and Sear the Chicken Quarters
Pat the 4 whole Chicken Quarters completely dry with paper towels. This is crucial for achieving crispy skin. Season both sides generously with 1.5 tsp Kosher Salt, 1 tsp Black Pepper, 1 tsp Dried Thyme, 1 tsp Dried Rosemary, and 1 tsp Paprika. I crush the dried herbs between my fingers as I sprinkle them to release their aromatic oils.
Heat 2 tbsp Olive Oil in a large, oven-safe skillet or Dutch oven over medium-high heat. When the oil shimmers, add the chicken quarters skin-side down. Sear undisturbed for 5-6 minutes until the skin turns a deep golden brown. Flip and sear the other side for 3-4 minutes until equally browned. Remove chicken and set aside.
Step 2: Sauté the Aromatics and Toast the Rice
In the same skillet, reduce heat to medium. Add the finely diced 1 whole Yellow Onion and cook for 3-4 minutes until softened and translucent. Stir in the minced 4 cloves Garlic Cloves and cook for 30 seconds until fragrant—don’t let it brown.
Add the 1.5 cups Long-Grain White Rice to the skillet and stir to coat the grains in the flavorful fat. Toast the rice for 1-2 minutes until the edges appear slightly translucent. This step enhances the nutty flavor of the rice and prevents it from becoming mushy during baking.
Step 3: Deglaze and Add Liquids
Pour in 2.5 cups Chicken Stock, using a wooden spoon to scrape up any browned bits from the bottom of the skillet. These bits, known as the fond, are packed with flavor and will enrich your rice. Add 2 whole Bay Leaves and the zest of the 1 whole Lemon to the liquid.
Stir everything together, then nestle the seared chicken quarters into the rice mixture, skin-side up. The liquid should just cover the rice. If it doesn’t, add a splash more stock. The chicken will continue to cook in the oven, infusing the rice with its savory juices.
Step 4: Bake Until Chicken is Tender and Rice is Fluffy
Preheat your oven to 375°F. Cover the skillet tightly with a lid or aluminum foil and transfer to the oven. Bake for 30 minutes, then remove the cover and bake for an additional 15-20 minutes until the chicken skin is crispy and the rice has absorbed all the liquid.
The chicken is done when its internal temperature reaches 165°F and the juices run clear. The rice should be tender and fluffy with each grain separate. If the top starts to brown too quickly, tent the skillet with foil to prevent burning.
Step 5: Rest and Garnish
Remove the skillet from the oven and discard the 2 whole Bay Leaves. Let the dish rest for 5-10 minutes before serving. This allows the juices in the chicken to redistribute and the rice to finish absorbing any remaining liquid.
Squeeze the juice from the 1 whole Lemon over the dish and sprinkle with 0.25 cup Fresh Parsley just before serving. The lemon’s acidity brightens all the rich, savory flavors, while the parsley adds a pop of fresh color. Serve hot, with extra parsley for garnish if desired.
Pro Tips For Making Baked Chicken Quarters And Rice
- Start Skin-Side Up: Place chicken quarters skin-side up first, then flip halfway through baking—this guarantees crispy skin without drying the meat.
- Toast the Rice: Sauté the rice in olive oil with minced garlic for 2-3 minutes before adding liquid; it adds a nutty depth that plain rice lacks.
- Check the Temp: Pull the chicken at 165°F in the thickest part, not when the juices “run clear”—that method lies more often than you’d think.
- Use Warm Stock: Pour hot chicken stock over the rice instead of cold; it cuts baking time by 10 minutes and prevents gummy rice.
Common Mistakes When Making Great baked chicken quarters and rice
Overcrowding the Pan
Resist the urge to fit everything into one small skillet. Using a pan that’s too small causes the chicken to steam instead of sear, resulting in rubbery skin. I recommend a 12-inch oven-safe skillet or Dutch oven for proper browning and even cooking. 🔥
Skipping the Sear
Don’t rush straight to the oven—searing the chicken first develops deep, complex flavors through the Maillard reaction. Those browned bits in the pan (the fond) are pure flavor gold for your rice. Give each side 5-6 minutes of undisturbed cooking time.
Unbalanced Liquid Ratios
The rice needs exactly 2.5 cups Chicken Stock for 1.5 cups rice in this recipe. Too much liquid makes it mushy, while too little leaves it undercooked. If your skillet is wide, you might need an extra splash to cover the rice completely.
Peeking in the Oven
Every time you open the oven door, you lose 25-50°F of heat, which can extend cooking time and lead to uneven results. Trust the process and check only after 30 minutes of covered baking. Patience is key here.
Neglecting to Rest
Cutting into the chicken immediately after baking causes all those precious juices to spill out onto your cutting board. Always let it rest for 5-10 minutes—this allows the muscles to relax and reabsorb the juices. The rice benefits too, as it finishes absorbing residual moisture. 💡
Using Cold Ingredients
Starting with cold chicken straight from the fridge leads to uneven cooking. Let your quarters sit at room temperature for 20-30 minutes before searing. This ensures even cooking throughout and helps achieve that perfect golden-brown crust.
Nutrition Facts
Frequently Asked Questions
Can I use chicken thighs instead of quarters?
Yes! Bone-in, skin-on thighs work beautifully with the same 375°F temperature. Reduce baking time to 25-30 minutes covered since thighs cook faster than quarters.
Why do I need to sear the chicken first?
Searing creates a flavorful crust and renders fat that infuses the rice. This step builds deep, complex flavors through caramelization—skip it and your dish will taste flat.
How do I know when the rice is done?
The rice is ready when it’s tender and all liquid is absorbed. Check after 30 minutes of covered baking—if still firm, add 1/4 cup hot stock and continue cooking.

- Jollof Rice Sauce Recipe: West African Tomato and Spice Infusion - September 25, 2026
- Japanese Rice Soup Recipe: Umami-Rich Comfort in a Bowl - September 25, 2026
- Homemade Cream Of Rice Recipe: Silk-Smooth Breakfast in Minutes - September 25, 2026