
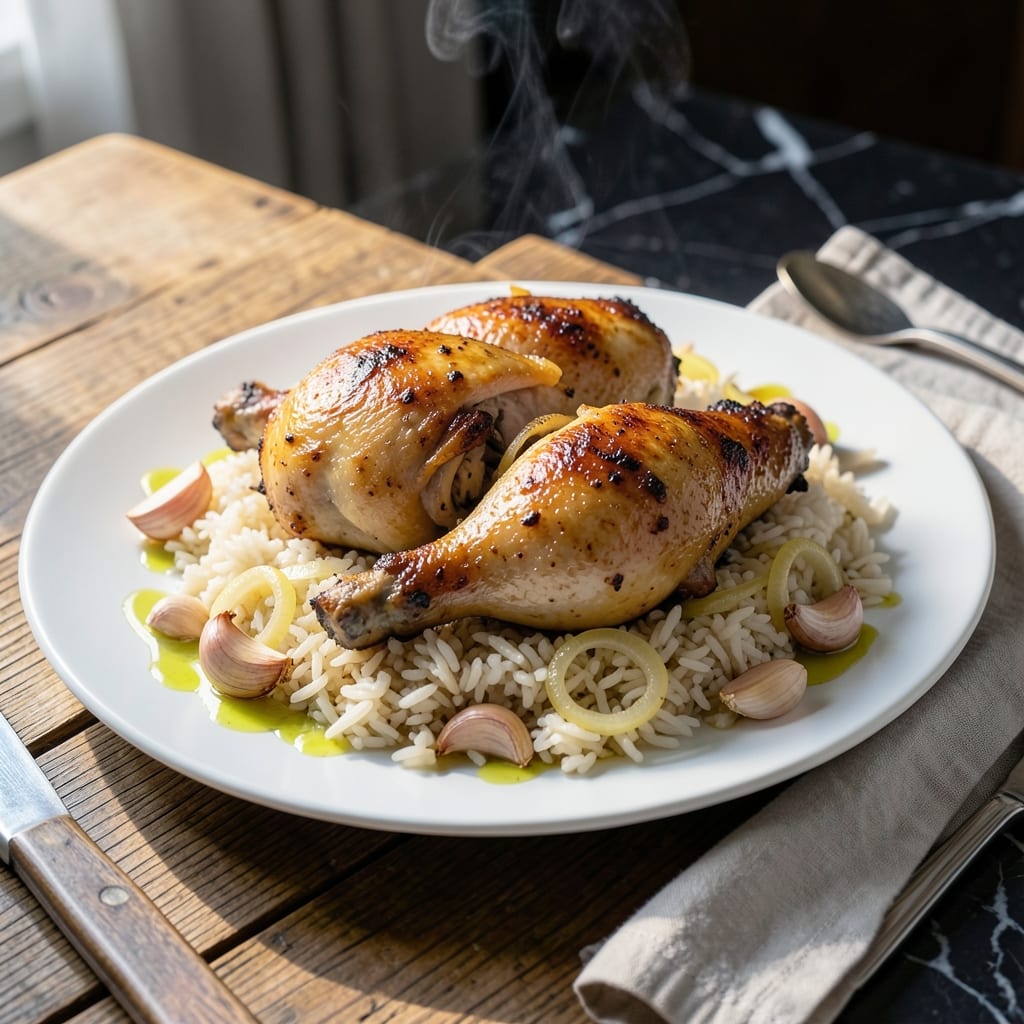
There’s a simple elegance to baking chicken thighs and rice together in one pan, letting the oven do most of the work. This method ensures juicy, flavorful meat and perfectly cooked grains with minimal effort.
The beauty lies in the harmony of ingredients—seasoned chicken releases its savory juices into the rice as it bakes, infusing every bite with depth. A single pan means easy cleanup, while the hands-off approach guarantees consistent results.
What emerges is a complete meal: tender chicken with crispy edges nestled alongside rice that’s absorbed all the rich, savory flavors. It’s a no-fuss dish that feels like a home-cooked hug.
Ideal for busy weeknights or lazy weekends, this one-pan wonder delivers satisfaction without the stress.
Ingredients for Baked Chicken Thighs and Rice
Bone-in chicken thighs, fragrant rice, and a handful of pantry staples create this effortless one-pan meal.
| Ingredient | Amount | Notes |
|---|---|---|
| Bone-in, Skin-on Chicken Thighs 🍗 | 6 whole | Excess fat trimmed if desired |
| Long-Grain White Rice 🍚 | 1 ½ cups | Uncooked, rinsed thoroughly |
| Chicken Stock 🥣 | 2 ½ cups | Low-sodium preferred for control |
| Yellow Onion 🧅 | 1 whole | Finely diced for even distribution |
| Garlic Cloves 🧄 | 4 cloves | Minced for maximum flavor infusion |
| Unsalted Butter 🧈 | 2 tbsp | Melted for browning chicken |
| Olive Oil 🫒 | 1 tbsp | Extra-virgin for depth of flavor |
| Diamond Crystal Kosher Salt 🧂 | 1 ½ tsp | Divided for seasoning layers |
| Freshly Ground Black Pepper 🌶️ | 1 tsp | Coarsely ground for texture |
| Dried Thyme 🌿 | 1 tsp | Crushed to release essential oils |
| Dried Rosemary 🌿 | 1 tsp | Crushed to release essential oils |
| Smoked Paprika 🌶️ | 1 tsp | Adds subtle depth and color |
| Bay Leaf 🍃 | 1 whole | For aromatic infusion while baking |
| Fresh Flat-Leaf Parsley 🌿 | ¼ cup | Chopped, for garnish and brightness |
The chicken thighs are non-negotiable here. Bone-in, skin-on ensures juicy meat and crispy edges—the skin renders fat that flavors the rice beautifully. Costco sells them in family packs at a great price. For the rice, long-grain white like Basmati or jasmine absorbs the savory juices perfectly without turning mushy. Look for low-sodium chicken stock—Swanson or Better Than Bouillon are reliable choices.
No chicken stock? Water plus 1 tsp bouillon paste works in a pinch. Fresh herbs can replace dried at triple the amount (so 1 tbsp fresh thyme for 1 tsp dried). Boneless thighs will cook faster but won’t be as flavorful—stick with bone-in if possible. The butter can be swapped with olive oil if avoiding dairy, though you’ll lose some richness. Don’t skip the rice rinse—it removes excess starch for fluffier grains.
This dish reheats well for 3-4 days in the fridge. Store in an airtight container, though the chicken skin may soften. Freezes for up to 3 months—portion before freezing for easy meals. The parsley garnish is best added fresh, so save that step for serving.
Why You’ll Love This Recipe
- One Pan Meal: I toss everything in a single dish—chicken, rice, onions, garlic—and let the oven do the work.
- Crispy & Juicy: The skin-on thighs get golden and crackly while the rice soaks up all that garlicky, onion-infused stock.
- Feeds My Crew: It’s my go-to when I need to satisfy picky eaters and hungry teens alike.
- Leftovers Rock: Honestly, the flavors taste even better the next day, and it reheats like a dream.
Step-by-Step Instructions for Baked Chicken Thighs and Rice
This one-pan method ensures perfectly cooked rice and tender chicken with minimal effort.
Step 1: Season and Sear the Chicken Thighs
Pat the bone-in, skin-on chicken thighs dry with paper towels to ensure crispy skin. Season generously with 1 tsp Diamond Crystal Kosher Salt, 1 tsp Freshly Ground Black Pepper, 1 tsp Dried Thyme, 1 tsp Dried Rosemary, and 1 tsp Smoked Paprika. Rub the seasoning evenly over all surfaces.
Heat a large oven-safe skillet or Dutch oven over medium-high heat. Add the 1 tbsp Olive Oil and 2 tbsp Unsalted Butter. Once the butter foams, add the chicken thighs skin-side down. Sear undisturbed for 6-8 minutes until the skin is deep golden brown and crispy. Flip and sear the other side for 3-4 minutes. Remove and set aside.
Step 2: Sauté Aromatics and Toast the Rice
In the same skillet, reduce heat to medium. Add the finely diced Yellow Onion and cook for 3-4 minutes until softened and translucent. Stir in the minced Garlic Cloves and cook for 30 seconds until fragrant—be careful not to burn it.
Add the 1.5 cups Long-Grain White Rice to the skillet and stir to coat in the fat and aromatics. Toast for 2 minutes, stirring constantly, until the rice becomes slightly translucent at the edges. This step enhances the nutty flavor and prevents a gummy texture.
Step 3: Deglaze and Add Liquid
Pour in the 2.5 cups Chicken Stock, scraping the bottom of the skillet to release any browned bits. Add the Bay Leaf and the remaining ½ tsp Diamond Crystal Kosher Salt. Stir well to distribute the rice evenly.
Return the seared chicken thighs to the skillet, nesting them skin-side up into the rice. The liquid should just cover the rice—if it doesn’t, add a splash more stock. Bring to a gentle simmer.
Step 4: Bake Until Tender and Golden
Cover the skillet tightly with a lid or foil and transfer to a preheated 375°F oven. Bake for 25 minutes. Then, remove the cover and bake for an additional 10-15 minutes until the chicken skin crisps and the rice absorbs all the liquid.
The chicken is done when it reaches an internal temperature of 165°F and the rice is tender with no resistance. If the top begins to brown too quickly, tent loosely with foil.
Step 5: Rest and Garnish
Remove from the oven and let the dish rest covered for 5-10 minutes. This allows the rice to steam and the juices in the chicken to redistribute. Discard the bay leaf before serving.
Garnish with the 0.25 cup Fresh Flat-Leaf Parsley, chopped. Fluff the rice gently with a fork and serve the chicken thighs atop the rice, spooning any crispy bits from the pan over the top.
Pro Tips For Making Baked Chicken Thighs And Rice
- Crisp the Skin First: Sear the chicken thighs skin-side down in a hot pan for 4-5 minutes before baking—I learned this the hard way after pulling out pale, soggy skin more times than I’d like to admit.
- Toast the Rice: Sauté the rice in the onion and garlic for 2 minutes until nutty and fragrant, then add stock. It adds depth without extra effort, and my grandmother swore by this.
- Skip the Rinse: Resist the urge to rinse the rice—you’ll wash away the starch that helps thicken the cooking liquid into a creamy texture.
- Use Hot Stock: Pour in chicken stock that’s already simmering, not cold, so it doesn’t drop the temperature and slow the rice from cooking evenly.
Wine and Beer Pairings for These Flavors
White Wine Pairs
Crisp whites cut through the richness of this dish beautifully. I love a California Chardonnay with its buttery notes complementing the chicken’s savory flavors. For something lighter, try a Sauvignon Blanc from New Zealand—its citrus acidity cleanses your palate. 🍷
Red Wine Options
Medium-bodied reds work surprisingly well here. A Pinot Noir from Oregon offers red fruit notes that harmonize with the herbs. Grenache from Spain is another great choice, with its spicy undertones enhancing the smoked paprika.
Beer Recommendations
For beer lovers, a Belgian-style Witbier like Hoegaarden brings citrus and coriander notes that brighten the dish. A German Pilsner with its crisp, clean finish also pairs perfectly without overpowering the flavors. 🍺
Non-Alcoholic Pairings
Sparkling water with a squeeze of lemon or lime refreshes your palate. Iced tea—especially unsweetened black tea with a sprig of fresh mint—also complements the savory notes beautifully.
Nutrition Facts
Frequently Asked Questions
Should I use bone-in or boneless thighs?
always choose bone-in, skin-on thighs for best flavor and texture. The bone adds depth while the skin crisps beautifully. Boneless may cook faster but often dries out.
What if my rice is undercooked?
Add ¼ cup hot stock or water, cover tightly, and return to the 375°F oven for 10-15 minutes. Check moisture and repeat if needed. Don’t stir—it releases starch and makes rice gummy.
Can I use brown rice instead?
Yes, but increase liquid to 3 cups and bake covered for 45 minutes before crisping. Brown rice needs more time and moisture to soften properly.

- Jollof Rice Sauce Recipe: West African Tomato and Spice Infusion - September 25, 2026
- Japanese Rice Soup Recipe: Umami-Rich Comfort in a Bowl - September 25, 2026
- Homemade Cream Of Rice Recipe: Silk-Smooth Breakfast in Minutes - September 25, 2026