
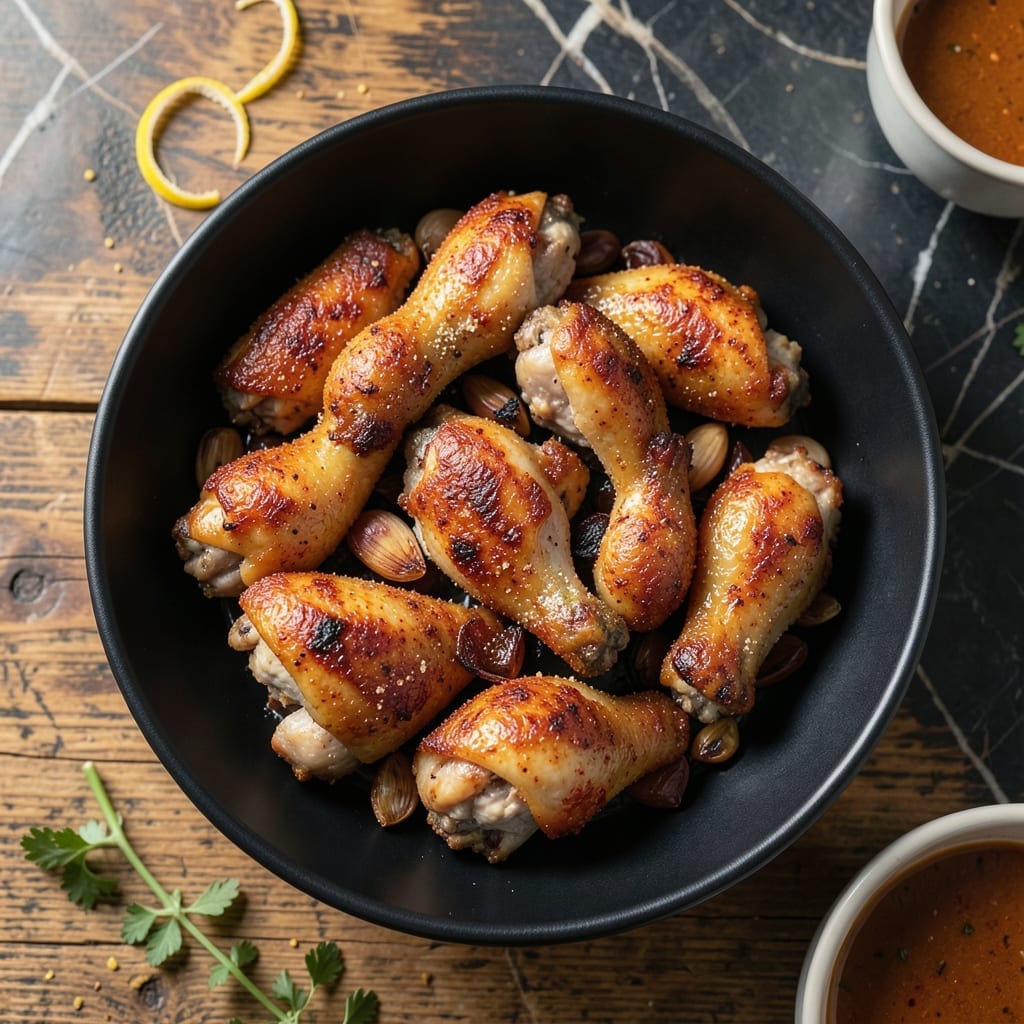
Achieving crispy chicken wingettes without frying is simpler than you think. This oven-baked method delivers golden, shatteringly crisp skin with juicy meat underneath.
The secret lies in a two-step process: patting the wings completely dry, then tossing them with baking powder before baking. This creates the perfect environment for browning and crisping at high heat.
After 45 minutes in a hot oven, you’ll have wings with restaurant-quality texture. The baking powder draws out moisture while promoting deep browning, resulting in that coveted crunch.
No special equipment required—just your oven and a baking sheet. The results consistently impress, with every bite offering that ideal balance of crisp and tender.
Ingredients for Baked Chicken Wingettes
Pantry staples plus wings—nothing exotic, just crispy, golden perfection every time.
| Ingredient | Amount | Notes |
|---|---|---|
| Chicken Wingettes 🍗 | 2 lb | Split at joints, tips removed |
| Baking Powder 🧂 | 1 tbsp | Aluminum-free preferred for flavor |
| Kosher Salt 🧂 | 1 ½ tsp | Diamond Crystal brand recommended |
| Black Pepper 🌶️ | 1 tsp | Freshly ground preferred |
| Garlic Powder 🧄 | 1 tsp | Not garlic salt |
| Onion Powder 🧅 | 1 tsp | Fresh ground preferred |
| Paprika 🌶️ | 1 tsp | Sweet or smoked variety |
| Cayenne Pepper 🔥 | ½ tsp | Adjust for heat preference |
| Olive Oil 🫒 | 1 tbsp | For tossing wings |
| Cornstarch 🌾 | 1 tbsp | For extra crispiness |
| Butter 🧈 | 2 tbsp | Melted, for tossing after baking |
| Fresh Parsley 🌿 | ¼ cup | Chopped, for garnish |
The wingettes are everything here. Split them yourself (cheaper than pre-cut) or grab the drumette/wingette packs at Costco—they’re already separated. Pat them bone-dry with paper towels (this is non-negotiable). I always use Diamond Crystal kosher salt—it’s less dense than table salt, so the seasoning hits just right. The baking powder isn’t a leavening mistake—it’s the magic for that crackly skin.
No baking powder? Cornstarch alone still gets you crispiness, just less browning. Swap the spices to taste—Cajun seasoning or ranch powder works great for variety. Out of fresh parsley? Dried parsley or green onions add color. The butter toss at the end is key for that glossy finish (trust me, don’t skip it). Want extra heat? Add hot sauce to the melted butter.
Baked wings hold up well—good for 3-4 days in the fridge, though they’re best fresh. Reheat in the oven or air fryer to revive the crunch. Freeze uncooked wings on a tray first, then bag for up to 3 months. That baking powder trick? Works on thighs and drumsticks too.
Why You’ll Love This Recipe
- I’ll be real: they taste just as good cold the next day, and they’re cheap enough to make anytime.
- One Pan Magic: I toss the wingettes with baking powder and spices, pop them in the oven, and that’s it—no frying, no flipping, no fuss.
- Crispy Garlic Bite: The baking powder works like a charm to get them extra crispy, while the garlic powder gives that savory punch in every bite.
- Weeknight MVP: Honestly, I make these for quick dinners, game day snacks, or even meal prep—they’re always a hit.
Step-by-Step Instructions for Oven-Baked Chicken Wingettes
Here’s the method I use for achieving crispy, golden wingettes straight from the oven.
Step 1: Season the Wingettes for Maximum Crispiness
Pat the 2 lb chicken wingettes dry with paper towels—this is critical for crispy skin. In a large bowl, combine the 1 tbsp baking powder, 1.5 tsp kosher salt, 1 tsp black pepper, 1 tsp garlic powder, 1 tsp onion powder, 1 tsp paprika, and 0.5 tsp cayenne pepper.
The baking powder is the secret here—it raises the pH, helping the skin brown and crisp without frying. Toss the wingettes in this seasoning mix until evenly coated, then drizzle with the 1 tbsp olive oil and toss again to ensure every piece is slicked with oil.
Step 2: Add Cornstarch for Extra Crunch
Sprinkle the 1 tbsp cornstarch over the seasoned wingettes and toss once more. The cornstarch absorbs moisture and creates a crispy, crackly exterior. You’ll notice the wingettes look slightly dusty—that’s exactly what you want.
Let them rest for 10 minutes while you preheat the oven to 425°F. This short rest helps the seasoning adhere better and the baking powder work its magic. Arrange a wire rack over a baking sheet—this setup ensures hot air circulates around the wingettes for even crisping.
Step 3: Bake Until Golden and Crispy
Place the wingettes on the wire rack, leaving a little space between each piece so they don’t steam. Bake in the preheated oven for 45 minutes, then flip each wingette and bake for another 15-20 minutes.
You’ll know they’re done when the skin is deep golden brown and crispy to the touch. The internal temperature should reach 165°F when tested with a meat thermometer. Don’t skip the flip—this ensures both sides get equally crispy.
Step 4: Toss in Butter and Garnish
As soon as the wingettes come out of the oven, transfer them to a clean bowl. Drizzle with the 2 tbsp melted butter and toss gently to coat. The butter adds richness and helps the seasoning cling even better.
Finally, sprinkle with the 0.25 cup chopped fresh parsley and toss once more. The parsley adds a bright, fresh contrast to the rich, spicy wingettes. Serve immediately while they’re hot and crispy—these are best straight from the oven.
Pro Tips For Making Baked Chicken Wingettes
- Dry the Wings: Pat the wingettes completely dry with paper towels before seasoning—I learned this the hard way after my first batch came out steamed instead of crispy.
- Use Baking Powder: Don’t skip the baking powder; about 1 teaspoon per pound of wings makes the skin extra crispy without changing the taste.
- Crank the Oven: Bake at 425°F or higher to get that golden, crackling skin—any lower and they’ll turn out soggy, even if you bake them longer.
- Season Twice: Toss the wings in half the seasoning before baking, then hit them with the rest right out of the oven for maximum flavor.
Best Sauces and Condiments for This Dish
Classic Buffalo
Toss your crispy wingettes in ½ cup Frank’s RedHot mixed with 4 tbsp melted butter. The vinegar tang of the sauce pairs perfectly with the rich, spiced wings. Add 1 tsp garlic powder for depth.
Honey Garlic Glaze
Combine ¼ cup honey, 3 tbsp soy sauce, and 2 minced garlic cloves in a saucepan. Simmer for 3-4 minutes until thickened, then toss with wings. This sweet-savory combo is a crowd-pleaser. 💛
BBQ Dry Rub
Skip the sauce and dust baked wings with a mix of 1 tbsp smoked paprika, 1 tbsp brown sugar, and ½ tsp chipotle powder. The dry rub clings to the crispy skin beautifully.
Lemon Pepper
Zest 1 lemon and mix with 1 tbsp cracked black pepper and 1 tsp salt. Toss with wings and a squeeze of lemon juice. The citrus brightens the rich, savory flavors. ✨
Spicy Sriracha
Blend ¼ cup sriracha, 2 tbsp lime juice, and 1 tbsp maple syrup for a sweet-spicy glaze. Drizzle over wings and toss to coat evenly. The heat builds with each bite.
Ranch Dressing
Serve wings with a side of Hidden Valley Ranch for dipping. The cool, creamy dressing balances the heat from the cayenne in the seasoning. Perfect for those who prefer milder flavors.
Nutrition Facts
Frequently Asked Questions
Why do I need baking powder for crispy skin?
Baking powder raises the skin’s pH, which breaks down proteins faster. This creates micro-bubbles that crisp up beautifully at 425°F. It’s the secret to that shatteringly crisp texture without frying.
Can I skip the wire rack?
Not recommended. The rack lets hot air circulate underneath, preventing soggy bottoms. Without it, wings may steam instead of crisp. If you must, flip them more often during baking.
How do I know when they’re done?
Look for deep golden brown skin and an internal temp of 165°F. The skin should feel crisp to the touch. If in doubt, bake 5-10 minutes longer.
Can I use frozen wingettes?
Yes, but thaw and pat completely dry first. Any moisture will prevent crisping. Add 5-10 minutes to the baking time if they’re still chilled.

- Jollof Rice Sauce Recipe: West African Tomato and Spice Infusion - September 25, 2026
- Japanese Rice Soup Recipe: Umami-Rich Comfort in a Bowl - September 25, 2026
- Homemade Cream Of Rice Recipe: Silk-Smooth Breakfast in Minutes - September 25, 2026