
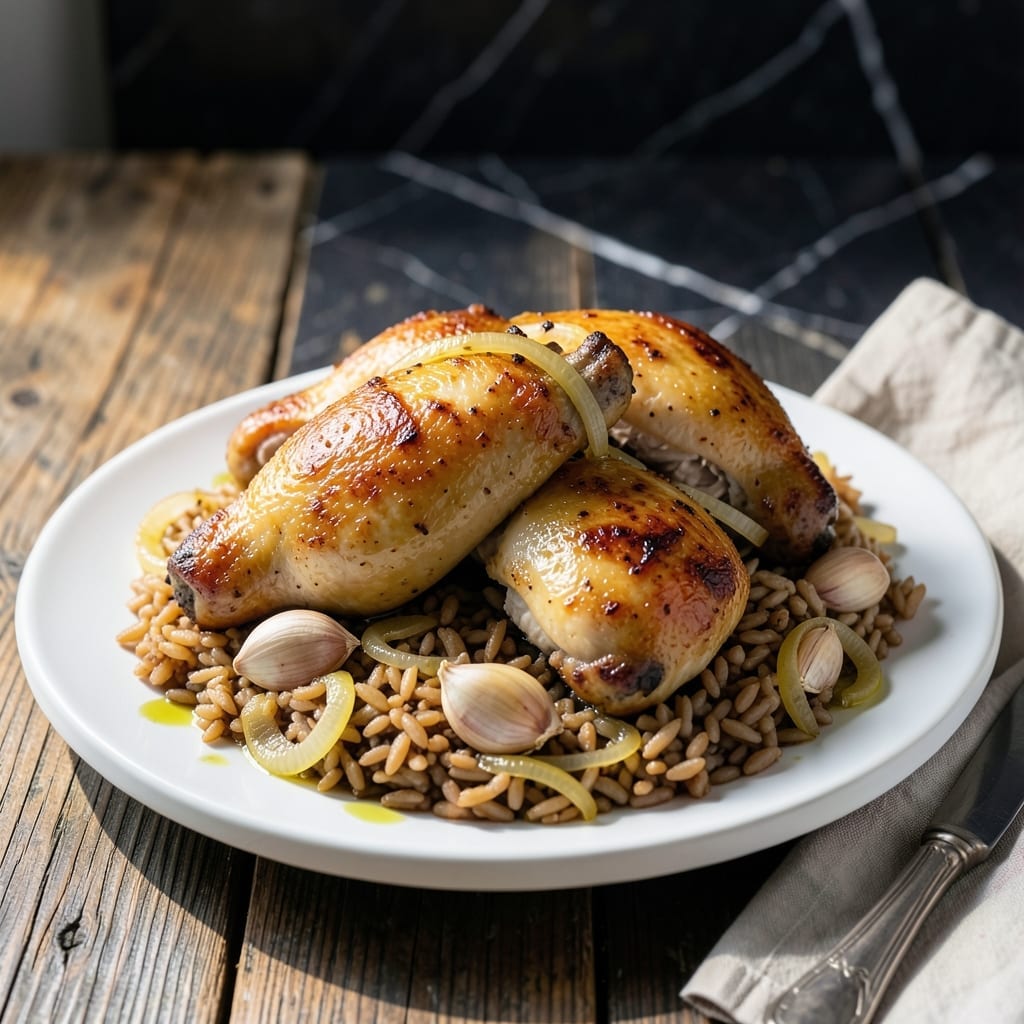
This one-pan meal solves the weeknight dinner dilemma with tender baked chicken and fluffy brown rice cooked together. No extra pots, no messy cleanup—just a complete, balanced dish ready in under an hour.
I developed this method while working the line at The Smoky Pig, where efficiency matters as much as flavor. The chicken stays juicy, the rice absorbs rich pan drippings, and everything finishes simultaneously in a 400°F oven.
You’ll get golden chicken thighs with crispy edges and perfectly cooked grains that never turn mushy. The secret is in the timing and a simple seasoning blend that enhances without overpowering.
Serve straight from the pan for a meal that looks as good as it tastes. This approach works every time.
Ingredients for Baked Chicken with Brown Rice
One pan, one oven, one incredible meal with juicy chicken and perfect grains.
| Ingredient | Amount | Notes |
|---|---|---|
| Chicken Thighs 🍗 | 2 lb | Boneless, skin-on preferred |
| Brown Rice 🍚 | 1 ½ cups | Long-grain, rinsed thoroughly |
| Chicken Stock 🥣 | 2 ½ cups | Low-sodium preferred |
| Olive Oil 🫒 | 2 tbsp | Extra-virgin for richness |
| Garlic Cloves 🧄 | 4 cloves | Minced finely |
| Yellow Onion 🧅 | 1 whole | Diced medium |
| Dried Thyme 🌿 | 1 tsp | Rubbed between fingers |
| Dried Rosemary 🌿 | 1 tsp | Crushed for better aroma |
| Paprika 🌶️ | 1 tsp | Sweet or smoked variety |
| Kosher Salt 🧂 | 1 ½ tsp | Diamond Crystal preferred |
| Black Pepper 🌶️ | 1 tsp | Freshly ground for best flavor |
| Bay Leaf 🌿 | 1 whole | Removed before serving |
| Lemon 🍋 | 1 whole | Zested and juiced |
The chicken thighs are non-negotiable here—skin-on, bone-in gives you that crispy edge and juicy interior. I always grab mine from Whole Foods or Costco when they’re on sale. Brown rice needs to be long-grain (the short stuff turns to mush). Rinse it until the water runs clear—worth the extra minute. Stock matters too: low-sodium so you control the salt.
No chicken thighs? Drumsticks work too (adjust cook time by 5 minutes). Swap brown rice for white if you’re in a rush, but cut the stock by half a cup. Fresh herbs can replace dried—use three times the amount. Out of paprika? Cumin or chili powder adds a nice twist. The lemon zest brightens everything up, but bottled juice (in a pinch) still works.
Leftovers keep 4-5 days in the fridge, and honestly taste better the next day. Freezes beautifully for 3 months. I portion into containers so lunches are sorted for the week. Just reheat gently—microwave can dry out the chicken.
Why You’ll Love This Recipe
- One Pan Wonder: I toss everything—the thighs, rice, garlic, and stock—into one dish and let the oven do the work.
- Garlic Infused: The garlic cloves roast right with the chicken, so every bite has that deep, savory punch.
- Meal Prep Dream: I make a double batch on Sunday and have lunches ready for the whole week.
- Budget Friendly: Chicken thighs and brown rice stretch far, and honestly, it tastes better than pricier cuts.
Step-by-Step Instructions for Baked Chicken With Brown Rice
This one-pan wonder comes together with minimal effort and maximum flavor.
Step 1: Prep and Season the Chicken Thighs
Pat the 2 lb Chicken Thighs dry with paper towels to ensure crispy skin. I like to trim any excess fat, leaving just enough for flavor. Season both sides generously with 1 tsp Paprika, 1.5 tsp Kosher Salt, and 1 tsp Black Pepper. The paprika adds a subtle smokiness that pairs beautifully with the herbs.
Let the seasoned chicken sit at room temperature for 10-15 minutes while you prep the rest. This step ensures even cooking and better absorption of the spices. The skin should look slightly tacky from the seasoning—this helps it crisp up in the oven.
Step 2: Sauté Aromatics and Toast the Rice
Heat 2 tbsp Olive Oil in a large oven-safe skillet or Dutch oven over medium heat. Add the diced Yellow Onion and cook for 3-4 minutes until it starts to soften and turn translucent. Then stir in the 4 cloves Garlic Cloves and cook for 30 seconds until fragrant—don’t let it brown.
Add the 1.5 cups Brown Rice to the skillet and stir to coat in the oil and aromatics. Toast for 2 minutes, stirring constantly, until the rice smells nutty and the edges look slightly golden. This step enhances the rice’s natural flavor and prevents a mushy texture.
Step 3: Add Liquids and Herbs for Flavor Infusion
Pour in the 2.5 cups Chicken Stock, then add the 1 tsp Dried Thyme, 1 tsp Dried Rosemary, and 1 whole Bay Leaf. I rub the dried herbs between my fingers before adding to release their oils. Stir well to distribute everything evenly.
Zest the 1 whole Lemon directly over the skillet, then cut it in half and squeeze in the juice. The acidity brightens the dish and balances the richness of the chicken. Give it one final stir, then arrange the chicken thighs skin-side up on top of the rice mixture.
Step 4: Bake to Perfection
Cover the skillet with a tight-fitting lid or foil and transfer to a preheated 375°F oven. Bake for 30 minutes, then carefully remove the lid and bake for another 15-20 minutes until the chicken skin is golden and crispy and the rice has absorbed all the liquid.
You’ll know it’s done when the chicken reaches an internal temperature of 165°F and the rice is tender with no crunch. If the top starts to brown too quickly, tent with foil. The rice should look fluffy and the liquid should be fully absorbed—no soupy residue at the bottom.
Step 5: Rest and Serve
Remove the skillet from the oven and let it rest, covered, for 5-10 minutes. This allows the juices in the chicken to redistribute and the rice to steam slightly, ensuring every grain is perfectly cooked. Discard the Bay Leaf before serving.
Gently fluff the rice with a fork and serve the chicken thighs on top. Each serving should have a generous portion of rice and chicken, with the crispy skin intact. The lemon and herbs should be fragrant, and the rice should have a slight sheen from the absorbed stock.
Pro Tips For Making Baked Chicken With Brown Rice
- Preheat the Pan: Sear the chicken thighs in olive oil first—4 minutes per side on medium-high heat gives them a golden crust that keeps the meat juicy during baking.
- Rinse the Rice: Always rinse brown rice under cold water before cooking to remove excess starch, which prevents a gummy texture in the final dish.
- Don’t Overcrowd: I learned this the hard way—leave space between thighs in the baking dish so they crisp instead of steam.
- Use Warm Stock: Skip cold chicken stock; warm it first so the rice cooks evenly and absorbs the liquid faster—about 20 minutes less baking time.
Common Mistakes When Making Perfect Results
Skipping the Rice Rinse
I see this mistake often—unrinsed brown rice leads to starchy, gummy grains. Rinse until the water runs clear to remove excess starch. This takes 2-3 minutes but prevents a mushy texture that ruins the dish. 💡
Overcrowding the Pan
Using a pan that’s too small steams the chicken instead of browning it. A 12-inch oven-safe skillet or Dutch oven gives the chicken space to crisp. If needed, cook in batches—crowding is the enemy of crispy skin.
Under-Seasoning the Rice
The rice needs its own seasoning, not just the chicken drippings. Taste the cooking liquid before baking and adjust with ½ tsp salt if needed. The stock should taste slightly over-seasoned—it mellows as the rice absorbs it.
Peeking Too Often
Every time you open the oven, you lose 50°F of heat. Resist checking for at least the first 30 minutes. The steady heat is what cooks the rice evenly and crisps the chicken skin. Trust the process.
Skipping the Rest
Cutting into the chicken immediately releases all the juices. Let it rest 5-10 minutes covered—this is when the rice finishes steaming and the chicken reabsorbs its moisture. Skipping this makes the chicken dry and the rice undercooked. ⏰
Wrong Oven Temperature
Too hot and the chicken burns before the rice cooks. Too low and everything turns mushy. Stick to 375°F—it’s the sweet spot for crispy skin and perfectly cooked grains. I learned this the hard way during my early days at The Smoky Pig.
Nutrition Facts
Frequently Asked Questions
Can I use chicken breasts instead of thighs?
Yes, but adjust the timing. Breasts cook faster and can dry out. Reduce baking time to 25-30 minutes total and check for 165°F internal temp.
How do I prevent the rice from turning mushy?
Always rinse the rice first and toast it in the pan before adding liquid. Use the exact 2.5 cups stock for 1.5 cups rice ratio and resist stirring while baking.
Can I make this ahead of time?
Prepare the dish up to the baking step, cover, and refrigerate for up to 12 hours. Add 5-10 minutes to the baking time when cooking from cold.
Why is my chicken skin not crispy?
Pat the skin very dry before seasoning and ensure the oven is fully preheated to 375°F. Uncover the pan for the last 15-20 minutes to crisp the skin.

- Jollof Rice Sauce Recipe: West African Tomato and Spice Infusion - September 25, 2026
- Japanese Rice Soup Recipe: Umami-Rich Comfort in a Bowl - September 25, 2026
- Homemade Cream Of Rice Recipe: Silk-Smooth Breakfast in Minutes - September 25, 2026