
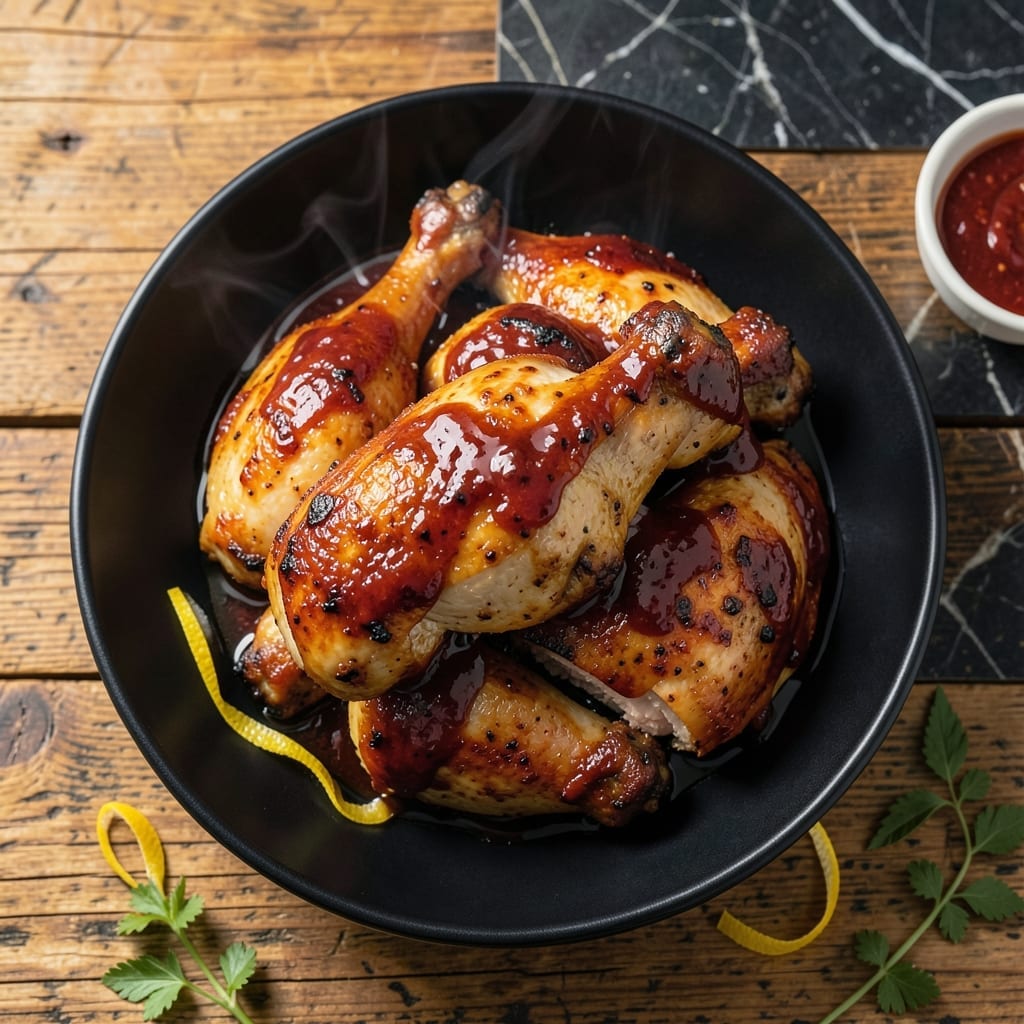
Achieving authentic barbecue flavor in your oven is absolutely possible with the right technique. This method delivers smoky depth and caramelized edges without a grill.
The secret lies in a two-step process: first baking the chicken at high heat to lock in juices, then finishing with a homemade barbecue sauce that forms a sticky, glossy glaze. Simple ingredients combine to create complex flavors.
You’ll get chicken that’s tender inside with a slightly charred exterior, just like outdoor grilling. The oven’s dry heat concentrates the sauce’s sweetness while maintaining the meat’s natural moisture.
Perfect for weeknight dinners or casual gatherings, this approach works with any cut of chicken. The results speak for themselves.
Ingredients for Barbeque Chicken Recipe Oven
Simple ingredients create that authentic smoky, caramelized barbecue flavor right in your oven.
| Ingredient | Amount | Notes |
|---|---|---|
| Chicken Thighs 🍗 | 2 lb | Boneless, skin-on preferred |
| Chicken Drumsticks 🍗 | 2 lb | Skin-on for crispiness |
| Ketchup 🍅 | 1 cup | High-quality for best flavor |
| Apple Cider Vinegar 🍏 | ¼ cup | Balances sweetness in sauce |
| Brown Sugar 🍚 | ½ cup | Light or dark variety |
| Worcestershire Sauce 🫒 | 1 tbsp | Adds depth to sauce |
| Smoked Paprika 🌶️ | 1 tsp | Provides smoky flavor |
| Garlic Powder 🧄 | 1 tsp | Enhances savory notes |
| Onion Powder 🧅 | 1 tsp | Complements garlic flavor |
| Salt 🧂 | 1 tsp | Kosher or sea salt |
| Black Pepper 🌶️ | ½ tsp | Freshly ground preferred |
| Olive Oil 🫒 | 2 tbsp | For brushing chicken |
| Liquid Smoke 🔥 | ½ tsp | Optional for extra smokiness |
The chicken cuts are key here. Thighs and drumsticks stay juicier than breasts during the high-heat baking. Look for skin-on pieces with good marbling at Whole Foods or your local butcher. For best results, pat the chicken completely dry before seasoning—this ensures that beautiful caramelization. I always buy extra when it’s on sale and freeze it for later use.
No liquid smoke? You can skip it—the smoked paprika already adds depth. Honey instead of brown sugar works in a pinch (use one-third less as it’s sweeter). If you’re avoiding processed ingredients, tomato paste plus molasses can replace ketchup. The vinegar is non-negotiable though—it’s what balances all that sweetness in the sauce.
The barbecue sauce keeps in the fridge for up to 1 week, or freeze it for 3 months. Leftovers reheat beautifully—just add a splash of water to thin if needed. Always store cooked chicken in airtight containers for up to 4 days.
Why You’ll Love This Recipe
- I’ll be real: the chicken tastes even better the next day, and it reheats beautifully for quick lunches.
- One Pan Wonder: I toss the chicken and sauce together, pop it in the oven, and let it do the work—no flipping, no fuss.
- Sticky Sweet Perfection: The brown sugar caramelizes with the ketchup and vinegar, creating a finger-licking glaze on every piece.
- Feeds My Crew: Honestly, this is the only dish my picky nephew and foodie sister both beg me to make.
Step-by-Step Instructions for Barbeque Chicken Oven
This method delivers tender, fall-off-the-bone results with a deep smoky-sweet glaze.
Step 1: Prepare and Season the Chicken
Pat the chicken thighs and drumsticks completely dry with paper towels. This ensures the skin will crisp properly in the oven. Place them in a large bowl and drizzle with the olive oil, tossing to coat evenly.
In a small bowl, combine the salt, black pepper, smoked paprika, garlic powder, and onion powder. Sprinkle this mixture evenly over all pieces of chicken, rubbing it into the skin. For maximum flavor penetration, let the seasoned chicken sit at room temperature for 15-20 minutes while you prepare the sauce.
Step 2: Make the Barbeque Sauce
In a medium saucepan, combine the ketchup, apple cider vinegar, brown sugar, Worcestershire sauce, and liquid smoke. Whisk until the brown sugar is fully dissolved and the mixture is smooth.
Bring the sauce to a gentle simmer over medium heat, then reduce to low heat and let it cook for 5-7 minutes until it thickens slightly. You want it to coat the back of a spoon but still be pourable. Remove from heat and set aside—it will thicken further as it cools.
Step 3: Roast the Chicken
Preheat your oven to 400°F. Arrange the seasoned chicken pieces on a wire rack set over a rimmed baking sheet, skin-side up. This setup allows heat to circulate around the chicken, ensuring even cooking and crispy skin on all sides.
Roast for 25 minutes, then remove from the oven. Brush a generous layer of the prepared sauce over all the chicken pieces, making sure to coat them evenly. Return to the oven and roast for another 15-20 minutes until the chicken is cooked through and the skin is deep golden brown and slightly charred in spots.
Step 4: Glaze and Rest
Transfer the chicken to a serving platter. Brush with another layer of sauce, using about half of what remains. Tent loosely with foil and let it rest for 10 minutes. This resting period allows the juices to redistribute, ensuring moist, flavorful meat.
Before serving, brush with the final layer of sauce. The chicken should have a glossy, sticky glaze with a rich mahogany color. The internal temperature of the thickest pieces should read 165°F on an instant-read thermometer. Serve immediately with additional sauce on the side if desired.
Pro Tips For Making Barbeque Chicken Recipe Oven
- Preheat the Oven: Crank it to 400°F—this high heat caramelizes the brown sugar in the sauce and gives the chicken that sticky, slightly charred finish. I learned this the hard way after too many batches came out pale and watery.
- Score the Chicken: Make shallow cuts in the thighs and drumsticks before baking. This isn’t just for looks—it lets the ketchup and vinegar mixture seep in deeper, so every bite actually tastes like barbecue.
- Skip the Overcrowding: Spread the pieces out on the baking sheet with at least an inch between them. Steer clear of piling them up, or they’ll steam instead of roast, and you’ll end up with soggy skin instead of that crispy, saucy coating.
- Simmer the Sauce: Mix the ketchup, apple cider vinegar, and brown sugar in a small pot and simmer for 5 minutes before brushing it on. Sounds like an extra step, but it thickens the sauce so it clings to the chicken instead of sliding off into the pan.
Essential Equipment for Great barbeque chicken recipe oven
Oven Setup
I always use my convection oven for this recipe—it circulates heat evenly for consistent browning. If yours doesn’t have convection, rotate the pan halfway through baking. A rimmed baking sheet with a wire rack is essential to elevate the chicken above the drippings. 🔥
Meat Thermometer
Don’t guess—use an instant-read thermometer like my ThermoWorks MK4. Check the thickest piece in 3 spots to ensure even cooking. The 165°F target is non-negotiable for safety and juiciness.
Basting Tools
A silicone pastry brush is perfect for applying sauce without absorbing flavors like bristle brushes do. I keep 2 brushes—one for raw chicken, one for cooked—to prevent cross-contamination.
Saucepan Essentials
For the sauce, use a medium stainless steel saucepan with a heavy bottom. It prevents scorching and distributes heat evenly. I swear by All-Clad for its durability and even heating.
Resting Equipment
After cooking, transfer chicken to a warm platter and tent with foil. This keeps it hot while resting. A folded kitchen towel under the platter prevents countertop scratches.
Cleanup Help
Line your baking sheet with parchment paper for easy cleanup. The sauce caramelizes and sticks, but parchment prevents the mess. I reuse sheets for 2-3 batches before replacing. 💡
Nutrition Facts
Frequently Asked Questions
What temperature should the oven be set to?
Preheat your oven to 400°F for even cooking and proper caramelization. This temperature ensures the chicken cooks through while developing that signature sticky glaze.
Can I use chicken breasts instead of thighs?
Yes, but reduce cooking time by 5-10 minutes to prevent dryness. Chicken breasts cook faster than thighs, so monitor closely with a meat thermometer.
How do I get crispy skin in the oven?
Pat the chicken completely dry before seasoning, and place it on a wire rack over a baking sheet. This allows air circulation for maximum crispiness.
Can I make the sauce ahead of time?
The sauce keeps in the fridge for up to 1 week or can be frozen for 3 months. Reheat gently before using.

- Jollof Rice Sauce Recipe: West African Tomato and Spice Infusion - September 25, 2026
- Japanese Rice Soup Recipe: Umami-Rich Comfort in a Bowl - September 25, 2026
- Homemade Cream Of Rice Recipe: Silk-Smooth Breakfast in Minutes - September 25, 2026