
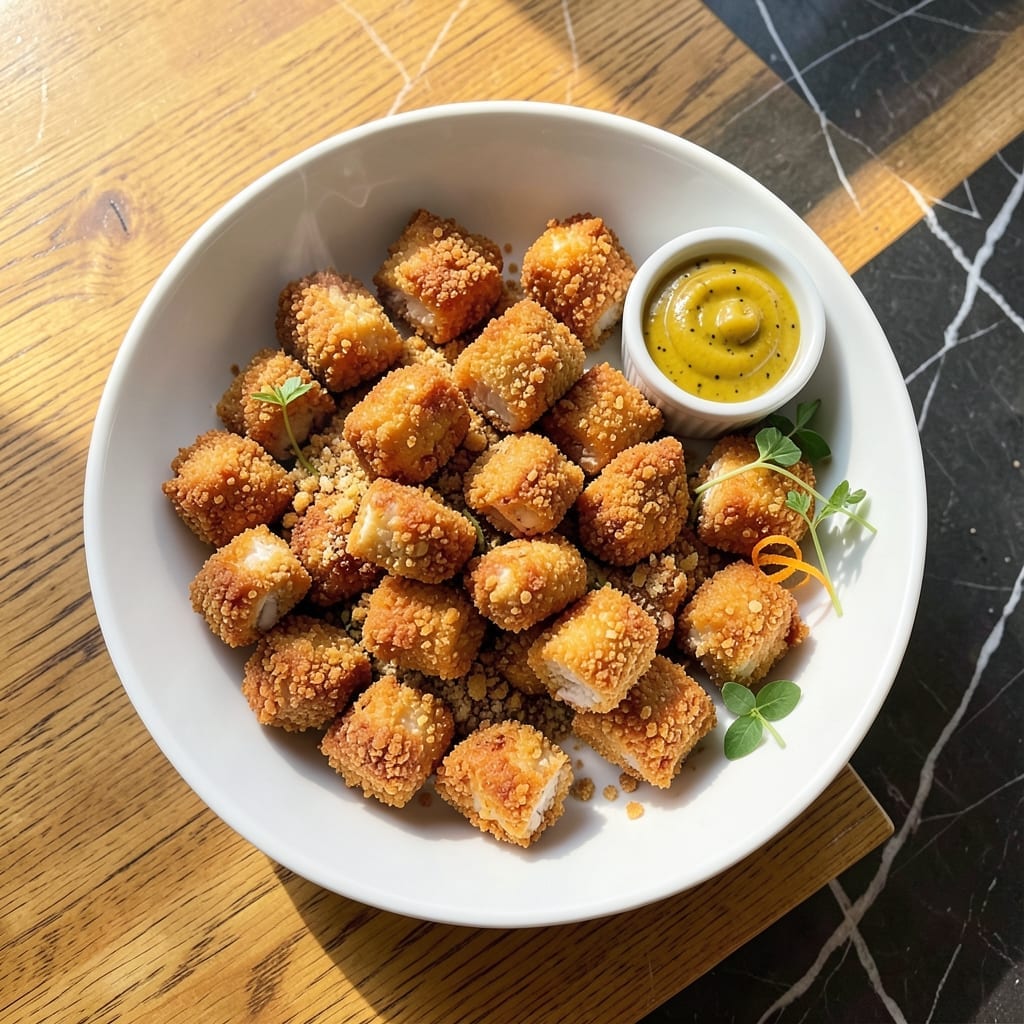
Homemade chicken nuggets reach new heights with this panko breading method that delivers an irresistibly crispy exterior. My years of testing revealed that panko’s coarse texture creates a lighter, crunchier coating than traditional breadcrumbs.
The secret lies in a three-step breading process that ensures maximum crunch. Panko’s larger flakes form a shatteringly crispy shell that stays intact even after baking. This technique transforms simple chicken into restaurant-quality bites.
What emerges from the oven is golden, extra crunchy nuggets with tender centers. The panko forms a perfect barrier that locks in juices while creating that satisfying snap with every bite. These outperform any frozen variety.
Serve with your favorite dipping sauces for a meal that’s both satisfying and fun. This method guarantees consistent results every time.
Ingredients for Chicken Nuggets Panko
Transform everyday chicken into restaurant-quality bites with these precise, crunch-focused ingredients.
| Ingredient | Amount | Notes |
|---|---|---|
| Boneless, Skinless Chicken Breasts 🍗 | 1 ½ lb | Cut into 1-inch pieces |
| Panko Breadcrumbs 🍞 | 2 cups | Japanese-style for maximum crunch |
| All-Purpose Flour 🌾 | ¾ cup | For initial dredging |
| Large Eggs 🥚 | 2 whole | Beaten for binding |
| Dijon Mustard 🟡 | 1 tbsp | Adds depth to egg wash |
| Garlic Powder 🧄 | 1 tsp | Enhances savory profile |
| Onion Powder 🧅 | 1 tsp | Balances seasoning blend |
| Paprika 🌶️ | 1 tsp | Smoked or sweet variety |
| Salt 🧂 | 1 tsp | Diamond Crystal kosher preferred |
| Black Pepper 🌶️ | ½ tsp | Freshly ground for best results |
| Neutral Oil 🫒 | ½ cup | Vegetable or canola for frying |
| Buttermilk 🥛 | ½ cup | For tenderizing chicken |
The panko is non-negotiable here. Kikkoman or Progresso brands deliver the coarsest flakes—essential for that shatteringly crisp texture. Asian markets often carry the best selection at lower prices. For the chicken, air-chilled breasts from Whole Foods or Trader Joe’s yield the juiciest results. Avoid pre-cut nuggets; whole breasts let you control the size for even cooking.
No buttermilk? Whole milk with 1 tbsp vinegar or lemon juice per cup works perfectly. For a gluten-free version, swap all-purpose flour for rice flour and use gluten-free panko (brands like Kikkoman offer this). The Dijon can be replaced with whole-grain mustard, but avoid yellow mustard—its acidity can toughen the coating. Skip the paprika if unavailable, but add extra black pepper for depth.
Bread the chicken just before cooking to prevent sogginess. Leftover nuggets keep in an airtight container for 3-4 days refrigerated, though they’re best fresh. For freezing, arrange in a single layer on a tray first—prevents clumping. Reheat in a 400°F oven for 10-12 minutes to restore crispness.
Why You’ll Love This Recipe
- 20-Minute Magic: I can get these from raw chicken to golden crisp in the time it takes to preheat the oven and set the table.
- Dijon Crunch: That kick of Dijon in the egg wash makes the panko crust taste like a grown-up nugget.
- Freezer Filler: Double the batch and freeze half—future me is always grateful for a stash of these.
- Panko Perfection: Honestly, the extra-crispy texture from panko makes these better than any fast-food version I’ve tried.
Step-by-Step Instructions for Chicken Nuggets Panko
Master the technique for achieving that perfect crunch and juicy interior every time.
Step 1: Prepare and Season the Chicken
Cut the 1.5 lb Boneless, Skinless Chicken Breasts into 1-inch pieces. I prefer uniform sizes for even cooking. Pat each piece dry with paper towels—this ensures the dredging adheres properly and promotes better browning.
Season the chicken lightly with 1 tsp Salt and 0.5 tsp Black Pepper. Don’t oversalt at this stage, as the breading will add additional seasoning. This preliminary seasoning enhances the flavor from within.
Step 2: Create the Dredging and Breading Stations
Set up three shallow bowls. In the first, combine the 0.75 cup All-Purpose Flour, 1 tsp Garlic Powder, 1 tsp Onion Powder, and 1 tsp Paprika. This flour mixture creates the base layer for the breading to cling to.
In the second bowl, whisk together the 2 whole Large Eggs, 1 tbsp Dijon Mustard, and 0.5 cup Buttermilk until smooth. The Dijon mustard adds a subtle depth, while the buttermilk tenderizes the chicken.
Place the 2 cups Panko Breadcrumbs in the third bowl. Their coarse texture guarantees maximum crunch. Japanese-style panko works best because of its light, airy structure.
Step 3: Bread the Chicken with Precision
Working with one piece at a time, dredge the chicken in the seasoned flour, shaking off any excess. This thin, even coating is crucial for the next layers to adhere properly. Dip the floured piece into the egg mixture, letting any excess drip off for a moment.
Transfer the chicken to the panko breadcrumbs. Press gently but firmly to ensure the crumbs adhere completely, covering all surfaces. For extra crunch, I like to press the chicken into the panko a second time. Place the breaded pieces on a wire rack set over a baking sheet to keep them from getting soggy.
Step 4: Fry to Golden Perfection
Heat the 0.5 cup Neutral Oil in a large skillet over medium-high heat until it shimmers and a pinch of panko sizzles when dropped in. The oil is ready when it reaches 350-375°F—use a thermometer for accuracy.
Carefully add the breaded chicken in a single layer, without crowding the pan. Cook for 3-4 minutes per side until the nuggets are golden brown and the internal temperature reaches 165°F. The panko should be deeply golden and crisp. Transfer to a paper towel-lined plate to drain excess oil.
If working in batches, keep the finished nuggets warm in a 200°F oven while frying the rest. This ensures they stay crisp and hot until serving.
Pro Tips For Making Chicken Nuggets Panko
- Dry the Chicken: Pat the chicken breasts thoroughly dry with paper towels before dredging—I learned this the hard way after my first batch turned out soggy instead of crispy.
- Double Dredge: Dip the chicken in flour, egg wash with Dijon, then panko, but repeat the egg and panko once more for that extra-crunchy coating.
- Skip the Overcrowding: Fry or bake in batches with space between each nugget, or they’ll steam instead of crisp—about 1 inch apart on the baking sheet works.
- Rest Before Serving: Give the nuggets 5 minutes on a wire rack after baking so the crust stays firm and doesn’t turn gummy from trapped steam.
Make-Ahead Tips for Leftovers
Prep Ahead Strategy
You can bread all the chicken up to 12 hours in advance. After coating, arrange pieces on a wire rack and refrigerate uncovered. This helps the coating set and dry slightly, which improves crispiness when cooking. 💡
Freezing Uncooked Nuggets
For long-term storage, bread the chicken completely, then freeze in a single layer on a baking sheet for 1-2 hours. Transfer to a freezer bag with parchment between layers. They’ll keep for 2 months without losing texture.
Freezing Cooked Nuggets
Cool completely, then freeze in a single layer before bagging. This prevents them from sticking together. I use quart-size freezer bags for portion control. They’ll maintain quality for 1 month.
Reheating from Frozen
For uncooked frozen nuggets, add 2-3 minutes to the frying time. No need to thaw first. For cooked frozen nuggets, bake at 400°F for 15-18 minutes, flipping halfway. This revives the crunch beautifully. 🔥
Day-Of Cooking Tips
If prepping the morning of, keep breaded nuggets refrigerated until ready to cook. Let them sit at room temperature for 10 minutes before frying to ensure even cooking. This small step makes a noticeable difference.
Storage Containers
I recommend glass containers with tight-sealing lids for refrigerated storage. They’re easy to clean and won’t absorb odors. For freezing, heavy-duty ziplock bags work best as they take up less space.
Nutrition Facts
Frequently Asked Questions
Can I bake these instead of frying?
Yes! Bake at 400°F for 15-18 minutes, flipping halfway. Spray with oil first for extra crispiness. The texture will be slightly different but still delicious.
What’s the best oil for frying?
Use a neutral oil with a high smoke point like vegetable, canola, or peanut oil. These handle the 350-375°F heat without burning and won’t impart extra flavor.
Why did my breading fall off?
This usually happens if the chicken was too wet. Pat it completely dry before dredging and let each coating layer set for 1-2 minutes before moving to the next.
Can I use regular breadcrumbs?
Regular breadcrumbs will work but won’t give the same crunch. If using them, add 1/2 cup crushed cornflakes to the mix for extra texture.

- Jollof Rice Sauce Recipe: West African Tomato and Spice Infusion - September 25, 2026
- Japanese Rice Soup Recipe: Umami-Rich Comfort in a Bowl - September 25, 2026
- Homemade Cream Of Rice Recipe: Silk-Smooth Breakfast in Minutes - September 25, 2026