
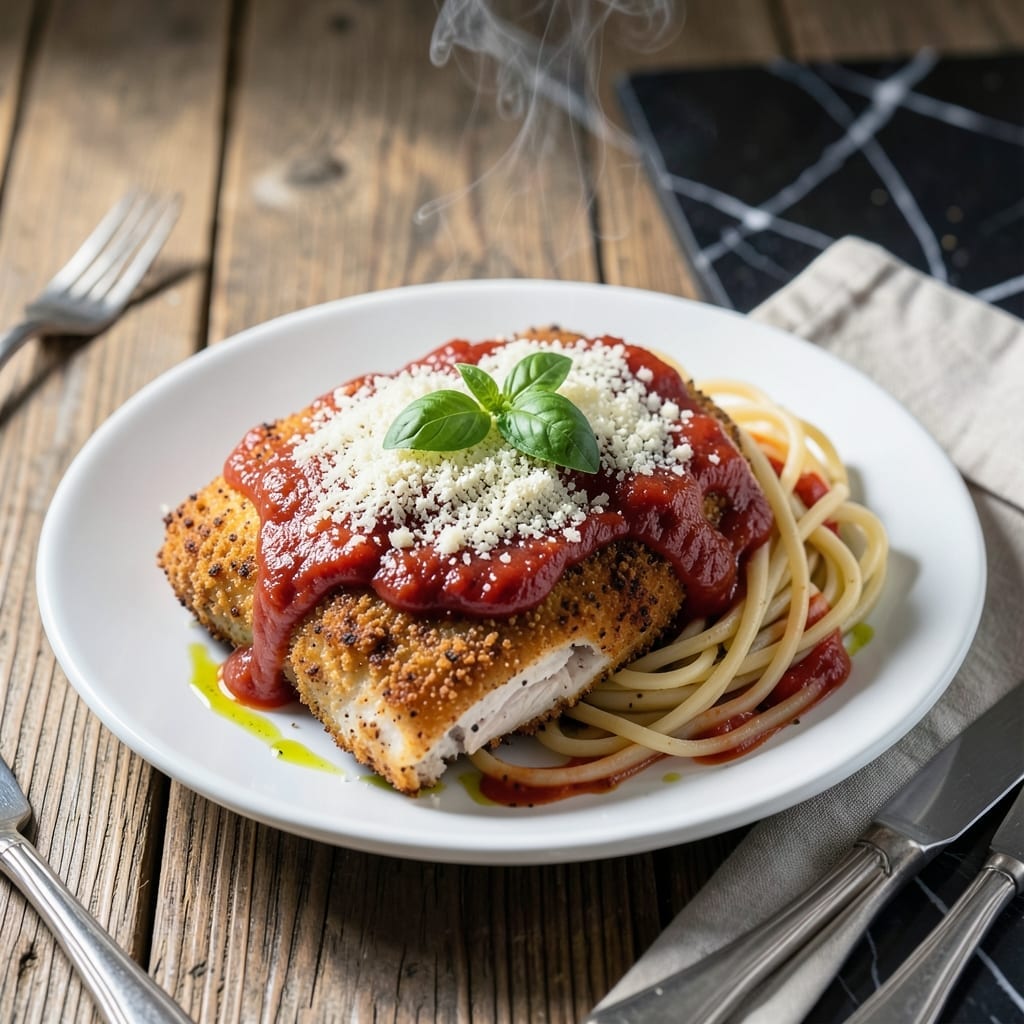
This classic dish delivers crispy breaded chicken topped with rich tomato sauce and melted cheese, a timeless combination that never fails to satisfy. The key is achieving that perfect golden crust without drying out the meat.
I’ve refined this method to ensure every bite has that ideal texture contrast—tender chicken inside, shatteringly crispy coating outside. The marinara and cheese add layers of flavor that make it irresistible.
The process is straightforward: bread, fry, sauce, and bake. Each step builds on the last to create a dish that’s greater than the sum of its parts. The result is restaurant-quality comfort food made in your own kitchen.
Serve it hot with pasta or a fresh salad for a complete meal. This version stays true to the original while keeping the technique accessible.
Ingredients for Basic Chicken Parmesan
Standard pantry items plus deli counter staples create this timeless comfort dish at home.
| Ingredient | Amount | Notes |
|---|---|---|
| Chicken Breasts 🍗 | 1 ½ lb | Boneless, skinless, pounded to 1/2-inch thickness |
| All-Purpose Flour 🌾 | 1 cup | For initial dredging coating |
| Large Eggs 🥚 | 2 whole | Beaten for egg wash |
| Italian Breadcrumbs 🍞 | 1 ½ cups | Panko style for extra crispiness |
| Parmesan Cheese 🧀 | ½ cup | Freshly grated from block |
| Marinara Sauce 🍅 | 2 cups | Homemade or high-quality jarred |
| Mozzarella Cheese 🧀 | 8 oz | Low-moisture, shredded or sliced |
| Garlic Cloves 🧄 | 3 cloves | Minced for sauce enhancement |
| Olive Oil 🫒 | ¾ cup | For frying chicken cutlets |
| Salt 🧂 | 1 ½ tsp | Divided for seasoning layers |
| Black Pepper 🌶️ | ½ tsp | Freshly ground preferred |
| Dried Oregano 🍃 | 1 tsp | For authentic Italian flavor |
| Dried Basil 🌿 | 1 tsp | Complements tomato sauce well |
| Red Pepper Flakes 🔥 | ¼ tsp | Optional for subtle heat |
The chicken quality impacts texture and flavor. Boneless, skinless breasts are ideal for even cooking. Look for air-chilled options at Whole Foods or natural markets for better moisture retention. Pounding to uniform thickness ensures consistent cooking and prevents dryness. Most grocery stores carry pre-trimmed breasts, but trimming yourself guarantees no unwanted bits.
Breadcrumbs can be regular or panko for extra crunch. No marinara on hand? Crushed tomatoes with garlic and herbs works in a pinch. Cheese substitutions: Provolone melts beautifully alongside mozzarella. For gluten-free, cornmeal or almond flour replaces breadcrumbs. Fresh herbs like basil or oregano can replace dried at triple the amount.
Prep breading stations in advance for efficiency. Leftover chicken keeps 3-4 days refrigerated or freezes well for 2 months. Reheat in oven to maintain crispiness. Breadcrumbs can be pre-mixed and stored in airtight container for future use.
Why You’ll Love This Recipe
- No-Fuss Coating: I just dip, dredge, and bake—flour, egg, breadcrumbs with parmesan, and it’s ready for the oven.
- Crispy Cheese Crust: That golden parmesan-breadcrumb mix gets so crunchy, then melts into the juicy chicken underneath.
- Feeds Everyone: It’s my go-to for Sunday dinner, weeknight rush, or when the kids bring friends over last minute.
- Leftovers? Better: Honestly, it tastes even richer the next day—toss it on a sandwich or reheat for a quick lunch.
Step-by-Step Instructions for Chicken Parmesan
Here’s the proven method for achieving crispy, golden cutlets with perfectly melted cheese every time.
Step 1: Prep and Bread the Chicken Breasts
Start by patting the 1.5 lb Chicken Breasts dry with paper towels. Season both sides with 1 tsp Salt and 0.5 tsp Black Pepper. Set up a breading station with three shallow dishes: one with the 1 cup All-Purpose Flour, one with the 2 whole Large Eggs beaten, and one with the 1.5 cups Italian Breadcrumbs mixed with the 0.5 cup Parmesan Cheese.
Dredge each breast in flour, shaking off the excess, then dip in egg, letting any extra drip off. Finally, press into the breadcrumb mixture, ensuring a thick, even coating on all sides. This three-step process is what creates that ultra-crispy exterior. Place the breaded cutlets on a plate and let them rest for 5 minutes to help the coating adhere.
Step 2: Pan-Fry to Golden Perfection
Heat 0.75 cup Olive Oil in a large skillet over medium-high heat until shimmering but not smoking. Working in batches to avoid crowding, add the breaded chicken and cook for 3-4 minutes per side until golden brown and crispy. The oil should sizzle when the chicken hits the pan—if it doesn’t, wait a minute for it to get hotter.
Don’t move the chicken around too much—let it develop a deep golden crust before flipping. Use a slotted spatula to transfer the cooked cutlets to a paper towel-lined plate to drain excess oil. The coating should be uniformly crispy and hold together firmly when handled.
Step 3: Layer with Sauce and Cheese
Preheat your oven to 375°F. Spread 1 cup Marinara Sauce in the bottom of a baking dish. Place the fried chicken cutlets in a single layer over the sauce. Spoon the remaining 1 cup Marinara Sauce evenly over the chicken, then sprinkle with 1 tsp Dried Oregano, 1 tsp Dried Basil, and 0.25 tsp Red Pepper Flakes for a hint of heat.
Top each cutlet with slices or shreds of 8 oz Mozzarella Cheese, ensuring full coverage. The cheese should start melting immediately from the residual heat of the chicken and sauce. For extra flavor, sprinkle a little extra Parmesan Cheese on top of the mozzarella.
Step 4: Bake Until Bubbly and Melty
Bake for 15-20 minutes until the cheese is fully melted and bubbling at the edges, and the sauce is heated through. The top should be light golden brown in spots, with the cheese stretched and gooey. If the cheese isn’t browning enough, broil for the last 1-2 minutes, but watch closely to prevent burning.
Let the dish rest for 5 minutes before serving. This allows the cheese to set slightly so it doesn’t all slide off when you plate it. Garnish with fresh parsley if desired, though the dried herbs in the sauce provide plenty of Italian flavor already.
Pro Tips For Making Basic Chicken Parmesan
- Pound the Chicken: Use the flat side of a meat mallet to pound the chicken breasts to an even ½-inch thickness—this guarantees they cook through at the same rate without drying out.
- Season Each Layer: Salt and pepper the flour, mix it into the eggs, and stir it into the breadcrumbs; seasoning every step means flavor in every bite, not just the surface.
- Rest Before Breading: Let the floured, egg-dipped chicken rest for 2 minutes before the breadcrumbs—this helps the coating stick and stay put in the pan.
- Use Fresh Breadcrumbs: I learned this the hard way—fresh Italian breadcrumbs brown faster and crisp better than stale ones, so check the date on the package.
Essential Equipment for This Dish
Essential Skillet
I always reach for my 12-inch cast iron skillet for frying—its even heat distribution and retention ensure perfectly crispy breading without hot spots. A Lodge brand skillet is my go-to for durability and performance. Avoid nonstick pans as they can’t handle the medium-high heat needed. 🔥
Baking Dish
A 9×13-inch glass baking dish works perfectly for finishing in the oven. I prefer Pyrex for its heat resistance and easy cleanup. Make sure it’s deep enough to hold the sauce and cheese without spilling over.
Meat Pounder
Uniform thickness is key for even cooking, so I use a meat mallet to pound the chicken to ½-inch thickness. The flat side tenderizes while the textured side helps break down fibers. A rolling pin works in a pinch, but the mallet gives you more control.
Tongs and Spatula
Use sturdy metal tongs for flipping the breaded chicken during frying—they provide better grip than a fork. A slotted spatula helps drain excess oil when transferring to the paper towel-lined plate.
Thermometer
While not strictly necessary, an instant-read thermometer helps ensure the chicken reaches 165°F internally. I like the ThermoWorks ThermoPop for its accuracy and quick response time. This prevents overcooking while maintaining juiciness.
Cooling Rack
Place your fried cutlets on a wire cooling rack set over a baking sheet to keep them crispy while you finish frying the rest. This prevents the breading from getting soggy by allowing air circulation underneath. 💡
Nutrition Facts
Frequently Asked Questions
Can I use chicken thighs instead of breasts?
Yes, boneless thighs work well and stay juicier. Pound them to ½-inch thickness for even cooking. They may need 1-2 extra minutes in the pan due to higher fat content.
Why did my breading fall off during frying?
This usually happens if the chicken wasn’t dry before breading or didn’t rest after coating. Press firmly when breading and let it sit for 5 minutes before frying. Also ensure oil is at medium-high heat before adding chicken.
Can I bake instead of frying?
For a lighter version, bake breaded chicken at 400°F for 20-25 minutes on a wire rack. You won’t get the same crispiness, but it still tastes great. Finish with sauce and cheese as directed.

- Jollof Rice Sauce Recipe: West African Tomato and Spice Infusion - September 25, 2026
- Japanese Rice Soup Recipe: Umami-Rich Comfort in a Bowl - September 25, 2026
- Homemade Cream Of Rice Recipe: Silk-Smooth Breakfast in Minutes - September 25, 2026