
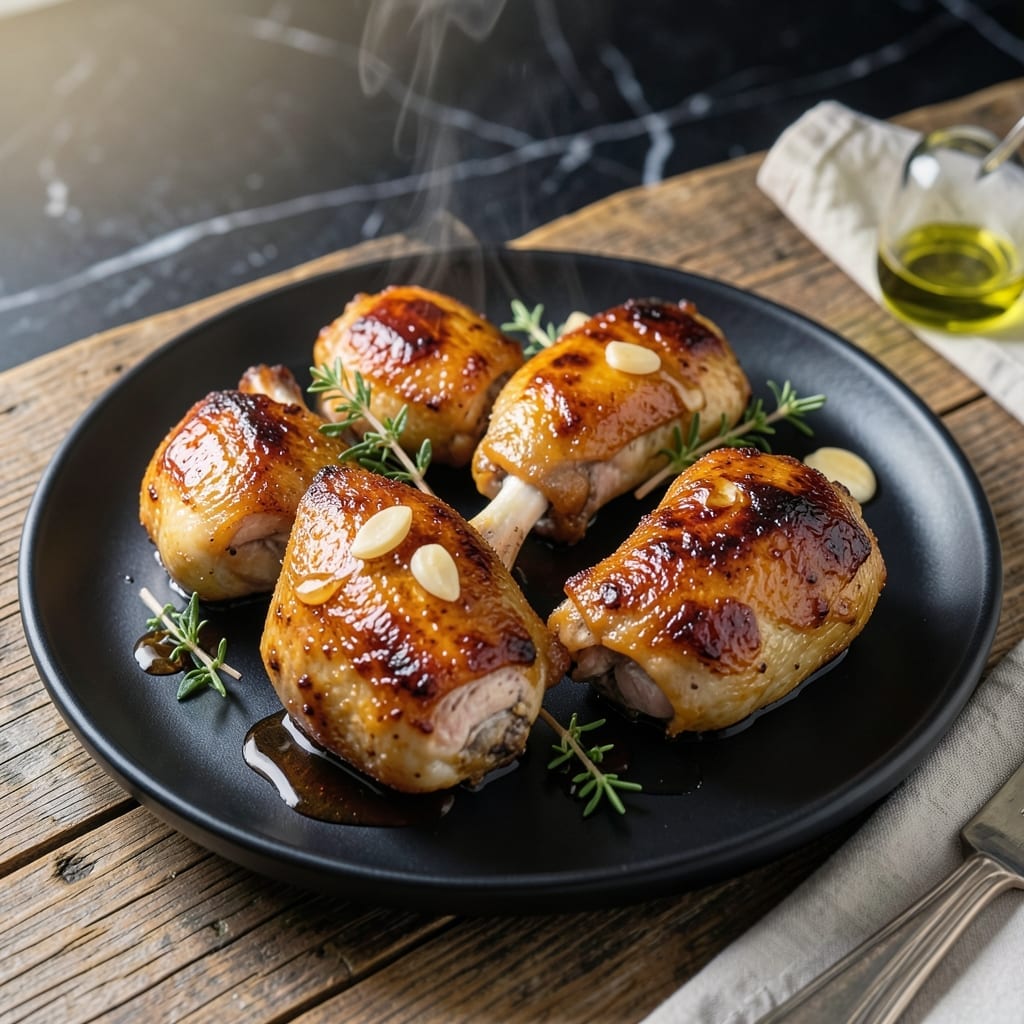
This recipe transforms simple chicken thighs into a restaurant-worthy dish with minimal effort. The secret lies in the balance between sweet honey and bold garlic, creating a sticky-sweet glaze that caramelizes beautifully under high heat.
The technique is straightforward: sear the thighs skin-side down for crispy results, then finish with the glaze in the oven. I developed this method after testing various approaches, and it consistently delivers juicy meat with a glossy, flavorful coating.
You’ll end up with tender, fall-off-the-bone chicken coated in a rich, aromatic sauce that’s perfect for serving over rice or with roasted vegetables. The glaze thickens as it bakes, ensuring every bite is packed with flavor.
This dish proves that weeknight dinners can be both easy and impressive.
Ingredients for Honey Chicken Thighs
Transform everyday chicken thighs with honey, garlic, and a few pantry staples into something extraordinary.
| Ingredient | Amount | Notes |
|---|---|---|
| Bone-in, Skin-on Chicken Thighs 🍗 | 2 lb | About 6-8 thighs, patted dry |
| Honey 🍯 | ½ cup | Pure, unprocessed preferred |
| Garlic Cloves 🧄 | 6 cloves | Minced for maximum flavor |
| Soy Sauce 🫙 | ⅓ cup | Low-sodium for balance control |
| Apple Cider Vinegar 🍏 | 2 tbsp | Balances sweetness with acidity |
| Olive Oil 🫒 | 2 tbsp | Divided for searing and glaze |
| Dijon Mustard 🟡 | 1 tbsp | Smooth, not grainy variety |
| Fresh Ginger 🌿 | 1 tbsp | Peeled and finely grated |
| Kosher Salt 🧂 | 1 tsp | Diamond Crystal preferred |
| Freshly Ground Black Pepper 🌶️ | ½ tsp | Coarse grind for texture |
| Red Pepper Flakes 🔥 | ¼ tsp | Adjust for heat preference |
| Fresh Thyme Sprigs 🌿 | 4 pieces | Leaves stripped, stems discarded |
| Unsalted Butter 🧈 | 2 tbsp | For richness in glaze |
The chicken thighs are non-negotiable—bone-in, skin-on delivers the juiciest results and crispest skin. Look for even-sized pieces at Whole Foods or your local butcher; they’ll render fat more consistently. The honey should be raw and unprocessed for depth of flavor. For soy sauce, Kikkoman low-sodium is my go-to (consistent quality, widely available). Don’t skip drying the chicken skin—this is what ensures that crispy texture mentioned in the intro.
Need to swap soy sauce? Tamari or coconut aminos work in a 1:1 ratio. No fresh ginger? Ground ginger at one-quarter the amount (it’s potent). If you’re avoiding dairy, replace the butter with coconut oil—same richness, no sacrifice. The Dijon can be yellow mustard in a pinch, though the flavor profile will be milder. For extra complexity, a dash of fish sauce (if you have it) deepens the umami.
The glaze thickens as it cools—perfect for 3-4 days stored in an airtight container in the fridge. Reheat gently on the stove with a splash of water to loosen. Chicken itself keeps 4 days refrigerated, but it’s best fresh. For meal prep, cook the chicken and store the glaze separately to maintain that sticky-sweet texture.
Why You’ll Love This Recipe
- One Pan Wonder: I just toss the chicken thighs with honey, garlic, and soy sauce, then let the oven do the work—minimal mess, maximum flavor.
- Sweet & Savory Magic: The honey caramelizes with the soy sauce and garlic, creating that sticky, finger-licking glaze on crispy skin.
- Weeknight Hero: Between us, this is my go-to for busy evenings—it’s hearty enough for dinner and even better as leftovers the next day.
- Budget-Friendly Feast: Bone-in thighs stay juicy and cost less than breasts, so I can feed the whole family without breaking the bank.
Step-by-Step Instructions for Honey Chicken Thighs
Master the technique for perfectly caramelized, fall-off-the-bone chicken every time.
Step 1: Season and Sear the Chicken Thighs
Pat the 2 lb Bone-in, Skin-on Chicken Thighs completely dry with paper towels. Season both sides generously with 1 tsp Kosher Salt, 0.5 tsp Freshly Ground Black Pepper, and 0.25 tsp Red Pepper Flakes. I press the seasoning into the skin to ensure maximum flavor adhesion.
Heat 1 tbsp Olive Oil in a large skillet over medium-high heat until shimmering. Add the chicken thighs skin-side down and sear undisturbed for 6-8 minutes until the skin is deep golden brown and crisp. Flip and sear the other side for 4-5 minutes. Transfer to a plate and set aside.
Step 2: Build the Aromatic Glaze Base
In the same skillet, reduce heat to medium and add the remaining 1 tbsp Olive Oil. Sauté 6 cloves minced Garlic Cloves, 1 tbsp Fresh Ginger, and the leaves from 4 pieces Fresh Thyme Sprigs for 1-2 minutes until fragrant but not browned.
Stir in 0.33 cup Soy Sauce, 2 tbsp Apple Cider Vinegar, and 1 tbsp Dijon Mustard. Scrape up all the browned bits from the bottom of the pan—they’re packed with flavor. Let this mixture simmer for 2 minutes to meld the flavors together.
Step 3: Create the Sticky Honey Glaze
Reduce heat to medium-low and stir in 0.5 cup Honey. Allow the mixture to simmer for 3-4 minutes until it thickens slightly and becomes glossy. The glaze should coat the back of a spoon but still be pourable.
Add 2 tbsp Unsalted Butter and whisk until fully melted and incorporated. This adds a rich, velvety finish to the glaze. Taste and adjust seasoning if needed, though the soy sauce and honey should provide a balanced sweet-savory profile.
Step 4: Finish and Serve
Return the chicken thighs to the skillet along with any accumulated juices. Spoon the glaze over the top, ensuring each piece is thoroughly coated. Simmer for 3-4 minutes, turning the chicken once, until the glaze has thickened and clings to the chicken.
The chicken is done when the internal temperature reaches 165°F and the glaze has caramelized into a sticky, glossy coating. Serve immediately, garnished with any remaining sauce and fresh thyme leaves for a touch of color and aroma.
Pro Tips For Making Honey Chicken Thighs
- Pat Thighs Dry: I learned this the hard way—wet skin steams instead of crisping. Use paper towels and press hard to remove every bit of moisture before searing.
- Brown the Skin First: Start skin-side down in a hot pan for 5-6 minutes without moving. This builds a crispy base that holds up to the honey glaze.
- Thin the Honey: Mix honey with 1 tablespoon of warm apple cider vinegar before brushing. It spreads easier and coats the thighs evenly without pooling.
- Rest Before Serving: Give the thighs 5-10 minutes under loose foil after cooking. The juices redistribute, and the honey glaze sets just enough to stay put.
Essential Equipment for honey chicken thighs
Skillet Selection
For this dish, I always reach for my 12-inch cast iron skillet—it retains heat beautifully and develops that perfect sear on the chicken skin. A Lodge brand skillet is my go-to for even heating and durability. The heavy base prevents hot spots that can burn your glaze. 🔥
Tongs for Turning
Use 12-inch locking tongs to flip the thighs without piercing the skin. I prefer OXO Good Grips for their comfortable handle and precise control. This keeps the crispy skin intact while allowing you to baste with the glaze.
Measuring Tools
Accurate measurements matter for the glaze balance. I use Pyrex glass measuring cups for the honey and soy sauce, and stainless steel measuring spoons for the smaller quantities. The vinegar and mustard need exact portions to achieve that perfect sweet-tangy profile.
Thermometer for Perfection
Don’t guess with chicken—use an instant-read thermometer to hit 165°F precisely. The ThermoWorks ThermaPen gives me confidence the meat is safe while remaining juicy. This is especially important with bone-in pieces that can cook unevenly.
Wooden Spoon for Glaze
A wooden spoon is essential for scraping up those flavorful browned bits when building your glaze. I keep a dedicated spoon just for this purpose—it won’t scratch your skillet and handles the sticky honey mixture better than metal.
Resting Plate
Have a warm plate ready for the seared thighs before glazing. This prevents the chicken from cooling too much while you build the sauce. I use a ceramic dinner plate that retains heat without making the chicken overcook.
Nutrition Facts
Frequently Asked Questions
Can I use boneless thighs instead?
Yes, but reduce cooking time to 5-6 minutes per side. Bone-in thighs stay juicier and hold up better to the glaze. Boneless may dry out faster and lack that crispy skin texture.
What if my glaze is too thin?
Simmer it longer on medium-low heat until it thickens to coat a spoon. If it reduces too much, add 1-2 tsp water. The butter helps stabilize the consistency.
Can I make this ahead?
Prepare the glaze up to 2 days ahead and refrigerate. Cook the chicken fresh, then reheat with glaze to prevent soggy skin. Leftovers keep 3-4 days in the fridge.

- Jollof Rice Sauce Recipe: West African Tomato and Spice Infusion - September 25, 2026
- Japanese Rice Soup Recipe: Umami-Rich Comfort in a Bowl - September 25, 2026
- Homemade Cream Of Rice Recipe: Silk-Smooth Breakfast in Minutes - September 25, 2026