
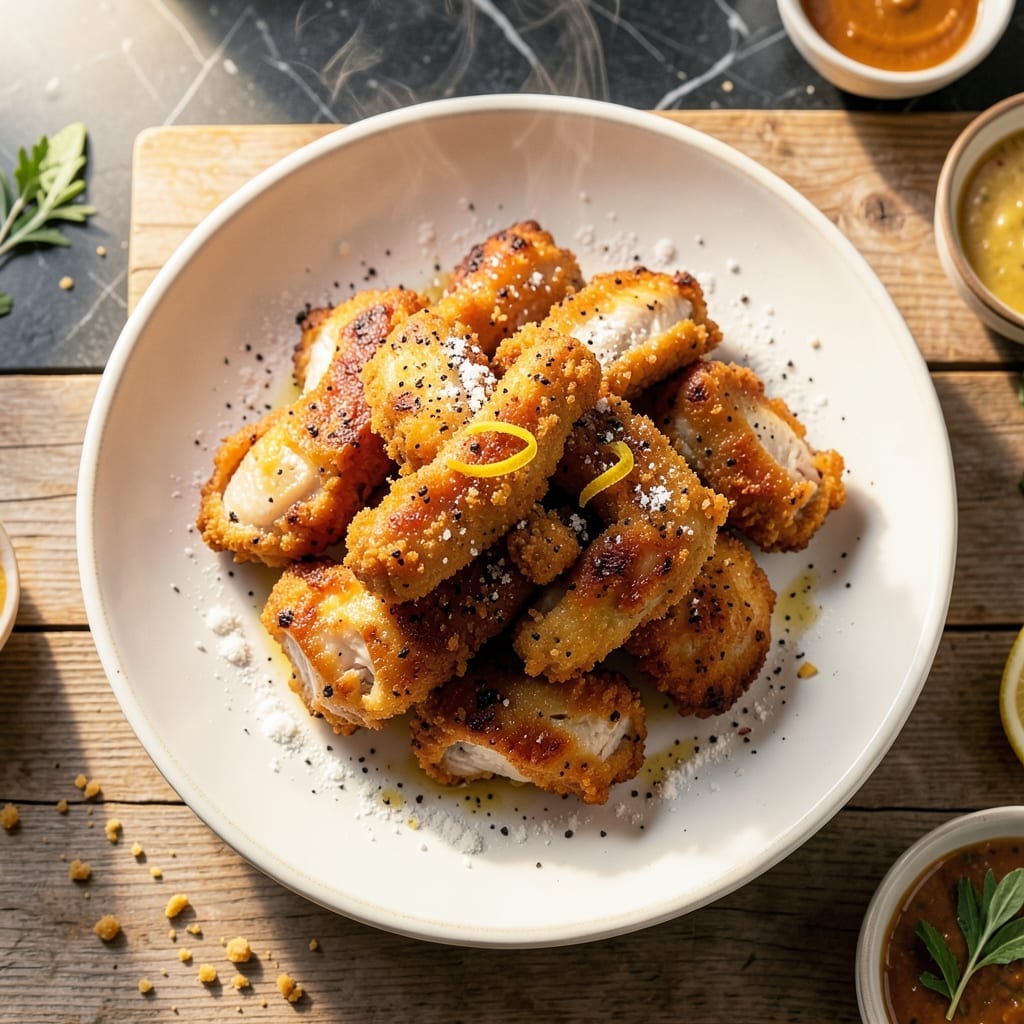
This battered chicken delivers on two essential promises: a golden crispy coating and juicy meat inside. I developed this method through trial and error, learning that the secret lies in the batter’s resting time and proper oil temperature.
The batter itself is a simple mix of flour, seasonings, and liquid that creates a light, airy crust. Resting it for 15 minutes allows the flour to hydrate fully, resulting in a coating that adheres perfectly to the chicken and fries up incredibly crispy.
Frying at the right temperature ensures the outside cooks quickly while the inside stays juicy and tender. Too low, and you’ll end up with greasy chicken; too high, and the coating burns before the meat is done.
This technique works for any cut of chicken and guarantees consistent results every time. The contrast between the shatteringly crispy exterior and the tender meat makes each bite irresistible.
Ingredients for Battered Chicken
A handful of pantry staples and a quick batter rest create that perfect crispy juicy contrast.
| Ingredient | Amount | Notes |
|---|---|---|
| Chicken Thighs 🍗 | 2 lb | Boneless, skinless, cut into strips |
| All-Purpose Flour 🌾 | 2 cups | For light, crispy batter |
| Cornstarch 🌾 | ½ cup | For extra crispiness |
| Baking Powder 🧂 | 2 tsp | Makes batter airy |
| Salt 🧂 | 1 ½ tsp | Divided for batter and chicken |
| Black Pepper 🌶️ | 1 tsp | Freshly ground preferred |
| Garlic Powder 🧄 | 1 tsp | For savory depth |
| Onion Powder 🧅 | 1 tsp | Balances seasoning |
| Paprika 🌶️ | 1 tsp | Sweet or smoked variety |
| Cold Water 💧 | 1 ½ cups | Ice cold for crispy batter |
| Vegetable Oil 🫒 | 4 cups | For deep frying |
| Large Egg 🥚 | 1 whole | Helps batter adhere |
The chicken needs to be boneless and skinless—thighs stay juicier than breasts. Costco has great bulk packs, or grab a family pack from your regular supermarket. For the flour, King Arthur or Gold Medal are reliable choices. The cornstarch is non-negotiable for that shatteringly crisp texture. Cold water is key—use ice cubes in it if your tap isn’t cold enough.
No cornstarch? Arrowroot powder at a 1:1 ratio works. Swap paprika for Cajun seasoning for a spicy kick. The egg can be omitted if needed—add 1 extra tbsp cornstarch to help the batter bind. Vegetable oil can be peanut or canola oil (both have high smoke points). For extra flavor, add a pinch of cayenne to the batter mix.
Fry in batches to avoid crowding the pan—this keeps the oil temp steady. Leftovers stay crispy for 2-3 days in the fridge if stored uncovered, but they’re best eaten fresh. Reheat in the oven at 400°F on a wire rack to revive the crunch.
Why You’ll Love This Recipe
- Minimal Effort: I just mix flour, cornstarch, and baking powder, dip the thighs, and fry—no fancy steps.
- Crispy Perfection: That cornstarch in the batter makes it shatteringly crisp every single time.
- Weeknight Hero: Between us, this is my Tuesday dinner lifesaver when time’s tight.
- Budget Stretcher: Honestly, chicken thighs stay cheap, and one batch feeds us for two meals.
Step-by-Step Instructions for Battered Chicken
Here’s the method. Straightforward, tested, works every time.
Step 1: Season and Prepare the Chicken
Pat the 2 lb Chicken Thighs completely dry with paper towels. This step is crucial—excess moisture prevents the batter from adhering properly. Cut the thighs into even strips, about 1-inch wide, to ensure uniform cooking.
Season the chicken strips generously with ½ tsp Salt, 1 tsp Black Pepper, 1 tsp Garlic Powder, 1 tsp Onion Powder, and 1 tsp Paprika. This initial seasoning ensures every bite is packed with flavor, even before the batter goes on.
Step 2: Mix the Batter for Maximum Crispiness
In a large bowl, whisk together the 2 cups All-Purpose Flour, 0.5 cup Cornstarch, 2 tsp Baking Powder, and the remaining 1 tsp Salt. The cornstarch is the secret to an ultra-crispy coating, while the baking powder adds lightness to the batter.
Create a well in the center of the dry ingredients and pour in the 1.5 cups Cold Water and 1 whole Large Egg. Whisk vigorously until just smooth—small lumps are fine. The cold water is essential for a crispy texture, so don’t use room temperature or warm water.
Let the batter rest for 5 minutes while you heat the oil. This allows the gluten to relax slightly, resulting in a tender yet crisp coating.
Step 3: Heat the Oil to the Perfect Temperature
Pour the 4 cups Vegetable Oil into a deep, heavy-bottomed pot or Dutch oven. You want at least 2 inches of oil depth for even frying. Heat the oil over medium-high heat until it reaches 350°F on a deep-fry thermometer.
If you don’t have a thermometer, test the oil by dropping in a small amount of batter. It should sizzle immediately and float to the surface within 3-5 seconds. Maintain this temperature throughout frying—if it drops too low, the chicken will absorb oil and become greasy instead of crispy.
Step 4: Fry to Golden Perfection
Dip each seasoned chicken strip into the batter, letting any excess drip off. Carefully lower it into the hot oil, working in batches to avoid overcrowding the pot. Overcrowding lowers the oil temperature and leads to soggy results.
Fry the chicken for 6-8 minutes per batch, turning occasionally, until the coating is deep golden brown and crispy. The internal temperature of the chicken should reach 165°F. Use a slotted spoon to transfer the fried chicken to a wire rack set over a baking sheet. This setup allows air to circulate, keeping the coating crisp.
Step 5: Drain and Serve Immediately
Let the chicken drain on the wire rack for 2-3 minutes. Sprinkle with a pinch of salt while still hot to enhance the flavor. The chicken should be crispy on the outside and juicy on the inside—this contrast is what makes it irresistible.
Serve immediately while hot and crispy. The batter will soften if left to sit, so timing is everything. Pair with your favorite dipping sauce or enjoy as is for a simple yet satisfying meal.
Pro Tips For Making Battered Chicken
- Heat the Oil First: After burning three batches, I finally figured out the oil needs to hit 350°F before the chicken goes in—otherwise, you’ll get greasy, sad batter instead of that shatteringly crisp crust. —
- Dry the Thighs: Pat the chicken thighs bone-dry with paper towels first. Sounds tedious, but it’s the only way the batter sticks properly instead of sliding off in sad clumps. —
- Skip the Overmixing: Stir the batter just until the flour and cornstarch disappear—lumps are fine. Overmixing develops gluten, and suddenly your coating turns chewy instead of light and crisp. —
- Add Cornstarch Last: I learned this the hard way—mix the flour, baking powder, and salt first, then fold in the cornstarch. It keeps the batter airy and prevents that weird gummy texture that ruins the crunch.
Essential Equipment for This Recipe
Deep Fry Thermometer
A deep-fry thermometer is non-negotiable for perfect results. I use the Taylor Precision model—it clips to the pot and gives instant readings. Maintaining 350°F ensures crispy, not greasy, chicken every time. 🌡️
Heavy-Duty Pot
Choose a 5-6 quart Dutch oven or heavy pot with high sides. I swear by my Lodge enameled cast iron—it distributes heat evenly and prevents hot spots. The depth keeps oil contained and safe.
Slotted Spoon
A stainless steel slotted spoon lets you retrieve chicken while draining excess oil. Look for one with a long handle (at least 12 inches) to keep hands safe from splatters.
Wire Rack Setup
Place a wire cooling rack over a baking sheet to drain fried chicken. This OXO Good Grips rack allows air circulation on all sides, keeping the coating crisp. Never drain on paper towels—they steam the crust. 💡
Batter Whisk
A balloon whisk blends batter smoothly without overmixing. I prefer OXO’s 11-inch whisk—its large surface area makes quick work of lumps while keeping the batter light.
Oil Safety Gear
Always have a fire extinguisher rated for grease fires nearby. I also keep a silicone splatter screen handy to prevent oil burns. Safety first—hot oil demands respect.
Nutrition Facts
Frequently Asked Questions
What makes the batter extra crispy?
Cold water and cornstarch are key. The 1.5 cups cold water prevents gluten formation, while 0.5 cup cornstarch adds crunch. Resting the batter for 5 minutes also helps achieve that perfect texture.
Can I use chicken breasts instead of thighs?
Yes, but thighs stay juicier. If using breasts, brine them first in saltwater for 30 minutes to prevent dryness. Cut into even strips for uniform cooking.
How do I keep the chicken crispy after frying?
Drain on a wire rack, not paper towels. This allows air circulation to prevent steam from softening the coating. Serve immediately for best results.
Why did my batter fall off during frying?
Pat the chicken completely dry before battering. Excess moisture creates a barrier. Also, let excess batter drip off before frying to help it adhere better.

- Jollof Rice Sauce Recipe: West African Tomato and Spice Infusion - September 25, 2026
- Japanese Rice Soup Recipe: Umami-Rich Comfort in a Bowl - September 25, 2026
- Homemade Cream Of Rice Recipe: Silk-Smooth Breakfast in Minutes - September 25, 2026