
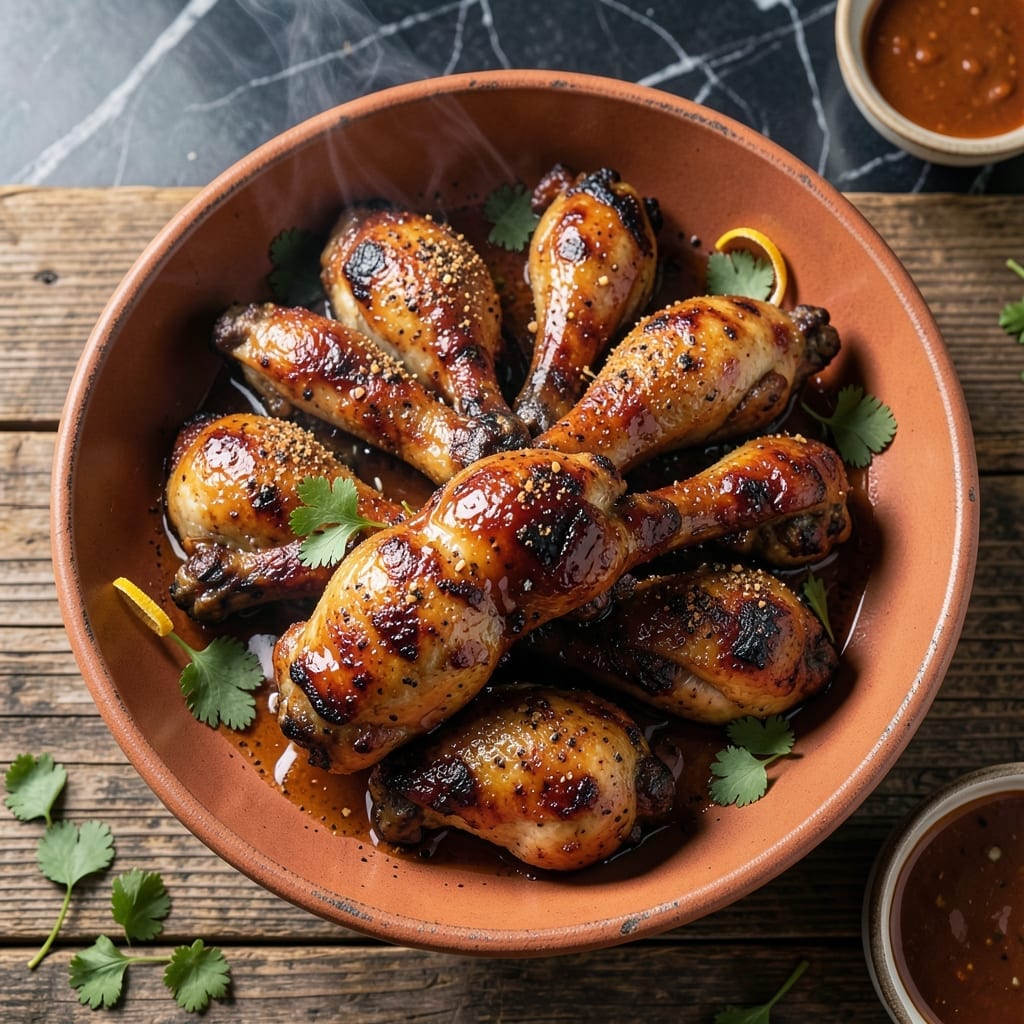
There’s a reason dry-rubbed, grill-kissed chicken legs remain a backyard favorite—they deliver bold flavor and juicy tenderness without complicated techniques.
This method relies on a well-balanced spice blend and precise grilling to achieve that perfect char while keeping the meat moist. The dry rub creates a flavorful crust that locks in natural juices during cooking.
What emerges from the grill is fall-off-the-bone chicken with a smoky, caramelized exterior and meat that stays succulent to the last bite. The technique ensures even cooking and maximum flavor penetration.
Serve with classic sides for a meal that feels special but comes together with minimal effort. Here’s how to master it.
Ingredients for Bbq Chicken Legs
Bold spices and chicken legs come together for a backyard classic with minimal effort.
| Ingredient | Amount | Notes |
|---|---|---|
| Chicken Legs 🍗 | 8 pieces | Skin-on, bone-in preferred |
| Brown Sugar 🍚 | ¼ cup | Light or dark variety |
| Smoked Paprika 🌶️ | 2 tbsp | For deep smoky flavor |
| Garlic Powder 🧄 | 2 tsp | Not garlic salt |
| Onion Powder 🧅 | 2 tsp | Enhances savory depth |
| Ground Black Pepper 🌶️ | 1 ½ tsp | Freshly ground preferred |
| Kosher Salt 🧂 | 1 tbsp | Diamond Crystal preferred |
| Chili Powder 🌶️ | 1 tbsp | Mild or hot variety |
| Ground Cumin 🌿 | 1 tsp | Toasted for deeper aroma |
| Cayenne Pepper 🔥 | ½ tsp | Adjust for heat preference |
| Olive Oil 🫒 | 2 tbsp | For coating chicken |
| BBQ Sauce 🍯 | 1 cup | For basting, quality brand |
The chicken legs are the foundation—skin-on, bone-in ensures juiciness and flavor. Source them from Whole Foods or Costco for consistently high quality. The smoked paprika is non-negotiable for that signature BBQ depth (look for Spanish smoked paprika at specialty stores). Brown sugar balances the heat; Domino or C&H brands work reliably. For the BBQ sauce, Stubb’s Original or Sweet Baby Ray’s are solid store-bought options.
No smoked paprika? Regular paprika plus a pinch of liquid smoke gets you close. Swap brown sugar for white in a pinch (texture differs slightly). Short on spices? Pre-made BBQ seasoning at half the amount works. The cayenne can be omitted for mild heat, or doubled for extra kick. For the olive oil, any neutral oil (vegetable, canola) substitutes fine—just avoid strongly flavored options like sesame.
The dry rub keeps in an airtight container for 3 months. Chicken legs are best used within 2 days of purchase but freeze beautifully for 6 months. Apply the rub up to 12 hours ahead for deeper flavor penetration (worth the extra minute).
Why You’ll Love This Recipe
- One Pan Magic: I toss the chicken legs with the dry rub, pop them in the oven, and that’s it—no marinating, no flipping, just set-and-forget simplicity.
- Smoky Sweet Crust: The brown sugar caramelizes with the smoked paprika, creating this sticky, finger-licking glaze that clings to every bite.
- Weeknight Hero: Honestly, I’ve served these for quick family dinners and last-minute backyard get-togethers with equal success.
- Stretches Far: Between us, a batch costs less than takeout and reheats beautifully for lunches all week.
Step-by-Step Instructions for BBQ Chicken Legs
Master this method for crispy, smoky, fall-off-the-bone results every time.
Step 1: Prepare the Dry Rub and Season Chicken
In a medium bowl, combine the 0.25 cup brown sugar, 2 tbsp smoked paprika, 2 tsp garlic powder, 2 tsp onion powder, 1.5 tsp ground black pepper, 1 tbsp kosher salt, 1 tbsp chili powder, 1 tsp ground cumin, and 0.5 tsp cayenne pepper. Whisk until fully blended and no streaks of individual spices remain.
Pat the 8 pieces chicken legs dry with paper towels to ensure optimal seasoning adhesion. Rub each piece with the 2 tbsp olive oil, then generously coat with the spice mixture. Massage the rub into the skin and meat, pressing firmly to create an even layer. Let the seasoned chicken rest at room temperature for 15-20 minutes to allow the flavors to penetrate.
Step 2: Preheat Grill and Set Up for Indirect Cooking
Preheat your grill to medium-high heat (about 375-400°F). For charcoal grills, bank the coals to one side to create a hot zone and a cooler zone. For gas grills, turn on all burners to preheat, then reduce one side to medium-low for indirect cooking.
Clean and oil the grill grates thoroughly to prevent sticking. I use tongs and a folded paper towel dipped in oil to coat the grates just before placing the chicken. This creates a non-stick surface that helps achieve those beautiful grill marks and easy release.
Step 3: Grill Chicken Using Indirect Heat
Arrange the chicken legs on the cooler side of the grill, bone-side down. Cover and cook for 25-30 minutes, turning occasionally, until the internal temperature reaches 165°F. The skin should be golden and starting to crisp at the edges.
Move the chicken to the hot side of the grill for the last 5-7 minutes to crisp the skin further. Watch for flare-ups from the oil and rub sugars—use a spray bottle of water to tame any excessive flames. The chicken is ready for basting when it has developed a deep amber color and the juices run clear when pierced.
Step 4: Baste with BBQ Sauce and Finish
Transfer the chicken to the cooler side of the grill again. Brush each piece generously with the 1 cup bbq sauce, coating all sides. Cover and cook for an additional 5-8 minutes, turning and basting once more with any remaining sauce.
The sauce should caramelize slightly, creating a glossy, sticky coating. Avoid basting too early, as the sugars in the sauce can burn if exposed to direct high heat for too long. The chicken is done when the internal temperature reaches 175°F and the sauce has set into a beautiful lacquered finish.
Step 5: Rest and Serve
Remove the chicken from the grill and transfer to a serving platter. Tent loosely with foil and let rest for 5-10 minutes. This allows the juices to redistribute throughout the meat, ensuring each bite is moist and flavorful.
Serve immediately while still warm. The chicken legs should have a crispy, caramelized exterior with tender, juicy meat that pulls away from the bone easily. Any leftover sauce from the basting process can be served on the side for additional dipping.
Pro Tips For Making Bbq Chicken Legs
- Pat Dry First: I learned this the hard way—skip drying the chicken legs with paper towels and your skin won’t crisp up, no matter how hot the grill gets.
- Start Skin-Side Down: Place the legs skin-side down first over medium-high heat for 6-7 minutes to render fat and prevent sticking—this builds the base for that sticky, caramelized crust.
- Don’t Rush the Sauce: Brush on the brown sugar and spice mix only in the last 10 minutes of cooking, or the sugar burns before the chicken finishes.
- Rest Before Serving: Give the legs 5 minutes under loose foil after grilling so the juices redistribute—cutting too soon sends all that flavor onto the plate, not into the meat.
Make-Ahead Tips for bbq chicken legs
Prep the Rub
Mix your dry rub ingredients up to 1 day ahead and store in an airtight container. This lets the spices meld together for deeper flavor. I always make extra to have on hand for future grilling sessions.
Season the Chicken
Pat the chicken legs dry and coat with the rub up to 12 hours before grilling. Place them on a wire rack over a baking sheet and refrigerate uncovered. This drying step helps the skin crisp up beautifully on the grill. 💡
For even better penetration, score the skin lightly with a knife before applying the rub. The flavors will sink in deeper during the marination time.
Partial Cooking Method
Par-cook the chicken legs in the oven at 350°F for 20 minutes before grilling. This ensures even cooking through the meat while still getting that smoky char from the grill.
Sauce Separately
Prepare your BBQ sauce up to 3 days ahead and store it in the fridge. Cold sauce brushes on more evenly and caramelizes better than room temperature sauce during the final grilling stage.
Grill Setup
If using charcoal, light your chimney 30 minutes before cooking to ensure even, consistent heat. For gas grills, preheat with all burners on high for 15 minutes, then adjust to your cooking zones. Clean grates just before adding the chicken.
Rest Before Serving
Let the grilled chicken rest for 5-10 minutes before serving. This crucial step allows juices to redistribute. Cover loosely with foil to keep warm while you finish other dishes. 🔥
Nutrition Facts
Frequently Asked Questions
What’s the best way to prevent burning the sauce?
Apply sauce only during the last 5-8 minutes of cooking. The sugars in sauce can burn easily over direct heat, so keep it on the cooler side of the grill.
Can I use chicken thighs instead?
Yes! Bone-in, skin-on thighs work well with the same rub and method. Adjust cooking time to 20-25 minutes for indirect heat, as thighs cook slightly faster than legs.
How do I know when it’s fully cooked?
Use a meat thermometer to check the internal temperature. Chicken legs are safe at 165°F, but 175°F ensures fall-off-the-bone tenderness. Juices should run clear, not pink.
Should I marinate or just use a dry rub?
A dry rub is traditional for crispy skin and bold flavor. For extra moisture, you can marinate in buttermilk for 4-12 hours before applying the rub, but pat dry thoroughly afterward.

- Jollof Rice Sauce Recipe: West African Tomato and Spice Infusion - September 25, 2026
- Japanese Rice Soup Recipe: Umami-Rich Comfort in a Bowl - September 25, 2026
- Homemade Cream Of Rice Recipe: Silk-Smooth Breakfast in Minutes - September 25, 2026