
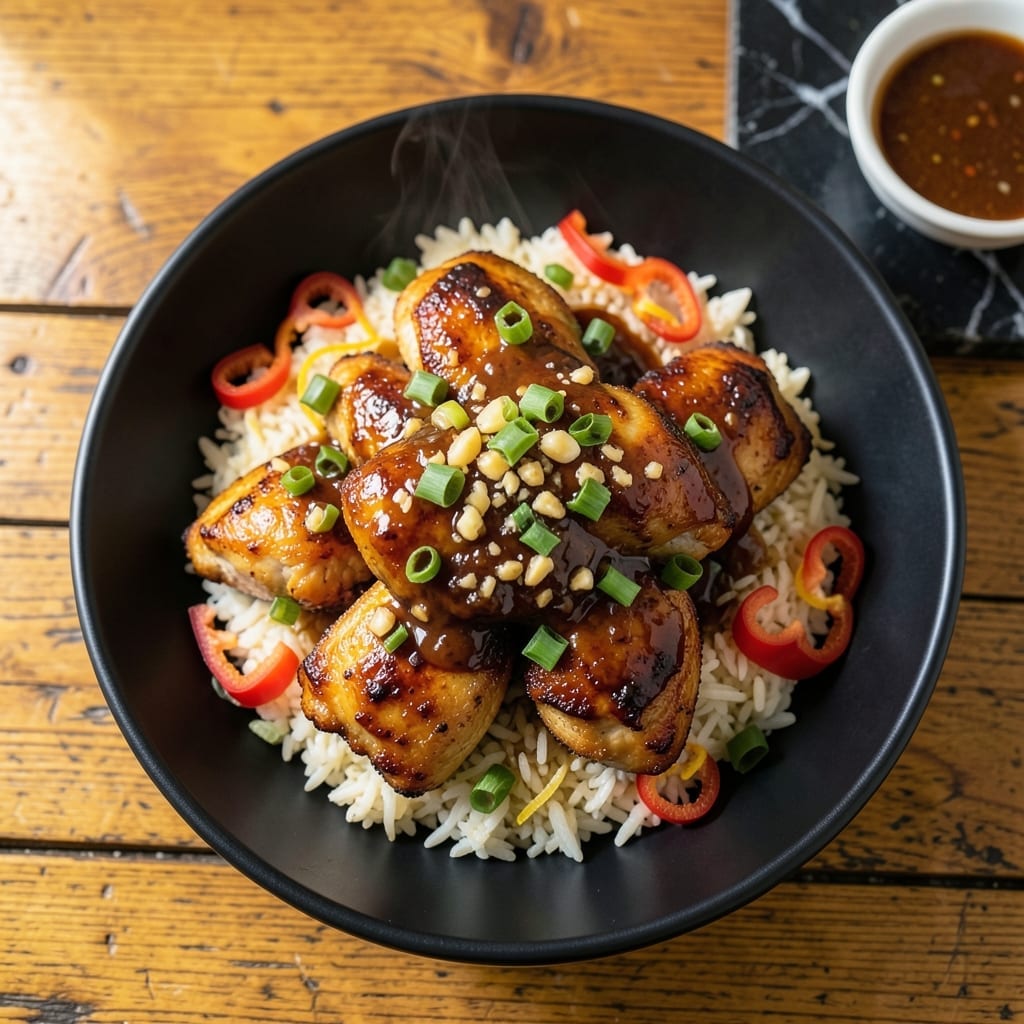
I’ve perfected this chicken teriyaki over years of testing, and the results speak for themselves. The secret lies in the balance—sweet, savory, and just the right amount of glossy glaze clinging to every bite.
What sets this version apart is the technique: searing the chicken first locks in juices, while a quick homemade sauce delivers depth you won’t find in bottled versions. The sauce reduces to a glossy consistency that coats the meat beautifully.
Each piece emerges tender and flavorful, with a caramelized edge that’s impossible to resist. The dish comes together in under 30 minutes, making it ideal for busy weeknights.
Serve it over steamed rice with a sprinkle of sesame seeds for a meal that feels restaurant-worthy. Here’s how to achieve that perfect balance every time.
Ingredients for Best Ever Chicken Teriyaki
Simple ingredients create that glossy, tender chicken teriyaki everyone will love.
| Ingredient | Amount | Notes |
|---|---|---|
| Boneless Skinless Chicken Thighs 🍗 | 1 ½ lb | Cut into bite-sized pieces |
| Soy Sauce 🫒 | ½ cup | Low-sodium preferred |
| Brown Sugar 🍚 | ⅓ cup | Packed firmly |
| Honey 🍯 | ¼ cup | Pure for best flavor |
| Fresh Garlic Cloves 🧄 | 4 cloves | Minced finely |
| Fresh Ginger Root 🌿 | 1 tbsp | Grated or minced |
| Rice Vinegar 🍶 | 2 tbsp | Unseasoned variety |
| Sesame Oil 🫒 | 1 tbsp | Toasted for depth |
| Cornstarch 🌾 | 1 tbsp | Mixed with water for slurry |
| Vegetable Oil 🫒 | 2 tbsp | Neutral flavor for searing |
| Water 💧 | ¼ cup | For cornstarch slurry |
| Sesame Seeds 🌰 | 1 tbsp | Toasted, for garnish |
| Green Onions 🧅 | 3 whole | Thinly sliced for garnish |
The chicken is everything here. Thighs stay juicier than breasts—look for skinless, boneless at Costco or your regular grocery store. Dark meat handles the searing better without drying out. Fresh ginger and garlic are non-negotiable for that bright, authentic flavor (the jarred stuff just doesn’t cut it). I usually grab mine from the produce section at Whole Foods when I’m already picking up other Asian cooking staples.
No honey? Maple syrup or agave works in a pinch. Out of rice vinegar? Apple cider vinegar at half the amount gets you close. If you don’t have sesame oil, toast some seeds in neutral oil and use that for garnish instead. The soy sauce should be low-sodium—reduces the risk of oversalting as the sauce thickens. And yes, the cornstarch slurry is the secret to that glossy finish.
Sauce keeps in the fridge for 4-5 days—great for meal prep. Reheat gently to keep the glaze smooth. Chicken is best fresh but holds up for 3 days stored separately from the sauce. Freeze cooked chicken for up to 3 months if you’re making a big batch.
Why You’ll Love This Recipe
- One Pan Wonder: I toss everything together in a single skillet—chicken, soy sauce, brown sugar, honey, and garlic—no extra bowls to wash.
- Sweet-Savory Magic: The mix of honey and brown sugar with soy sauce creates this sticky, caramelized glaze that clings to the chicken thighs. Honestly, I could eat it straight from the pan.
- Meal Prep MVP: I make a big batch on Sunday and it reheats beautifully for lunches all week. My kids even pack leftovers in their thermoses.
- Budget Winner: Chicken thighs stay juicy and flavorful without costing a fortune. Here’s what sold me—it tastes like takeout but costs half as much.
Step-by-Step Instructions for Chicken Teriyaki
Here’s how I get that glossy glaze and fall-apart tenderness every single time.
Step 1: Make the Teriyaki Sauce Base
In a medium bowl, whisk together the 0.5 cup soy sauce, 0.33 cup brown sugar, 0.25 cup honey, minced 4 cloves fresh garlic cloves, 1 tbsp fresh ginger root, and 2 tbsp rice vinegar until the sugar dissolves completely. This is where the magic starts—I always use packed brown sugar for the deep molasses flavor.
Then stir in the 1 tbsp sesame oil. The sauce should look thick and glossy at this point. Taste it and you’ll notice the perfect balance of salty, sweet, and tangy. Set this aside while you prep the chicken.
Step 2: Sear the Chicken to Golden Perfection
Cut the 1.5 lb boneless skinless chicken thighs into bite-sized pieces. Heat the 2 tbsp vegetable oil in a large skillet over medium-high heat until it shimmers. Add the chicken in a single layer—don’t crowd the pan or it’ll steam instead of sear.
Cook undisturbed for 4-5 minutes until the bottoms are deep golden brown. Flip and cook another 3-4 minutes until the chicken is cooked through. You’ll know it’s done when the pieces are no longer pink inside. Transfer the chicken to a plate and set aside.
Step 3: Create the Glossy Glaze
Pour the sauce into the same skillet and bring to a boil over medium heat. While it heats, mix the 1 tbsp cornstarch with 0.25 cup water in a small bowl until smooth. This slurry is what transforms the sauce into that beautiful thick glaze.
Once the sauce is boiling, whisk in the cornstarch slurry and cook for 1-2 minutes until it thickens enough to coat the back of a spoon. The sauce should look glossy and slightly syrupy—this is what makes it the best teriyaki glaze.
Step 4: Finish and Garnish
Return the chicken to the skillet and toss to coat completely in the thickened sauce. Cook for another 1-2 minutes until everything is heated through and the chicken is glazed. The sauce should cling to each piece of chicken with a beautiful sheen.
Transfer to a serving dish and sprinkle with the 1 tbsp sesame seeds and sliced 3 whole green onions. The sesame seeds add a nutty crunch, while the green onions bring freshness to cut through the richness. Serve immediately while the glaze is still glossy and warm.
Pro Tips For Making Best Ever Chicken Teriyaki
- Sear Chicken First: Get your skillet screaming hot before adding the thighs—this gives you that deep golden crust that locks in juices. I learned this the hard way after serving pale, soggy chicken too many times.
- Mince Garlic Fine: Fresh garlic cloves should be minced to a near-paste so they melt into the sauce. Sounds tedious, but it actually changes the outcome—no one wants to bite into a raw garlic chunk.
- Reduce the Sauce: After the chicken cooks, let the teriyaki mixture simmer for 3-4 minutes until it thickens slightly. Skip this and you’ll have watery sauce sliding off your chicken.
- Slice Against Grain: After resting, slice those thighs against the grain for tender bites. My grandmother swore by this, and she was right: it makes the texture noticeably better.
Flavor Customization for This best ever chicken teriyaki
Spicy Kick
Add ½ tsp red pepper flakes to the sauce while whisking for a subtle heat that builds with each bite. For serious spice lovers, stir in 1 tbsp sriracha or 1 tsp gochujang after the sauce thickens. I love the depth this adds.
Sweet Heat Twist
Swap the honey for ¼ cup pineapple juice and add 1 tbsp sriracha. The natural sweetness of pineapple pairs perfectly with the heat. This Hawaiian-inspired version is my summer favorite. 🌶️
Umami Boost
Enhance the savory depth by adding 1 tbsp oyster sauce or 1 tsp fish sauce to the base. A splash of 1 tbsp mirin also adds complexity. These small additions make the flavor pop.
Citrus Brightness
Stir in 1 tbsp orange zest and 2 tbsp orange juice into the finished sauce. The citrus lifts the richness and adds a fresh, vibrant note. It’s a game-changer for balance.
Garlic Lover’s
Double the garlic to 8 cloves for a bold, aromatic punch. Roast the extra cloves first for a sweeter, mellowed flavor. I always keep roasted garlic paste in my fridge for this. 💡
Ginger Forward
Increase the ginger to 2 tbsp and add 1 tsp ground ginger for a warming, zesty profile. Fresh ginger’s brightness shines, while the ground adds earthy depth.
Nutrition Facts
Frequently Asked Questions
Can I use chicken breast instead of thighs?
You can, but thighs stay juicier and handle the searing better. If using breast, reduce cooking time to 3-4 minutes per side to prevent dryness. Brining the breast first can help maintain moisture.
Why did my sauce turn out thin?
This usually happens if the cornstarch slurry wasn’t cooked long enough. Boil for a full 1-2 minutes after adding it. Also, ensure you’re using 1 tbsp cornstarch with 0.25 cup water for the proper ratio.
How can I make this gluten-free?
Swap the soy sauce for tamari or a gluten-free soy alternative. Check that your rice vinegar and other ingredients are certified gluten-free. The rest of the recipe remains the same.
Can I prepare this ahead of time?
The sauce keeps for 4-5 days refrigerated. Cook the chicken fresh for best texture, but you can meal prep components separately. Reheat sauce gently and toss with freshly cooked chicken.

- Jollof Rice Sauce Recipe: West African Tomato and Spice Infusion - September 25, 2026
- Japanese Rice Soup Recipe: Umami-Rich Comfort in a Bowl - September 25, 2026
- Homemade Cream Of Rice Recipe: Silk-Smooth Breakfast in Minutes - September 25, 2026