
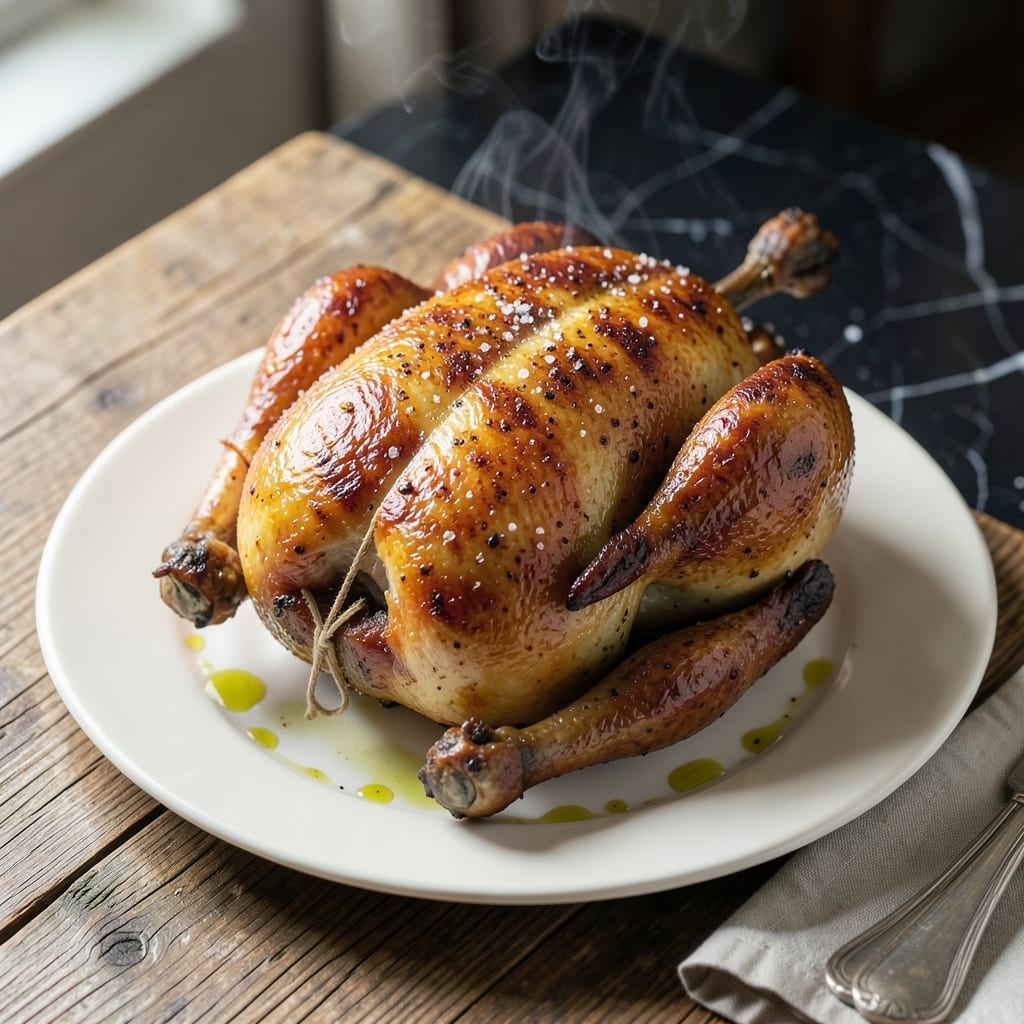
There’s a reason rotisserie chicken remains a timeless favorite—it delivers juicy, flavorful meat with minimal effort. This method recreates that signature tenderness at home, locking in every drop of natural moisture.
The secret lies in a high-heat start followed by a slower finish, allowing the skin to crisp while the meat stays succulent. A simple seasoning blend enhances the chicken’s natural richness without overpowering it.
What you’ll get is meat that pulls away from the bone with ease, bathed in its own savory juices. The skin emerges golden and crisp, sealing in all the flavor you’d expect from a professional rotisserie.
Perfect for weeknight dinners or meal prep, this technique ensures consistent results every time. The process is straightforward, but the outcome tastes anything but ordinary.
Ingredients for Boston Chicken
Simple pantry spices and a whole bird. That’s all you need.
| Ingredient | Amount | Notes |
|---|---|---|
| Whole Chicken 🍗 | 4 lb | Fresh, not frozen preferred |
| Olive Oil 🫒 | 2 tbsp | Divided for rubbing and basting |
| Kosher Salt 🧂 | 1 ½ tbsp | Diamond Crystal preferred |
| Black Pepper 🌶️ | 1 tsp | Freshly ground for best flavor |
| Garlic Powder 🧄 | 1 tsp | Not garlic salt |
| Onion Powder 🧅 | 1 tsp | Adds depth to seasoning |
| Dried Thyme 🌿 | 1 tsp | Crushed between fingers |
| Dried Rosemary 🌿 | 1 tsp | Crushed to release aroma |
| Paprika 🌶️ | 1 tsp | Sweet or smoked variety |
| Lemon Juice 🍋 | 1 tbsp | Freshly squeezed for brightness |
| Unsalted Butter 🧈 | 2 tbsp | Melted for basting |
The chicken is the star here. Whole fresh birds from Whole Foods or your local butcher give the best results—avoid pre-brined as it throws off seasoning. Look for plump, pale skin (not gray) and no off smells. I grab mine from Costco when I’m feeding a crowd (the 5-lb birds work great too, just adjust cooking time). Room temp before cooking is key—sit it out 30 minutes beforehand.
No fresh herbs? Dried work perfectly—just use one-third the amount of fresh. Swap paprika for cayenne if you want heat. The butter can be vegetable oil in a pinch, but you’ll miss that rich flavor. If you’ve only got table salt, cut the amount by half (it’s saltier than kosher). The lemon juice is flexible—apple cider vinegar adds a nice tang too.
Leftovers keep 4-5 days in the fridge, or freeze for 3 months. I shred the meat first for easy storage. Reheat in a skillet with a little broth to keep it juicy. Never microwave whole—it’ll dry out fast.
Why You’ll Love This Recipe
- One Pan Magic: I love that I just rub the chicken with olive oil, salt, pepper, and garlic powder, then let the oven do the work.
- Crispy & Juicy: The skin gets perfectly golden while the meat stays tender—garlic powder gives it that warm, savory depth.
- Feeds Everyone: A whole chicken means dinner for the family plus leftovers for sandwiches or salads the next day.
- Budget Winner: Honestly, it’s cheaper than takeout and just as satisfying with minimal effort.
Step-by-Step Instructions for Rotisserie-Style Chicken
Here’s the method I use to get that classic Boston Market flavor at home.
Step 1: Prep and Season the Whole Chicken
Remove the whole chicken from its packaging and pat it completely dry inside and out with paper towels. This is crucial for crispy skin. I always check the cavity and under the wings for any moisture that might have pooled.
In a small bowl, mix the kosher salt, black pepper, garlic powder, onion powder, dried thyme, dried rosemary, and paprika. Rub this seasoning mixture all over the chicken, including inside the cavity. Drizzle the olive oil over the chicken and massage it in, working it under the skin on the breast and thighs. Finish by brushing with the lemon juice.
Step 2: Truss and Rest the Chicken
Tuck the wings under the body and tie the legs together with kitchen twine. This compact shape helps the chicken cook evenly and maintains its form during roasting. Place the chicken breast-side up on a wire rack set in a baking dish.
Let the seasoned chicken sit at room temperature for 30 minutes. This takes the chill off and allows the salt to begin penetrating the meat. Meanwhile, preheat your oven to 425°F and melt the unsalted butter.
Step 3: Roast at High Heat for Crispy Skin
Brush the melted unsalted butter all over the chicken. Place it in the preheated oven and roast for 15 minutes at 425°F to start the browning process. You’ll see the skin beginning to turn golden brown and crisp up.
After the initial 15 minutes, reduce the oven temperature to 375°F and continue roasting. Baste the chicken with the pan juices every 20 minutes. The chicken is done when the internal temperature reaches 165°F in the thickest part of the thigh, which should take about 1 hour and 15 minutes total cooking time.
Step 4: Rest and Serve
Transfer the chicken to a cutting board and tent loosely with foil. Let it rest for 15 minutes before carving. This allows the juices to redistribute throughout the meat, ensuring every bite is moist and flavorful.
Carve the chicken and serve immediately. The skin should be deeply browned and crisp, while the meat remains juicy and tender. Pour any pan juices over the carved chicken for extra flavor. This method delivers that signature rotisserie-style taste you’re looking for.
Pro Tips For Making Boston Chicken
- Pat It Dry: Use paper towels to thoroughly dry the chicken skin before seasoning—it guarantees a crispier finish, especially with just olive oil.
- Season Under the Skin: Loosen the skin and rub the salt, pepper, and garlic powder directly onto the meat; it actually changes the outcome more than just seasoning the surface.
- Don’t Overcrowd the Pan: If roasting in pieces, give each one space in the pan so they brown instead of steam—I learned this the hard way with soggy results.
- Let It Rest: After cooking, tent the chicken with foil and rest it for 10-15 minutes; the juices redistribute and the meat stays moist every time.
Storing and Reheating This boston chicken
Refrigerator Storage
Let your chicken cool for no more than 2 hours before storing. I use glass containers with tight lids to keep moisture in. It stays fresh at 40°F or below for 4-5 days—the flavors actually deepen as it rests. ❄️
Freezer Storage
For longer storage, freeze shredded or whole pieces in heavy-duty freezer bags. Squeeze out all air to prevent freezer burn. It keeps well for 3 months without losing quality. Label with the date so you can track freshness.
Oven Reheating
Preheat your oven to 350°F and place chicken in a baking dish with ¼ cup broth. Cover with foil and heat for 15-20 minutes until reaching 165°F. This method keeps the meat juicy and revives the skin’s crispness. 🔥
Stovetop Reheating
Add chicken to a skillet with 2 tbsp broth or water over medium-low heat. Cover and warm for 5-7 minutes, flipping once. This works great for shredded chicken in tacos or salads.
Microwave Reheating
For quick meals, microwave individual portions with a damp paper towel. Use 50% power for 1-2 minutes, checking often. Avoid overcooking—it dries out quickly. Add a splash of broth if needed.
Nutrition Facts
Frequently Asked Questions
Do I need to brine the chicken first?
Not at all! The salt in the seasoning blend acts as a dry brine during the 30-minute rest, drawing moisture to the surface before it reabsorbs with the seasoning. This method saves time while still delivering juicy results.
What if my chicken is larger than 4 lbs?
Adjust the cooking time by about 15 minutes per additional pound. Use a meat thermometer to check for 165°F in the thickest part of the thigh. The high-heat start remains the same, but the lower-temperature finish will need more time.
Can I use a different cooking method?
For a smoky flavor, try grilling over indirect medium-high heat for about 1 hour and 30 minutes. A slow cooker works too—just sear the skin first for crispiness. Each method has its own charm.
Why does the skin sometimes turn out soggy?
This usually happens if the chicken isn’t patted completely dry before seasoning or if it’s not rested on a wire rack. Both steps are crucial for allowing air circulation and moisture evaporation, which creates that coveted crispiness.

- Jollof Rice Sauce Recipe: West African Tomato and Spice Infusion - September 25, 2026
- Japanese Rice Soup Recipe: Umami-Rich Comfort in a Bowl - September 25, 2026
- Homemade Cream Of Rice Recipe: Silk-Smooth Breakfast in Minutes - September 25, 2026