
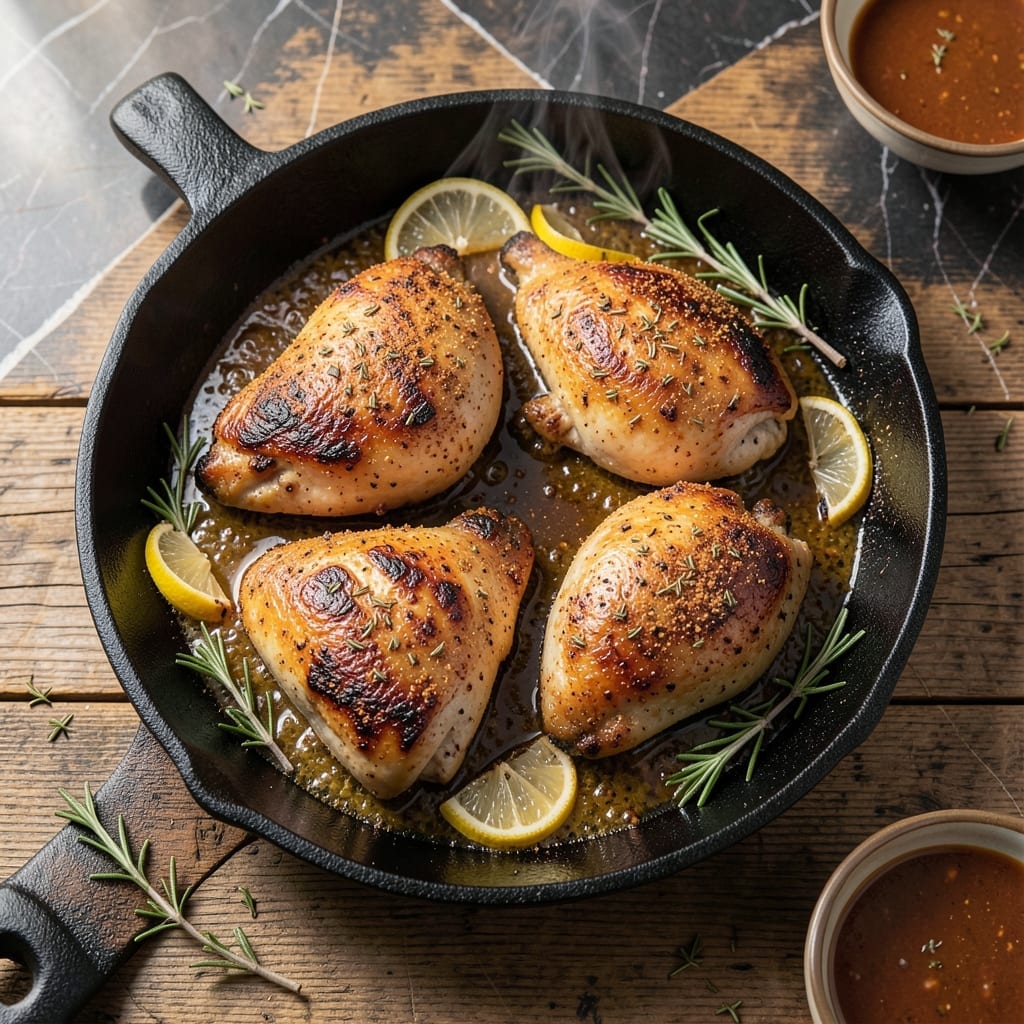
This method transforms ordinary chicken into a masterpiece with crispy golden skin and a juicy interior every time. The secret lies in the weighted pressing technique that ensures even cooking and maximum contact with the heat source.
Using a simple brick or heavy pan creates the perfect pressure for achieving that coveted crunch while locking in natural moisture. The result is chicken that rivals any restaurant preparation, with skin so crisp it shatters at the slightest touch.
I’ve tested this approach with various cuts and consistently get perfectly cooked meat that stays succulent beneath its crispy exterior. The technique works for both bone-in and boneless pieces, making it versatile for any meal.
Serve this dish with your favorite sides for a meal that impresses without requiring complicated techniques. The crispy skin and tender meat will have everyone asking for seconds.
Ingredients for Brick Chicken
Transform ordinary chicken with these essential ingredients for restaurant-quality results at home.
| Ingredient | Amount | Notes |
|---|---|---|
| Chicken Thighs 🍗 | 4 whole | Bone-in, skin-on preferred |
| Kosher Salt 🧂 | 1 ½ tsp | Diamond Crystal brand recommended |
| Black Pepper 🌶️ | 1 tsp | Freshly ground preferred |
| Garlic Powder 🧄 | 1 tsp | Not garlic salt |
| Paprika 🌶️ | 1 tsp | Sweet or smoked variety |
| Dried Thyme 🍃 | ½ tsp | Crushed between fingers |
| Dried Rosemary 🌿 | ½ tsp | Crushed between fingers |
| Olive Oil 🫒 | 2 tbsp | Extra-virgin for flavor |
| Lemon 🍋 | 1 whole | Zest and juice reserved |
| Fresh Parsley 🌿 | ¼ cup | Chopped, for garnish |
| Heavy Skillet 🍳 | 1 whole | Cast iron preferred |
| Bricks 🧱 | 2 whole | Wrapped in foil for pressing |
The chicken thighs are non-negotiable here. Bone-in, skin-on yields the crispiest skin and juiciest meat—boneless dries out too quickly under pressure. Source from Whole Foods or a trusted butcher for consistent sizing. The kosher salt (preferably Diamond Crystal) ensures even seasoning without overpowering. Cast iron skillets distribute heat ideally, but any heavy-bottomed pan works in a pinch.
No fresh herbs? Dried at half the amount works fine—just crush them to release oils. Out of paprika? Cayenne for heat or skip it entirely. The lemon can be swapped for lime (brightens differently but still delicious). If using boneless thighs, reduce cooking time by 2-3 minutes per side. Bricks can be replaced with another heavy pan—just ensure it’s oven-safe if finishing in the oven.
The seasoned thighs keep raw for 2 days in the fridge. Cooked chicken stays crispy when stored uncovered (to prevent steaming) for 3-4 days. Reheat in a dry skillet to revive the skin. This method scales easily—allow 1 thigh per person and adjust bricks accordingly.
Why You’ll Love This Recipe
- One Pan Wonder: I love that this only dirties a single skillet—just season the thighs, press with a pan, and let the magic happen.
- That Garlic Crust: The mix of garlic powder and paprika gives the skin this irresistible crispy, smoky bite every time.
- Weeknight Hero: Honestly, it’s my go-to for busy evenings when I need dinner fast but still crave restaurant-quality flavor.
- Budget-Friendly Feast: Chicken thighs stay juicy and cheap, so I can feed my family a hearty meal without overspending.
Step-by-Step Instructions for Brick Chicken
This technique delivers unmatched crispiness while preserving moisture in every bite.
Step 1: Season the Chicken Thighs Thoroughly
Pat the 4 whole Chicken Thighs completely dry with paper towels. This step is crucial—any moisture prevents crispy skin. In a small bowl, combine the 1.5 tsp Kosher Salt, 1 tsp Black Pepper, 1 tsp Garlic Powder, 1 tsp Paprika, 0.5 tsp Dried Thyme, and 0.5 tsp Dried Rosemary. Crush the dried herbs between your fingers to release their oils.
Rub the spice mixture evenly over all sides of the chicken thighs, pressing firmly to adhere. The paprika and herbs will create a flavorful crust while the salt draws out surface moisture, ensuring maximum crispiness when cooked.
Step 2: Preheat the Skillet and Prepare the Bricks
Place the heavy skillet (preferably cast iron) over medium-high heat for 5 minutes to get it screaming hot. While it heats, wrap the 2 whole Bricks tightly in heavy-duty foil. The bricks will serve as weights to press the chicken flat, ensuring even contact with the pan and maximum skin surface area for crisping.
Add the 2 tbsp Olive Oil to the skillet and swirl to coat the bottom completely. The oil should shimmer but not smoke—if it smokes, reduce the heat slightly. This high heat is essential for achieving a deep golden-brown crust on the chicken skin.
Step 3: Sear the Chicken Under Weight
Carefully place the chicken thighs skin-side down in the hot skillet. Immediately position the foil-wrapped bricks on top of the thighs, pressing down firmly. This weight ensures the skin makes full contact with the pan surface, preventing curling and promoting even browning.
Cook for 8-10 minutes without moving the chicken or bricks. You’ll see the edges of the skin start to turn deep golden brown and crisp. Resist the urge to peek or adjust—the steady pressure and high heat are creating the perfect crust.
Step 4: Finish Cooking and Rest
Remove the bricks and flip the chicken thighs. Cook for an additional 6-8 minutes until the internal temperature reaches 165°F and the juices run clear. The skin should now be uniformly crispy and mahogany-colored.
Transfer the chicken to a plate and let rest for 5 minutes before serving. During this rest, the juices redistribute throughout the meat, ensuring each bite remains moist. Squeeze the lemon over the thighs just before serving and garnish with the 0.25 cup Fresh Parsley.
Pro Tips For Making Brick Chicken
- Press Hard: Use a heavy pan or actual brick wrapped in foil to weigh down the chicken—this guarantees even contact with the heat and that crispy, golden crust you’re after.
- Salt the Night Before: Dry-brine the thighs with kosher salt at least 4 hours (or overnight) before cooking. I learned this the hard way after my first few batches came out bland.
- Skip the Overcrowding: Cook the thighs in batches if needed—cramming them in steams the skin instead of crisping it, and nobody wants soggy brick chicken.
- Start Skin-Side Down: Always begin with the skin directly on the hot surface and resist the urge to peek for at least 5 minutes. This builds the foundation for that perfect crunch.
Storing and Reheating Leftovers
Refrigerator Storage
Let the chicken cool completely, about 30 minutes, before transferring to an airtight container. I use glass containers to maintain crispness. Store in the fridge at 40°F or below for up to 3-4 days. 💡
Freezer Storage
For longer storage, wrap each piece individually in plastic wrap, then place in a freezer-safe bag. Squeeze out excess air to prevent freezer burn. This method keeps the chicken fresh for up to 3 months. Label with the date for easy tracking.
Stovetop Reheating
To revive crispiness, heat a dry skillet over medium heat. Add the chicken skin-side down and cover with a lid for 3-4 minutes. This steams the meat while crisping the skin. Flip and heat for another 2 minutes. ❄️
Oven Reheating
Preheat your oven to 375°F. Place the chicken on a wire rack set over a baking sheet. Bake for 10-12 minutes until the internal temperature reaches 165°F. This method ensures even heating and maintains crispiness.
Microwave Option
For quick meals, place the chicken on a microwave-safe plate with a damp paper towel. Heat on 70% power for 1-2 minutes. Note that this method may soften the skin, so it’s best for a quick fix.
Nutrition Facts
Frequently Asked Questions
What can I use instead of bricks?
Use another heavy pan or foil-wrapped cans as weights. A cast iron skillet works perfectly as both the cooking surface and weight. Just ensure it’s heavy enough to press the chicken flat.
Why does the skin get so crispy?
The weight flattens the chicken, maximizing skin contact with the hot pan. This even pressure combined with medium-high heat creates perfect browning and crispness.
Can I use boneless thighs?
Yes, but reduce cooking time by 2-3 minutes per side. Bone-in thighs stay juicier under pressure, but boneless works in a pinch. Watch closely to avoid drying out.
How do I prevent the bricks from smoking?
Wrap them tightly in heavy-duty foil to protect from direct heat. Use bricks that are clean and free of any flammable materials. The foil also makes cleanup easier.

- Jollof Rice Sauce Recipe: West African Tomato and Spice Infusion - September 25, 2026
- Japanese Rice Soup Recipe: Umami-Rich Comfort in a Bowl - September 25, 2026
- Homemade Cream Of Rice Recipe: Silk-Smooth Breakfast in Minutes - September 25, 2026