
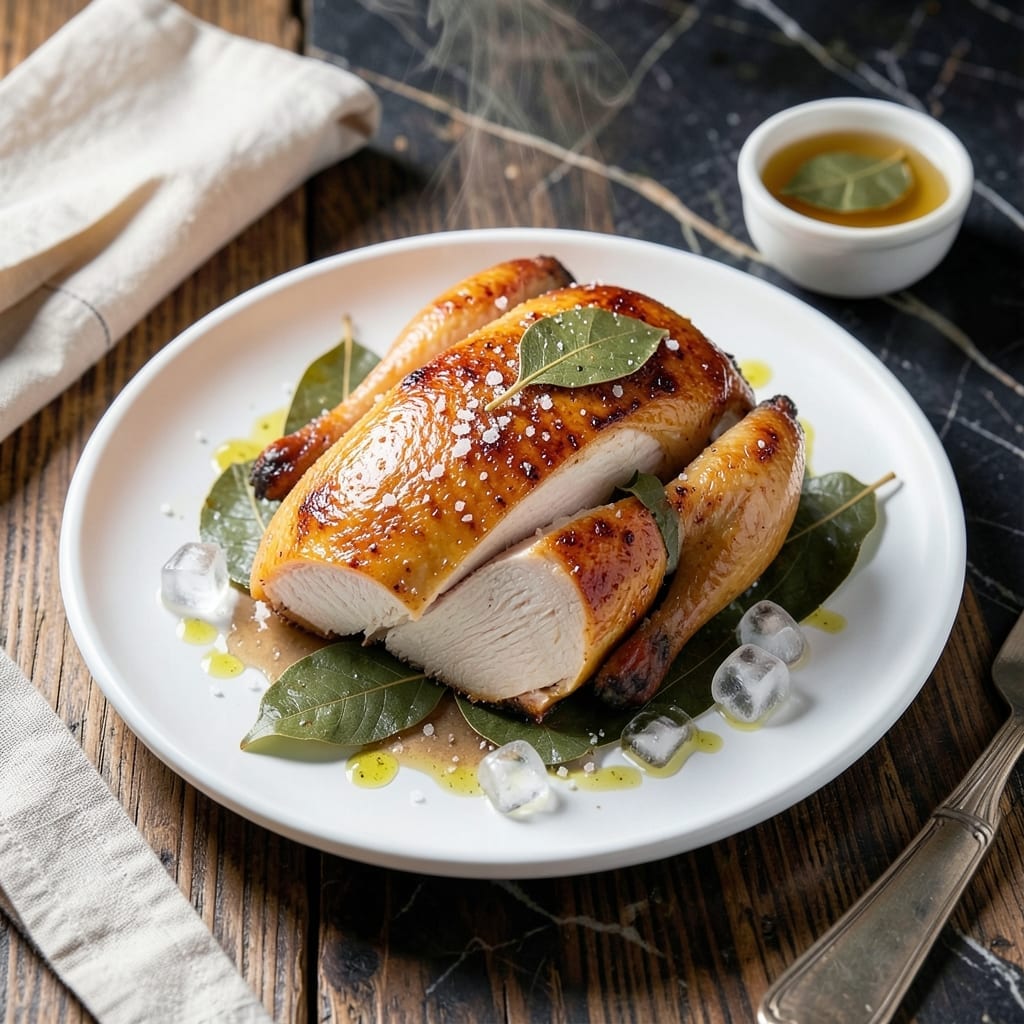
Achieving perfectly moist chicken every time starts with a simple brining technique that locks in flavor and juiciness. This method transforms even the leanest cuts into tender, succulent meat that never dries out during cooking.
The process begins with a saltwater solution that penetrates the meat, allowing it to retain natural juices. I’ve tested countless variations, and this approach consistently delivers the most reliable results for oven-roasted or grilled chicken.
After brining, the chicken cooks evenly, developing a golden exterior while staying moist inside. The seasoning absorbs deeply, ensuring every bite is packed with flavor rather than just surface taste.
Whether you’re preparing a weeknight dinner or a special meal, this technique guarantees chicken that’s tender, flavorful, and far superior to unbrined alternatives.
Ingredients for Brined Chicken
A simple brine transforms chicken into juicy, flavorful perfection every single time.
| Ingredient | Amount | Notes |
|---|---|---|
| Chicken Breasts 🍗 | 2 lb | Boneless, skinless, pounded even |
| Kosher Salt 🧂 | ½ cup | Diamond Crystal preferred for brining |
| Granulated Sugar 🍚 | ¼ cup | Balances salt in brine solution |
| Cold Water 💧 | 8 cups | Enough to fully submerge chicken |
| Ice Cubes ❄️ | 4 cups | Keeps brine cold during process |
| Bay Leaves 🌿 | 4 whole | Dried, for aromatic depth |
| Black Peppercorns 🌶️ | 1 tbsp | Lightly crushed for infusion |
| Garlic Cloves 🧄 | 6 cloves | Smashed to release flavor |
| Fresh Rosemary Sprigs 🌿 | 3 whole | Optional but recommended |
| Fresh Thyme Sprigs 🌿 | 3 whole | Optional but recommended |
| Olive Oil 🫒 | 2 tbsp | Extra-virgin for post-brine coating |
| Ground Black Pepper 🌶️ | 1 tsp | Freshly ground for finishing |
| Dried Oregano 🍃 | 1 tsp | Mediterranean variety preferred |
| Paprika 🌶️ | 1 tsp | Sweet or smoked for color |
The salt selection is critical for optimal brining. Diamond Crystal kosher salt dissolves cleanly without over-salting. Use a large stockpot or brining bag to accommodate the chicken fully submerged. I recommend Costco or Sam’s Club for bulk salt purchases at better prices. Cold water is non-negotiable—hot water would start cooking the meat prematurely.
No kosher salt? Use half the amount of table salt by volume. Sugar can be swapped for brown sugar or honey (though honey won’t dissolve as cleanly). Fresh herbs not available? Dried herbs at one-third the amount work in a pinch. The chicken can be whole pieces or cut into tenders—just adjust brining time accordingly. For larger cuts, extend the brine by 30 minutes per pound.
Brine the chicken for 1-4 hours—never exceed 12 hours or the texture becomes mushy. Cook immediately after brining or store in the fridge for up to 24 hours before cooking. The cooked chicken keeps well for 4-5 days refrigerated or 3 months frozen.
Why You’ll Love This Recipe
- 5-Minute Brine: Honestly, it’s just salt, sugar, and water—mix, dunk the chicken, and walk away.
- Juicy Every Time: That brine locks in moisture so even the leanest breast stays tender, never dry.
- Meal Prep Hero: I make a batch Sunday and we’re set for salads, sandwiches, or tacos all week.
Step-by-Step Instructions for Brined Chicken
Master the brining process for chicken that stays remarkably moist and packed with flavor.
Step 1: Create the Aromatic Brine Solution
In a large pot, combine the 8 cups cold water, 0.5 cup kosher salt, and 0.25 cup granulated sugar. Stir over medium heat just until the salt and sugar dissolve completely—this won’t take long since we’re using fine kosher salt.
Remove from heat and add the 4 whole bay leaves, 1 tbsp black peppercorns, 6 cloves garlic cloves, 3 whole fresh rosemary sprigs, and 3 whole fresh thyme sprigs. The water should be warm but not hot to preserve the aromatic qualities of the herbs.
Step 2: Cool and Submerge the Chicken
Add the 4 cups ice cubes to the brine solution to cool it rapidly. The brine must be completely cold before adding the 2 lb chicken breasts—this prevents the meat from cooking prematurely and ensures food safety.
Place the chicken breasts in a large bowl or food-safe container. Pour the cooled brine over them, making sure they are fully submerged. If needed, weigh them down with a plate to keep them under the liquid surface. This full submersion guarantees even flavor penetration.
Step 3: Brine for Maximum Moisture Retention
Cover the container and refrigerate for 4 to 6 hours. This is the ideal window—long enough to thoroughly season the meat without making it overly salty. The sugar in the brine helps balance the salt while promoting moisture retention in the chicken.
During this time, the brine works its magic, infusing every bite with flavor and ensuring the chicken stays juicy through cooking. Don’t exceed 8 hours of brining, as the texture can become mealy with prolonged exposure to the salt solution.
Step 4: Rinse, Pat Dry, and Season
Remove the chicken from the brine and discard the liquid. Rinse the chicken briefly under cold water to remove excess salt from the surface, then pat it completely dry with paper towels. This step is crucial for achieving a good sear and preventing steaming.
Rub the chicken with 2 tbsp olive oil, then season evenly with 1 tsp ground black pepper, 1 tsp dried oregano, and 1 tsp paprika. The oil helps the spices adhere and creates a beautiful crust when cooked.
Let the chicken rest at room temperature for 15 minutes before cooking. This takes the chill off the meat, promoting even cooking throughout and helping to maintain that coveted moisture we’ve worked to achieve.
Pro Tips For Making Brined Chicken
- Chill the Brine: Always use ice-cold water and add ice cubes to keep the brine below 40°F—warm brine starts cooking the chicken and turns it mushy.
- Brine Evenly: Make sure the chicken is fully submerged; I learned this the hard way after finding dry spots on my first few batches.
- Don’t Over-Brine: Stick to 4-6 hours max for chicken breasts—any longer and the texture gets weirdly spongy, like it’s been sitting in the fridge for days.
- Rinse and Dry: After brining, give the chicken a quick rinse under cold water and pat it very dry with paper towels—this guarantees a better sear later.
Creative Variations of This brined chicken
Citrus Herb Infusion
Swap 4 cups cold water for 2 cups orange juice and 2 cups lemon-lime soda in your brine. Add 1 sliced lemon, 1 sliced lime, and 1 sliced orange for bright citrus notes. The natural sugars in the soda enhance browning during cooking. 🌟
Spicy Southwestern Twist
Add 2 tbsp chili powder, 1 tbsp cumin, and 1 tsp cayenne to the basic brine. Replace bay leaves with 2 dried ancho chiles. This creates a bold, smoky profile perfect for tacos or fajitas.
Asian-Inspired Variations
Use 4 cups soy sauce as your base instead of saltwater. Add ½ cup brown sugar, 1 tbsp grated ginger, and 3 crushed garlic cloves. This works especially well with chicken thighs for stir-fries.
Honey Garlic Glaze
After brining, coat chicken with a mix of ¼ cup honey, 3 minced garlic cloves, and 1 tbsp soy sauce. Roast at 375°F for 25-30 minutes, basting occasionally for a sticky, caramelized finish.
Beer Brined Option
Replace 4 cups water with 4 cups light beer. The carbonation tenderizes while adding subtle malt notes. I prefer Pilsner for its clean flavor. This variation pairs perfectly with grilled preparations. 🍺
Mediterranean Herb Blend
Add 2 tbsp dried oregano, 1 tbsp dried thyme, and 1 tsp crushed red pepper to the standard brine. Include 1 lemon (quartered) and 5 smashed garlic cloves for an authentic Greek flavor profile.
Nutrition Facts
Frequently Asked Questions
How long should I brine chicken?
For best results, brine chicken for 4 to 6 hours. This ensures deep flavor penetration without making the meat too salty. Never exceed 8 hours, as longer brining can make the texture mushy.
Can I reuse the brine?
No, discard the brine after use. Reusing it risks bacterial contamination from raw chicken. Always make fresh brine for each batch to ensure food safety.
What if I don’t have kosher salt?
Substitute with half the amount of table salt by volume. Diamond Crystal kosher salt is ideal, but table salt works in a pinch—just use less.
Do I need to rinse the chicken after brining?
Yes, rinse briefly under cold water to remove excess salt from the surface. Pat it dry thoroughly with paper towels for the best sear.

- Jollof Rice Sauce Recipe: West African Tomato and Spice Infusion - September 25, 2026
- Japanese Rice Soup Recipe: Umami-Rich Comfort in a Bowl - September 25, 2026
- Homemade Cream Of Rice Recipe: Silk-Smooth Breakfast in Minutes - September 25, 2026