
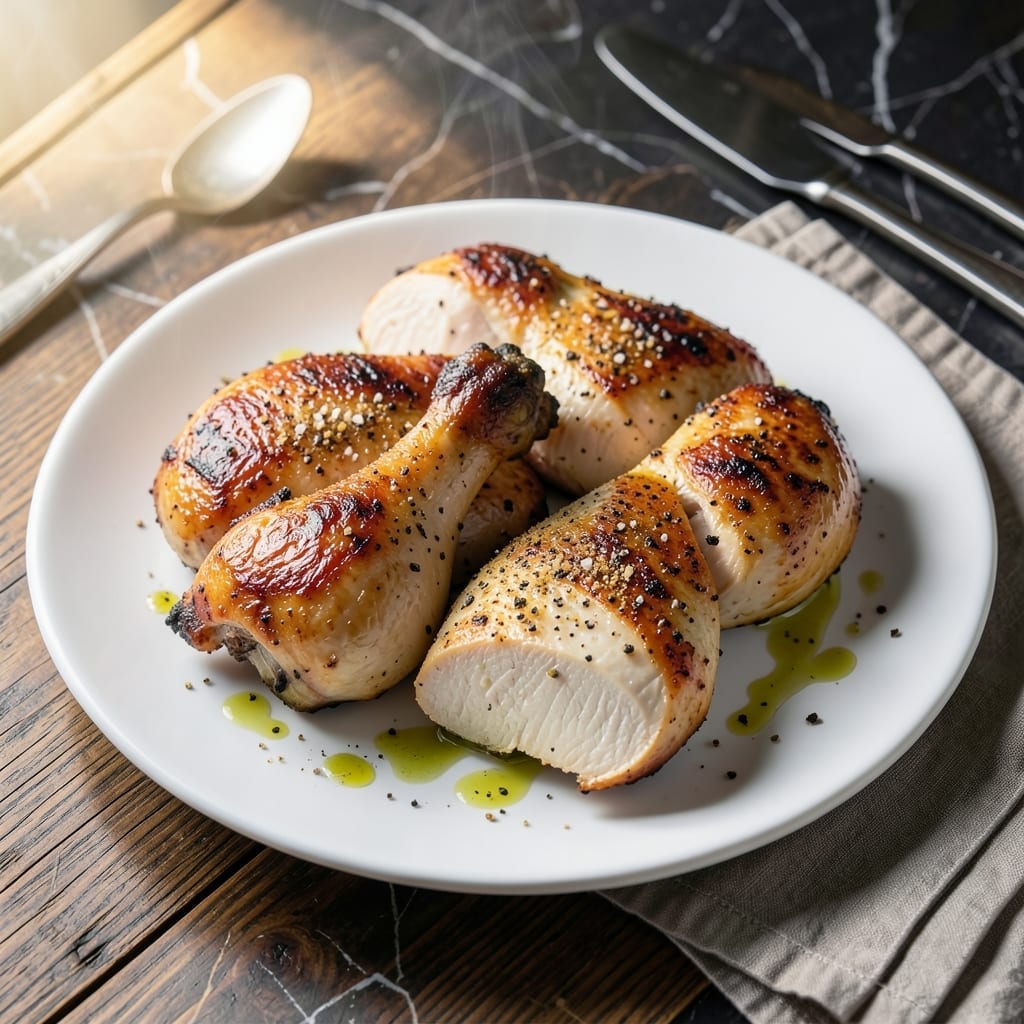
This broiling method delivers crispy chicken with minimal effort and maximum flavor. The high, direct heat of the broiler creates a golden-brown crust while keeping the meat juicy inside.
I developed this technique to achieve quick results without sacrificing texture. The key is positioning the rack at the right distance from the heat source and monitoring closely to prevent burning.
You’ll get perfectly cooked chicken with a shatteringly crispy exterior in a fraction of the time it takes to bake. The method works for any cut, from thighs to breasts.
Serve with your favorite sides for a meal that’s both simple and satisfying. Here’s how to do it right.
Ingredients for Broil Chicken
Pantry raid time. These bold seasonings transform simple chicken into a crispy masterpiece.
| Ingredient | Amount | Notes |
|---|---|---|
| Chicken Thighs 🍗 | 2 lb | Boneless, skin-on preferred |
| Chicken Breasts 🍗 | 2 lb | Boneless, skin-on or skinless |
| Extra-Virgin Olive Oil 🫒 | 3 tbsp | Divided for coating |
| Kosher Salt 🧂 | 1 ½ tsp | Diamond Crystal preferred |
| Freshly Ground Black Pepper 🌶️ | 1 tsp | Coarsely ground |
| Garlic Powder 🧄 | 1 tsp | Not garlic salt |
| Smoked Paprika 🌶️ | 1 tsp | For depth and color |
| Dried Thyme 🍃 | ½ tsp | Crushed between fingers |
| Dried Oregano 🍃 | ½ tsp | Mediterranean variety |
| Cayenne Pepper 🔥 | ¼ tsp | Optional for heat |
| Lemon 🍋 | 1 whole | Zested and juiced |
| Fresh Parsley 🌿 | ¼ cup | Chopped, for garnish |
The chicken matters most here. Thighs deliver juicier results than breasts—skin-on crisps beautifully under the broiler. Source from Whole Foods or a trusted butcher for consistent sizing. Costco offers excellent pre-portioned packs. Look for pieces with even thickness to ensure uniform cooking. Always pat the skin dry before seasoning—this is non-negotiable for achieving that shatteringly crisp texture.
No smoked paprika? Regular paprika plus a pinch of chipotle powder recreates the smokiness. Out of fresh parsley? Cilantro or chives work equally well as garnish. The olive oil can be any neutral oil in a pinch, but extra-virgin adds depth. For extra crunch, sprinkle breadcrumbs mixed with spices over the chicken before broiling. The cayenne is optional but recommended for a subtle kick.
Broiled chicken is best served immediately but holds well for 3-4 days refrigerated. Reheat in a 400°F oven to revive crispiness—microwaving ruins the texture. The seasoning blend keeps in an airtight container for 6 months. Double the batch for effortless future meals.
Why You’ll Love This Recipe
- No Fuss Cooking: I just toss the thighs and breasts with olive oil, salt, and pepper, then let the broiler do the work.
- Crispy & Juicy: That high heat locks in the moisture while giving the skin the most satisfying crunch.
- Meal Prep Hero: I broil a big batch on Sunday and it’s ready to slice over salads or stuff into wraps all week.
- Budget Stretch: A few affordable thighs and breasts feed my family for two nights—leftovers taste even better cold the next day.
Step-by-Step Instructions for Broil Chicken
This method delivers crispy skin and juicy meat with minimal effort and maximum flavor.
Step 1: Prepare and Season the Chicken
Pat the chicken thighs and chicken breasts dry with paper towels. This step is crucial—any moisture on the surface will prevent proper browning under the broiler. Place the pieces on a large baking sheet.
Drizzle 2 tbsp of the extra-virgin olive oil over the chicken. In a small bowl, combine the 1.5 tsp kosher salt, 1 tsp freshly ground black pepper, 1 tsp garlic powder, 1 tsp smoked paprika, 0.5 tsp dried thyme, 0.5 tsp dried oregano, and 0.25 tsp cayenne pepper. Rub this spice mixture evenly over all the chicken pieces, pressing it into the skin for maximum adhesion.
Step 2: Broil on High Heat
Position an oven rack about 6 inches from the broiler element and preheat the broiler on high. This close distance ensures intense heat for quick browning without overcooking the interior.
Place the seasoned chicken under the preheated broiler. Broil the chicken for 5-7 minutes until the skin begins to blister and turn deep golden brown. Watch closely during this time—broilers can vary in intensity, and you want to catch it at the perfect moment before it burns.
Step 3: Flip and Finish Cooking
Carefully flip each piece of chicken using tongs. Drizzle the remaining 1 tbsp extra-virgin olive oil over the now-uppermost sides. Return to the broiler and cook for an additional 4-6 minutes for chicken breasts or 6-8 minutes for chicken thighs, until the internal temperature reaches 165°F.
The chicken is done when the juices run clear and the thickest part of each piece registers 165°F on an instant-read thermometer. The skin should be crisp and deeply browned, while the meat remains tender and juicy.
Step 4: Rest and Garnish
Transfer the chicken to a serving platter and let it rest for 5 minutes. This brief rest allows the juices to redistribute throughout the meat, ensuring every bite is moist and flavorful.
While the chicken rests, zest and juice the lemon. Sprinkle the chopped fresh parsley over the chicken, then drizzle with some of the lemon juice for a bright, fresh finish. Serve immediately while hot and crispy.
Pro Tips For Making Broil Chicken
- Preheat the Broiler: Always preheat your broiler for at least 5 minutes—I learned this the hard way after serving undercooked chicken more times than I’d like to admit.
- Pat Dry First: Blot the chicken thighs and breasts with a paper towel before seasoning; excess moisture steams instead of sears, and nobody wants pale, soggy chicken.
- Use a Rack: Place chicken on a wire rack over a baking sheet so hot air circulates underneath—this guarantees crispy skin without flipping.
- Watch the Thickness: Slice chicken breasts horizontally if they’re thicker than 1 inch; even cooking is non-negotiable, and thin pieces broil faster and more evenly.
Perfect Pairings for This Recipe
Side Dish Stars
This crispy chicken shines alongside a simple arugula salad with lemon vinaigrette—the peppery bite cuts through the richness perfectly. I toss 4 cups baby arugula with 2 tbsp olive oil and 1 tbsp lemon juice. 🥗
Starchy Companions
Garlic mashed potatoes are a crowd-pleaser, soaking up those flavorful juices. For a lighter option, roasted sweet potatoes with a sprinkle of smoked paprika echo the chicken’s seasoning. Both options complement without overpowering.
Wine Pairings
A crisp Sauvignon Blanc from New Zealand cuts through the savory spices beautifully. For red lovers, a light Pinot Noir from Oregon offers complementary earthy notes. Avoid heavy tannic wines that clash with the dish’s simplicity. 🍷
Beer Options
A pilsner like Samuel Adams Noble Pils provides clean, crisp refreshment. For craft enthusiasts, a witbier with citrus notes adds an interesting contrast to the smoky paprika. Both styles enhance without competing.
Fresh Finishes
Serve with extra lemon wedges for brightness and a sprinkle of fresh parsley. I also love adding a side of pickled vegetables for a tangy crunch. These small touches elevate the meal from simple to special. 💫
Nutrition Facts
Frequently Asked Questions
What oven rack position works best?
Position the rack about 6 inches from the broiler element. This ensures intense, direct heat for crispy skin without burning the meat.
How do I know when it’s done?
Use an instant-read thermometer—the internal temperature should reach 165°F in the thickest part. The skin should be deeply browned and crisp.
Can I use skinless chicken?
Yes, but the results will be less crispy. Pat it extra dry and consider adding breadcrumbs for texture. The seasoning still delivers great flavor.
Why did my chicken burn?
Broilers vary in intensity. If yours runs hot, check after 4 minutes and adjust the rack lower if needed. Never walk away while broiling.

- Jollof Rice Sauce Recipe: West African Tomato and Spice Infusion - September 25, 2026
- Japanese Rice Soup Recipe: Umami-Rich Comfort in a Bowl - September 25, 2026
- Homemade Cream Of Rice Recipe: Silk-Smooth Breakfast in Minutes - September 25, 2026