
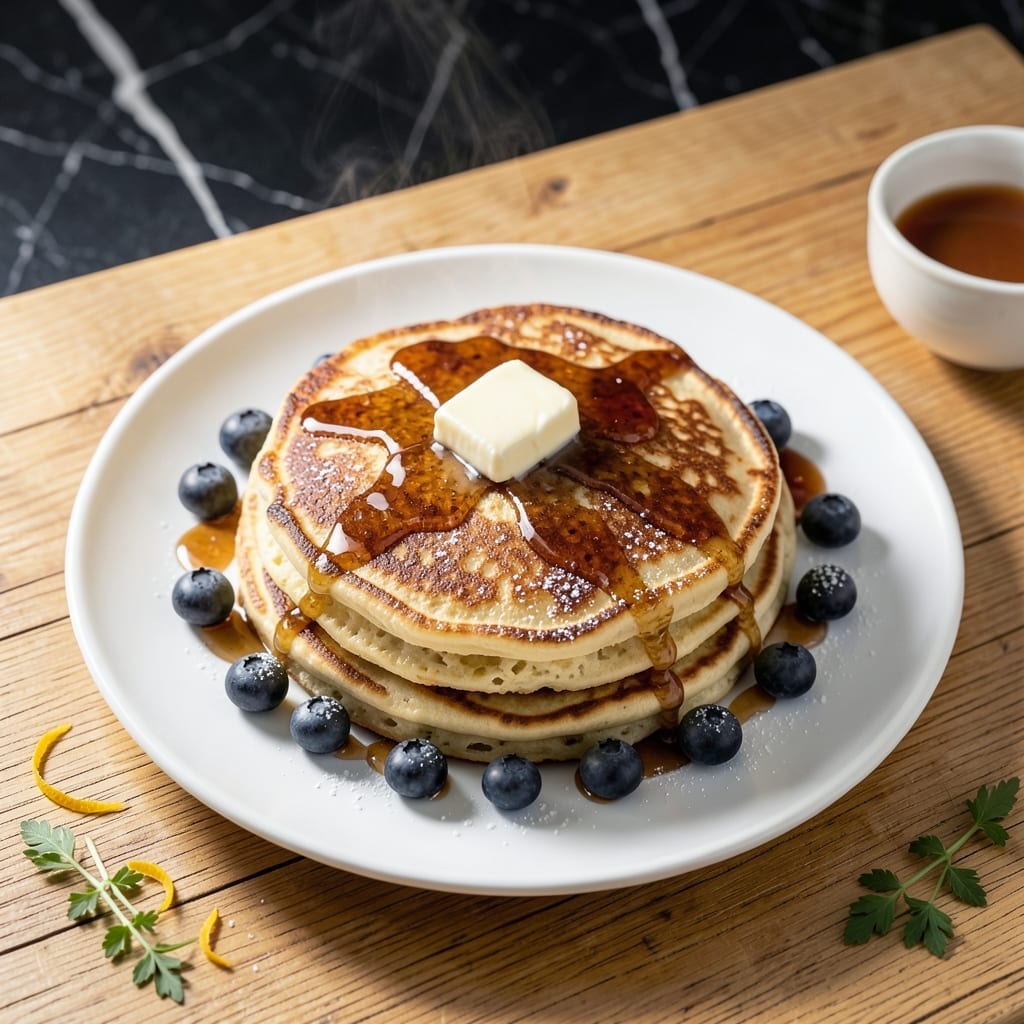
This brown rice pancake recipe delivers crispy edges with a wholesome, nutty flavor that transforms breakfast. The secret lies in soaking the rice overnight, which ensures a smooth batter and perfect texture.
With just a few simple ingredients and a hot griddle, you’ll achieve golden pancakes that are crisp on the outside and tender inside. Ideal for a hearty, vegetarian start to the day.
Ingredients for Brown Rice Pancake
Simple ingredients transform into golden, crisp-edged pancakes with nutty depth.
| Ingredient | Amount | Notes |
|---|---|---|
| Brown Rice 🌾 | 1 ½ cups | Uncooked, soaked overnight |
| Water 💧 | 3 cups | For soaking and blending |
| All-Purpose Flour 🌾 | ½ cup | Helps bind batter |
| Large Egg 🥚 | 1 whole | Room temperature preferred |
| Milk 🥛 | ¾ cup | Whole or 2% works best |
| Baking Powder 🧂 | 1 tsp | For fluffier pancakes |
| Salt 🧂 | ½ tsp | Kosher or sea salt |
| Sugar 🍚 | 1 tbsp | Granulated or coconut sugar |
| Vanilla Extract 🌿 | 1 tsp | Pure for best flavor |
| Unsalted Butter 🧈 | 2 tbsp | For cooking pancakes |
| Cinnamon 🌿 | ½ tsp | Ground, adds warmth |
| Maple Syrup 🍁 | ½ cup | For serving (optional) |
The brown rice is non-negotiable here—short-grain or medium-grain gives the best texture. Bulk bins at Whole Foods or Trader Joe’s are great for fresh, high-quality rice. Soak it overnight (12 hours minimum) for the smoothest batter. If you’re short on time, a quick soak in hot water for 2 hours works in a pinch, but the texture won’t be quite as perfect.
No milk? Oat milk or soy milk work well as substitutes. Out of eggs? Use a flax egg (1 tbsp ground flaxseed + 3 tbsp water). For a gluten-free version, swap the all-purpose flour for rice flour or oat flour. The sugar can be omitted if you prefer savory pancakes—just add a pinch more salt to balance the flavors.
Batter keeps in the fridge for 1 day—give it a good stir before cooking. Cooked pancakes stay fresh for 2-3 days in the fridge or freeze for 1 month. Reheat in a toaster or skillet to maintain that crispy edge (the microwave will make them soggy).
Why You’ll Love This Recipe
- One-Bowl Wonder: I mix the soaked brown rice, flour, egg, and milk right in the blender—no extra bowls, no fuss.
- Nutty & Light: The brown rice gives these pancakes a subtle toasty flavor that’s way more interesting than plain white flour versions.
- Breakfast or Dinner: I’ve served these for lazy Sunday mornings and quick weeknight dinners with a side of veggies.
- Stretches the Budget: A cup of brown rice makes a big batch, and the ingredients are all pantry staples I already keep on hand.
Step-by-Step Instructions for Brown Rice Pancakes
Here’s the method that delivers nutty flavor and crisp edges with every batch.
Step 1: Soak and Blend the Brown Rice
Place the 1.5 cups brown rice in a large bowl and cover with the 3 cups water. Let it soak at room temperature for at least 8 hours or overnight. This softens the grains for smooth blending and removes excess starch.
Drain and rinse the soaked rice, then transfer it to a high-speed blender. Add the 0.75 cup milk and blend until completely smooth—about 2-3 minutes. The batter should be the consistency of heavy cream. This step ensures the pancakes have that signature nutty depth.
Step 2: Combine Dry and Wet Ingredients
In a large mixing bowl, whisk together the 0.5 cup all-purpose flour, 1 tsp baking powder, 0.5 tsp salt, 1 tbsp sugar, and 0.5 tsp cinnamon. These dry ingredients provide structure and a subtle sweet warmth that complements the rice.
Pour the blended rice mixture into the dry ingredients. Add the 1 whole large egg and 1 tsp vanilla extract, then whisk until just combined. A few small lumps are fine—overmixing will make the pancakes tough. Let the batter rest for 10 minutes to hydrate the flour fully.
Step 3: Cook the Pancakes to Crisp Perfection
Heat a nonstick skillet or griddle over medium heat and add ½ tbsp unsalted butter per batch. Once the butter melts and begins to foam, pour ¼ cup batter per pancake onto the skillet. Cook for 3-4 minutes until the edges appear set and bubbles form on the surface.
Flip the pancakes and cook for another 2-3 minutes until golden brown and crisp. Press down lightly with a spatula during the first minute to ensure even contact with the pan. Repeat with the remaining batter, adding more unsalted butter as needed.
Step 4: Serve Warm with Maple Syrup
Transfer the pancakes to a plate and keep them warm in a 200°F oven if cooking in batches. Serve immediately with 0.5 cup maple syrup for a classic pairing, or top with fresh fruit for a lighter option.
The pancakes should be tender inside with a crisp, golden exterior. The soaking and blending process ensures a rich, nutty flavor that sets these apart from traditional pancakes. Enjoy while hot for the best texture.
Pro Tips For Making Brown Rice Pancake
- Soak the Rice: I learned this the hard way—soak the brown rice for at least 4 hours or overnight. It softens the grains so they blend smoothly into the batter.
- Heat the Pan First: Crank that skillet to medium-high and let it heat fully before adding oil. Sounds simple, but I burned three pancakes before realizing my pan wasn’t hot enough.
- Thin the Batter: Brown rice batter is thick, so add milk gradually until it’s like heavy cream. Too thick and your pancakes will be dense; too thin and they’ll fall apart.
- Press While Cooking: After pouring the batter, gently press the pancake with a spatula. This flattens it and guarantees even cooking, especially with the heartier brown rice texture.
Storing and Reheating This Dish
Refrigerator Storage
Let your pancakes cool completely before storing—I spread them on a wire rack to prevent steam buildup. Place in an airtight container with parchment between layers. They’ll stay fresh for 2-3 days at 40°F or below. ❄️
Freezer Storage
For longer storage, freeze pancakes flat on a baking sheet first (about 1 hour), then transfer to a freezer bag. They’ll keep for 1 month without losing texture. Label with the date—I use Ziploc freezer bags for best results.
Toaster Reheating
Pop frozen pancakes directly into the toaster on medium-high for 2-3 minutes. This method revives the crispy edges beautifully. Watch closely to avoid burning—the sugar in the batter can caramelize quickly.
Skillet Reheating
Heat a nonstick skillet over medium heat with ½ tbsp butter. Warm pancakes for 1-2 minutes per side until heated through. This works for both fridge-cold and thawed pancakes. 🔥
Microwave Option
Place a damp paper towel over pancakes and microwave on 50% power for 30-second intervals. This prevents rubbery texture, though it won’t restore crispness. Best for quick breakfasts when time is tight.
Nutrition Facts
Frequently Asked Questions
Can I use white rice instead?
White rice will work but lacks the nutty flavor and texture of brown rice. Soak it for 4-6 hours since it’s softer. The pancakes may be less hearty and crisp.
Why soak the rice overnight?
Soaking softens the grains for a smooth batter and removes excess starch. This ensures the pancakes cook evenly and develop that signature nutty depth. 8 hours minimum is ideal.
How do I make them extra crispy?
Use a well-heated nonstick skillet with ½ tbsp butter per batch. Press the batter lightly with a spatula and cook on medium heat for 4 minutes before flipping.
Can I make the batter ahead?
Yes, the batter keeps in the fridge for 1 day. Stir well before cooking as it may thicken. For best results, cook immediately after blending.

- Rice Pudding Recipe With Eggs and Milk: Old-Fashioned Custard-Style Comfort - September 30, 2026
- Rice Noodle Sauce Recipe: Bold Umami Depth for Authentic Stir-Fry - September 30, 2026
- Rice Pilaf Recipe: Fragrant Basmati With Toasted Vermicelli - September 30, 2026