
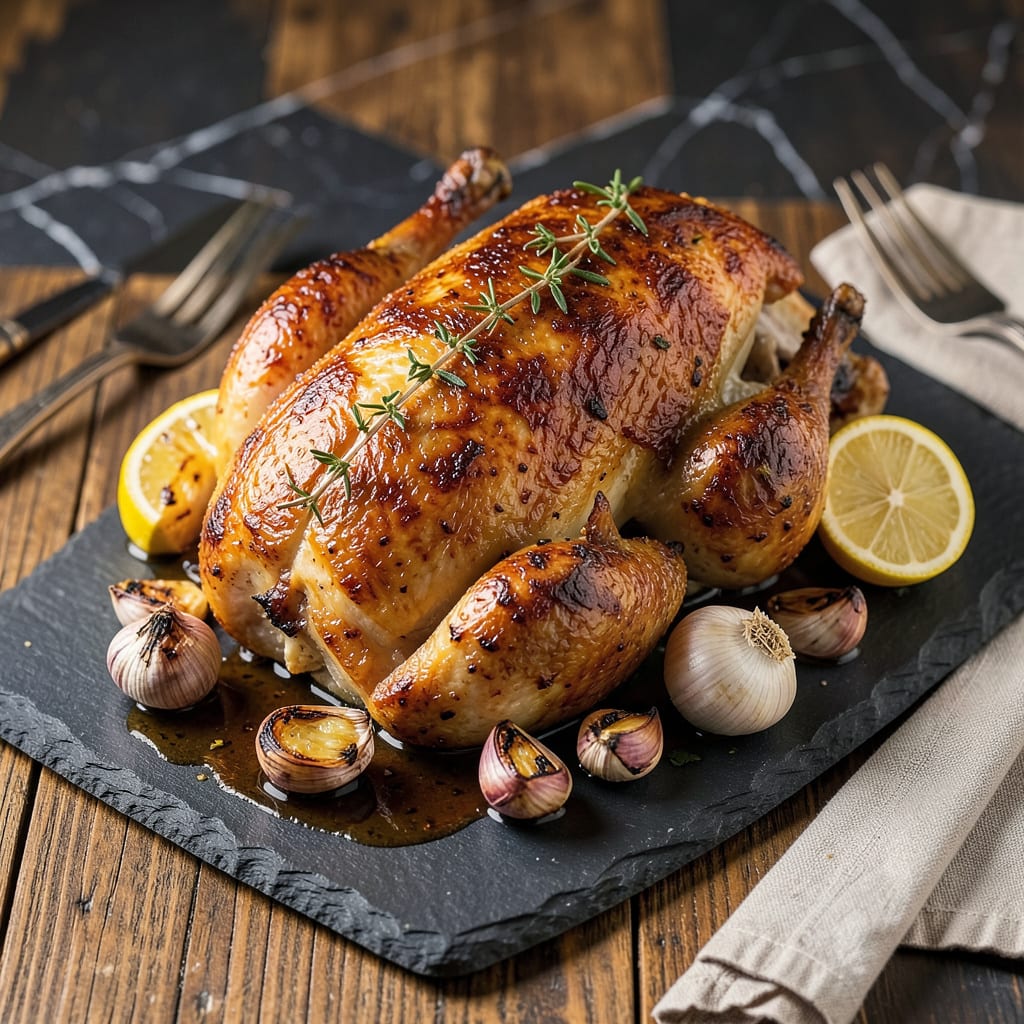
I’ll be real with you—this chicken technique changed my weeknight dinner game forever. There’s something almost magical about sliding butter under the skin before roasting. The first time I tried it, I couldn’t believe how the skin turned out shatteringly crispy while the meat stayed fall-off-the-bone juicy. No more dry, boring chicken here.
Here’s the thing—most people overlook the skin when cooking chicken, but that’s where all the flavor potential hides. By gently loosening the skin and tucking in seasoned butter, you create a built-in basting system. The butter melts as the chicken cooks, keeping the meat moist while helping the skin crisp up beautifully. I’ve made this with everything from simple salted butter to fancy herb blends, and it works every single time.
What you end up with is chicken that looks and tastes like it came from a fancy restaurant, but takes almost no extra effort. The skin gets golden and crisp, the meat stays tender, and every bite is packed with rich, buttery flavor. I’ve converted more chicken skeptics with this method than I can count—it’s that good.
Perfect for Sunday suppers or quick weeknight meals. The best part? Leftovers (if there are any) reheat surprisingly well. Let me show you exactly how to do it right—no fancy skills required.
📚 In This Guide
- What You’ll Need
- Instructions
- Tips and Common Mistakes
What Youll Need
- ● 1 whole chicken (3–5 lbs / 1.4–2.3 kg) – fresh or thawed if frozen 🍗
- ● ½ cup (1 stick / 113g) unsalted butter – softened (not melted) for easy spreading
- ● 1 tbsp kosher salt – plus extra for seasoning (or 1½ tsp table salt)
- ● 1 tsp black pepper – freshly ground for best flavor
- ○ 1 tsp garlic powder (optional, but highly recommended 💡)
- ○ 1 tsp smoked paprika (optional, for a smoky depth)
- ○ 1 lemon or orange – halved (for stuffing the cavity, optional but brightens flavor)
- ○ 4 sprigs fresh herbs (thyme, rosemary, or sage – optional but aromatic ✨)
- ● Sharp kitchen shears or a boning knife – to loosen the skin gently
- ● Small spoon or rubber spatula – for spreading butter evenly
- ● Roasting pan + rack (or a wire rack on a baking sheet for crispier skin)
- ● Meat thermometer – essential for perfect doneness (165°F / 74°C in the thickest part)
- ● Paper towels – to pat the chicken very dry (crispy skin secret!)
- ○ Basting brush (optional, for extra buttery glaze mid-roast)
Instructions
Here’s how to get that perfect balance of crispy skin and juicy meat every time.
Prepare the Chicken for Butter
Start with a whole chicken or chicken pieces, patted completely dry with paper towels. This is crucial—any moisture will prevent the skin from crisping up properly. I like to use a 4-5 pound whole chicken for this method, as it gives you plenty of skin surface to work with.
Gently loosen the skin from the meat by sliding your fingers between the skin and the flesh. Work carefully to avoid tearing the skin, especially around the breast and thighs. You want to create pockets where the butter can go, but keep the skin intact so it stays in place during cooking.
This step might feel a bit strange at first, but it’s the foundation for that perfect crispy skin. The more space you create under the skin, the more evenly the butter will distribute, leading to better flavor and texture.
Apply the Butter Under the Skin
Take softened butter (about 4 tablespoons for a whole chicken) and work it under the skin you’ve just loosened. I find it easiest to pinch off small pieces of butter and press them flat against the meat. Distribute it as evenly as possible across the breast, thighs, and legs.
Don’t be tempted to skip this step or use less butter—the fat is what creates that golden, crispy skin while keeping the meat incredibly juicy. As the butter melts during cooking, it will baste the meat from the inside, infusing every bite with rich flavor.
After applying the butter, gently press the skin back into place so it covers the meat completely. This helps the butter stay in place and ensures even cooking. The skin should look smooth and natural, not stretched or torn.
Season Generously Inside and Out
Season the chicken aggressively with salt and pepper, making sure to get some under the skin as well. I like to use about 1 tablespoon of salt for a whole chicken, adjusting slightly for personal taste. The seasoning under the skin will flavor the meat directly, while the salt on the skin helps draw out moisture for crispiness.
Don’t forget to season the cavity too—this adds flavor from the inside out. If you’re using additional herbs or spices (like thyme, rosemary, or garlic powder), sprinkle them under the skin and on the surface. They’ll infuse into the butter as it melts, creating a flavorful crust.
Let the seasoned chicken sit at room temperature for about 30 minutes before cooking. This helps the salt penetrate the meat and ensures more even cooking. You’ll notice the skin starts to look slightly translucent as the butter softens—this is exactly what you want.
Roast for Perfect Crispy Skin and Juicy Meat
Preheat your oven to 425°F—this high heat is key for getting that crispy skin while keeping the meat juicy. Place the chicken on a roasting rack set inside a baking sheet, breast-side up. The rack allows air to circulate underneath, helping the skin crisp all around.
Roast the chicken for about 1 hour to 1 hour 15 minutes, depending on size. You’ll know it’s done when the internal temperature reaches 165°F in the thickest part of the breast and the skin is deep golden brown and crispy. I always check the temperature in multiple spots to ensure even cooking.
About halfway through cooking, you might notice the butter bubbling under the skin—that’s perfect! It means the butter is rendering and basting the meat. If the skin isn’t browning evenly, you can rotate the pan, but avoid opening the oven too often to maintain consistent heat.
Rest and Serve for Maximum Juiciness
Once the chicken is fully cooked, transfer it to a cutting board and let it rest for at least 10-15 minutes before carving. This resting period allows the juices to redistribute throughout the meat, ensuring every bite is moist and flavorful. Tent the chicken loosely with foil to keep it warm without steaming the crispy skin.
When you carve into it, you’ll see the butter has created a beautiful golden layer between the skin and meat. The skin should be crispy and crackly, while the meat underneath stays tender and juicy. Serve immediately to enjoy that perfect contrast of textures.
I love serving this with simple sides like roasted vegetables or a fresh salad—the rich, buttery flavor of the chicken really shines when paired with lighter accompaniments. The crispy skin is always the star of the show!
Tips and Common Mistakes
Getting that perfect crispy skin while keeping the meat juicy is all about the details. Here’s what I’ve learned from making this countless times.
Butter Distribution: When applying the 4 tablespoons of softened butter in Step 2, take your time to spread it evenly under the skin. I like to flatten small pieces between my fingers before placing them—this ensures every bite gets that rich buttery flavor. Don’t rush this step; uneven butter distribution can lead to patches of skin that don’t crisp properly.
Temperature Matters: The 30 minutes at room temperature in Step 3 isn’t just for show. This resting period allows the salt to penetrate deeper into the meat and helps the butter soften further under the skin. If you skip this, you’ll miss out on that perfect seasoning distribution and might end up with uneven cooking.
Oven Position: For the 1 hour to 1 hour 15 minutes roasting time at 425°F in Step 4, position your oven rack in the center. This ensures even heat circulation for that golden brown color all over. If your oven runs hot, start checking at the 1-hour mark to prevent over-browning.
Resting is Critical: Those 10-15 minutes of resting time in Step 5 might seem like torture when you’re hungry, but they’re essential. Cutting too soon causes all those precious juices to spill out onto the cutting board instead of staying in the meat. I tent mine with foil to keep it warm while it rests.
Pro Tips for Butter Under Chicken Skin
- Getting that perfect crispy skin while keeping the meat juicy is all about the details. Here’s what I’ve learned from…
- Butter Distribution: When applying the 4 tablespoons of softened butter in Step 2, take your time to spread it evenly…
- Temperature Matters: The 30 minutes at room temperature in Step 3 isn’t just for show. This resting period allows the…
Frequently Asked Questions
Can I use something other than butter under chicken skin?
While butter adds rich flavor, you can swap it for duck fat (for extra crispiness), olive oil (lighter option), or even herb-infused ghee. Avoid low-smoke-point oils like sesame—stick to fats that handle high heat (375°F+). Pro tip: Mix softened butter with minced garlic or herbs for extra punch!
How do I keep the butter from leaking out while cooking?
Pat the chicken skin bone-dry before adding butter—moisture is the enemy! Chill the buttered chicken for 20–30 minutes pre-cook to firm up the fat. Use toothpicks to seal edges if needed, but remove them before roasting. High heat (425°F+) helps render fat quickly, locking in juices.
What’s the best way to time this for crispy skin without dry meat?
Roast at 425°F for 20–25 minutes (boneless) or 400°F for 40–45 minutes (bone-in). Start breast-side up, then flip halfway if needed. Use a meat thermometer—165°F in the thickest part guarantees juicy perfection. For extra crisp, broil 2–3 minutes at the end (watch closely!)
Why is my skin rubbery instead of crispy?
Three common culprits:
- Low heat—fat doesn’t render properly below 375°F.
- Overcrowding—space chicken pieces apart for airflow.
- Steam—avoid covering the pan or adding liquids early.
Is butter under chicken skin unhealthy?
Moderation is key! Butter adds saturated fat, but it’s fine occasionally. For a lighter twist, use half butter/half olive oil or brush skin with a thin layer. Remove excess drippings post-cook to cut calories. Pair with veggies to balance the meal!
Slipping butter under chicken skin is your secret weapon for restaurant-quality results at home—crispy, golden skin and melt-in-your-mouth juiciness in every bite! 🍗✨ Whether you’re roasting a whole bird or baking thighs, this simple trick elevates flavor and texture with minimal effort. Now that you’ve got the know-how, grab a stick of butter and put it to the test with your next meal.
Ready to impress? Try the technique with our favorite herb-butter chicken recipe—your taste buds (and dinner guests) will thank you!

- Jollof Rice Sauce Recipe: West African Tomato and Spice Infusion - September 25, 2026
- Japanese Rice Soup Recipe: Umami-Rich Comfort in a Bowl - September 25, 2026
- Homemade Cream Of Rice Recipe: Silk-Smooth Breakfast in Minutes - September 25, 2026