
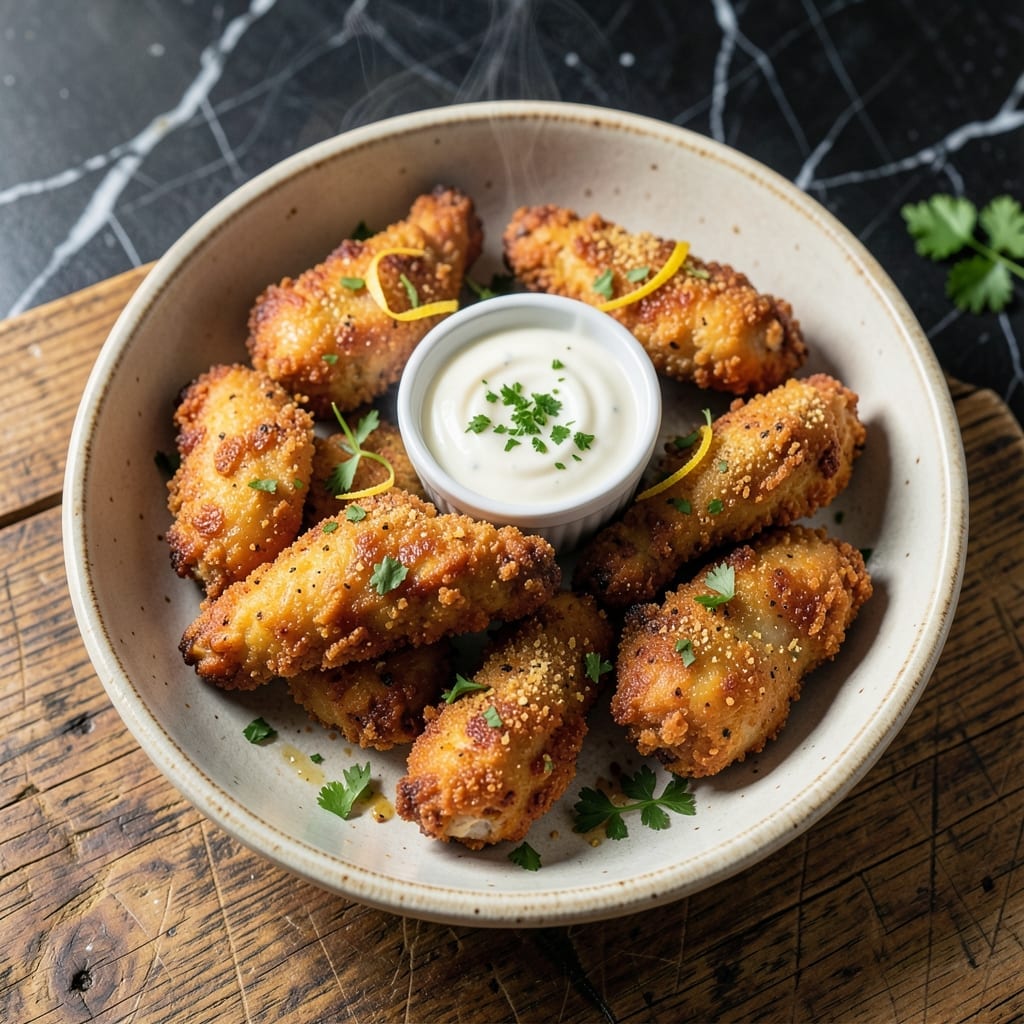
This copycat recipe delivers the tender, crispy chicken tenders that made Raising Cane’s famous, right in your own kitchen.
I’ve reverse-engineered their signature technique—double-dredging in seasoned flour and buttermilk for maximum crunch. The secret spice blend, with just the right kick, sets this version apart from ordinary chicken tenders.
The result is juicy meat inside a golden, shatteringly crisp coating that stays crunchy even after cooling. Fry in small batches to maintain oil temperature and ensure even cooking.
Serve with Cane’s sauce or your favorite dipping accompaniment for the full experience.
Ingredients for Cane’s Chicken Tenders
Pantry staples plus chicken and buttermilk. Short list, big crunch.
| Ingredient | Amount | Notes |
|---|---|---|
| Chicken Tenders 🍗 | 1 ½ lb | Boneless, skinless, uniform size |
| Buttermilk 🥛 | 2 cups | Full-fat for richness |
| All-Purpose Flour 🌾 | 2 cups | Divided for double dredging |
| Cornstarch 🌾 | ½ cup | For extra crispiness |
| Garlic Powder 🧄 | 2 tsp | Freshly ground preferred |
| Onion Powder 🧅 | 2 tsp | Fine grind for even coating |
| Paprika 🌶️ | 1 ½ tsp | Sweet or smoked variety |
| Cayenne Pepper 🔥 | ½ tsp | Adjust for heat preference |
| Salt 🧂 | 2 tsp | Diamond Crystal kosher preferred |
| Black Pepper 🌶️ | 1 tsp | Freshly ground for best flavor |
| Vegetable Oil 🫒 | 4 cups | For deep frying, high smoke point |
| Large Eggs 🥚 | 2 whole | For binding the coating |
| Hot Sauce 🌶️ | 2 tsp | Optional for buttermilk marinade |
The chicken is the star here. Chicken tenders (not breasts cut into strips) give you that perfect shape and texture—look for uniform sizes so they cook evenly. I grab mine from Costco when they’re on sale, but any grocery store works. The buttermilk matters too: full-fat makes the difference in tenderness and coating adhesion (don’t substitute regular milk).
No buttermilk? Whole milk plus 1 tbsp vinegar per cup works in a pinch. For the flour, all-purpose is non-negotiable—cake flour is too light, bread flour too heavy. Want extra crunch? Swap 1/4 cup cornstarch for flour. The spice blend is flexible: add a pinch of MSG if you’re into that, or swap smoked paprika for regular.
Fry in small batches to keep the oil temp steady. Leftovers? They reheat surprisingly well—375°F oven for 8-10 minutes brings the crunch back. Best eaten fresh, but they’ll keep in the fridge for 2 days.
Why You’ll Love This Recipe
- Minimal Effort: I toss the tenders in buttermilk, then the flour-cornstarch mix—no fancy steps, just crispy results.
- That Cane’s Crunch: The garlic powder in the crust gives it that familiar zing I can’t get enough of.
- Freezer Friendly: I double the batch and freeze half for those nights I’m too tired to cook.
- Budget Win: Chicken tenders and pantry staples mean I spend less but eat like a queen.
Step-by-Step Instructions for Crispy Chicken Tenders
Here’s the method I’ve perfected to achieve that signature crunch and flavor everyone loves.
Step 1: Marinate the Chicken in Buttermilk
In a large bowl, whisk together the 2 cups Buttermilk and 2 tsp Hot Sauce until fully combined. Add the 1.5 lb Chicken Tenders and make sure each piece is fully submerged in the mixture. The buttermilk’s acidity tenderizes the meat while adding richness.
Cover the bowl and refrigerate for at least 4 hours, or preferably overnight. This extended marinating time is crucial—it breaks down the proteins in the chicken, ensuring it stays juicy and tender after frying. I’ve found that longer marinating also helps the coating adhere better.
Step 2: Prepare the Double-Dredge Coating
In a shallow dish, combine 2 cups All-Purpose Flour, 0.5 cup Cornstarch, 2 tsp Garlic Powder, 2 tsp Onion Powder, 1.5 tsp Paprika, 0.5 tsp Cayenne Pepper, 2 tsp Salt, and 1 tsp Black Pepper. Whisk until the spices are evenly distributed throughout the flour mixture.
In a separate shallow dish, beat the 2 whole Large Eggs until well combined. The cornstarch in the flour mixture is the secret to that extra-crispy texture, while the double dredging (egg wash then flour) creates layers that puff up beautifully when fried.
Step 3: Dredge and Rest the Chicken
Remove the chicken from the buttermilk, letting any excess drip off. Dredge each piece in the flour mixture, pressing gently to ensure a thick, even coating. Shake off any excess flour, then dip in the beaten eggs, letting any excess drip off again.
Return the chicken to the flour mixture for a second dredge, pressing gently to create a thick, craggy coating. Place the coated tenders on a wire rack set over a baking sheet. Let them rest for 10-15 minutes—this allows the coating to set and adhere better to the chicken, preventing it from falling off during frying.
Step 4: Fry to Golden Perfection
In a large, deep skillet or Dutch oven, heat the 4 cups Vegetable Oil over medium-high heat until it reaches 350°F on a deep-fry thermometer. The right oil temperature is critical—too low and the chicken will absorb oil and be greasy; too high and the outside will burn before the inside cooks.
Working in batches to avoid crowding the pan, carefully lower the chicken into the hot oil. Fry for 4-5 minutes per side until the coating is deep golden brown and the internal temperature of the chicken reaches 165°F. Drain on a wire rack or paper towels to maintain crispiness.
Serve immediately while hot and crispy. The coating should have a satisfying crunch with every bite, while the chicken inside remains tender and juicy. This double-dredge method and precise frying technique is what sets this copycat version apart.
Pro Tips For Making Cane’S Chicken Tenders
- Double Dredge: Dip the tenders in buttermilk, then flour mix, then back in buttermilk and flour again—I learned this the hard way after my first batch had barely any crust.
- Rest the Chicken: Let the dredged tenders sit for 10 minutes before frying; it keeps the coating from sliding off in the oil.
- Heat the Oil: Use a thermometer and keep the oil at 350°F—any cooler and the tenders absorb grease instead of crisping up.
- Add Cornstarch: Mix 2 tablespoons of cornstarch into the flour for extra crunch; sounds weird, but it works.
Storing and Reheating This Recipe
Refrigerator Storage
Let the tenders cool completely before storing—this prevents condensation that makes them soggy. Place in a single layer on a paper towel-lined airtight container. They’ll keep for 2-3 days at 40°F or below. 🥗
Freezer Method
For longer storage, flash-freeze tenders on a baking sheet for 1 hour, then transfer to a freezer bag. Squeeze out excess air to prevent freezer burn. They’ll stay crispy for up to 1 month at 0°F.
Oven Reheating
Preheat oven to 375°F and place tenders on a wire rack over a baking sheet. Heat for 8-10 minutes until internal temp hits 165°F. This method restores crunch better than any other. 🔥
Air Fryer Revival
Arrange tenders in a single layer in your air fryer basket. Cook at 375°F for 4-5 minutes, shaking halfway. The circulating air recrisps the coating beautifully without drying the meat.
Microwave Shortcut
Place tenders on a paper towel-lined plate and microwave on high for 1-1.5 minutes. For better texture, finish with 30 seconds in a toaster oven to revive the crunch.
Nutrition Facts
Frequently Asked Questions
Can I bake these instead of frying?
Yes! Bake at 400°F for 15-20 minutes, flipping halfway. Use a wire rack over a baking sheet for even crisping. The texture won’t be identical but still delicious.
Why does the coating fall off during frying?
This usually happens if the oil isn’t hot enough or the chicken wasn’t rested after dredging. Ensure oil is at 350°F and let coated tenders rest for 10-15 minutes before frying.
Can I use chicken breasts instead of tenders?
You can, but cut them into 1-inch thick strips for even cooking. Tenders stay more tender and hold the coating better due to their natural shape.
How do I make them extra crispy?
Add an extra 1/4 cup cornstarch to the flour mix or double-fry: fry once, rest 5 minutes, then fry again.

- Jollof Rice Sauce Recipe: West African Tomato and Spice Infusion - September 25, 2026
- Japanese Rice Soup Recipe: Umami-Rich Comfort in a Bowl - September 25, 2026
- Homemade Cream Of Rice Recipe: Silk-Smooth Breakfast in Minutes - September 25, 2026