
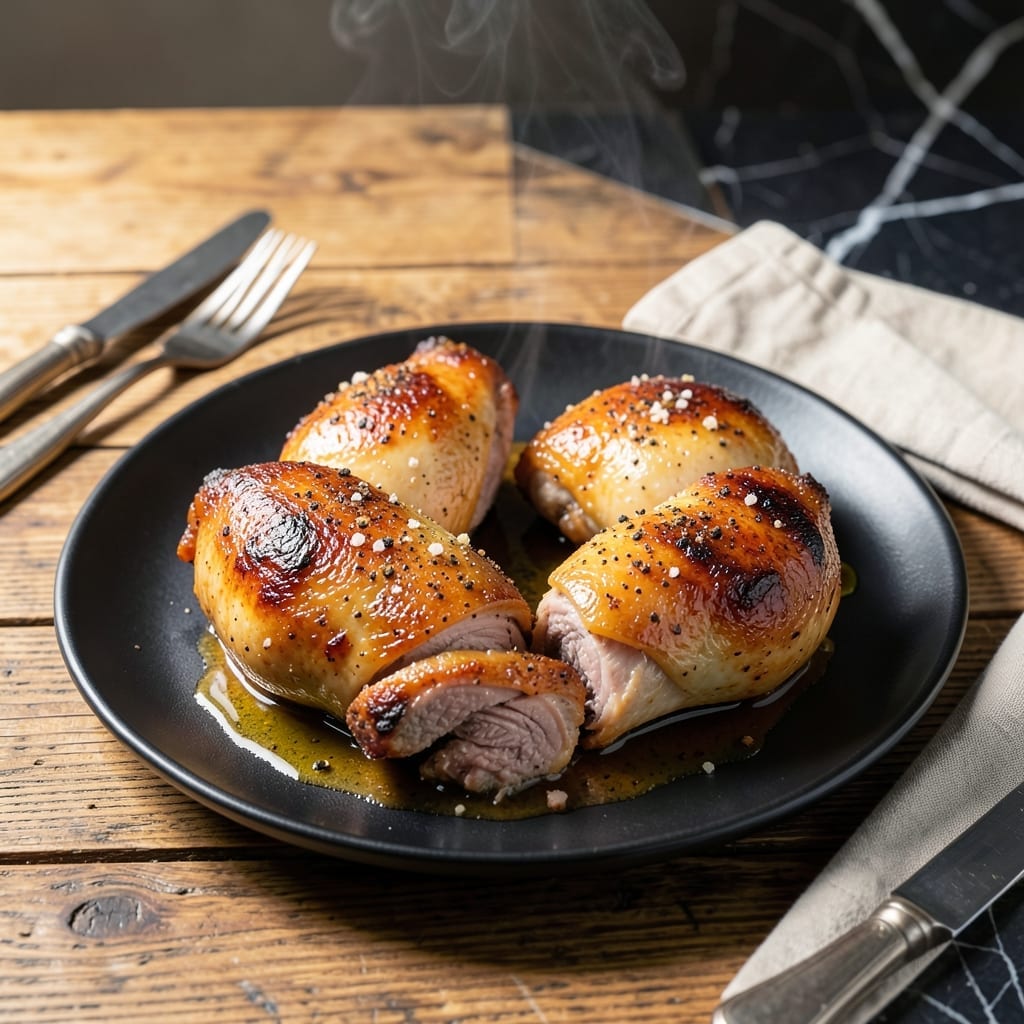
This carnivore chicken thigh recipe delivers exactly what it promises: crispy skin and rich, savory depth. I developed this method after years of perfecting whole-meat cooking techniques at The Smoky Pig.
The key is high heat and patience. Start with skin-on thighs, season simply with salt, and let the oven work its magic. The result is meat that falls off the bone with skin that shatters at the touch.
What emerges is a dish that honors the animal with minimal interference. The skin renders into golden perfection while the meat stays juicy and flavorful. This is meat at its purest and most delicious.
Serve it straight from the oven with the rendered fat for dipping. Simple, honest, and deeply satisfying.
Ingredients for Carnivore Chicken Thigh
This is meat at its simplest and most flavorful. Just chicken, salt, and patience.
| Ingredient | Amount | Notes |
|---|---|---|
| Chicken Thighs 🍗 | 2 lb | Skin-on, bone-in preferred |
| Coarse Sea Salt 🧂 | 1 ½ tbsp | Diamond Crystal or kosher variety |
| Black Pepper 🌶️ | 1 tsp | Freshly ground, coarse grind |
| Garlic Powder 🧄 | 1 tsp | Optional for extra depth |
| Onion Powder 🧅 | 1 tsp | Optional for savory balance |
| Smoked Paprika 🌶️ | ½ tsp | For subtle smoke flavor |
| Avocado Oil 🫒 | 1 tbsp | High smoke point for searing |
| Unsalted Butter 🧈 | 2 tbsp | For basting, optional |
| Fresh Rosemary 🌿 | 2 sprigs | For aromatic finish |
| Fresh Thyme 🍃 | 2 sprigs | For aromatic finish |
| Lemon 🍋 | ½ whole | For brightness, optional |
The chicken thighs are everything here. Bone-in, skin-on is non-negotiable for that crispy finish. I source mine from local butcher shops or Whole Foods—look for plump, evenly sized pieces with smooth skin. Avoid pre-brined or enhanced thighs; the salt needs to be your control. If you can only find boneless, it’ll still work, but the bone adds depth as it roasts.
No smoked paprika? Regular paprika with a pinch of cayenne gets close. Swap avocado oil for ghee or lard if you want more animal fat flavor. Fresh herbs not on hand? Dried rosemary and thyme at half the amount work fine. The lemon is optional but brightens the richness—skip if you prefer pure meaty flavor. Garlic and onion powder can be omitted for a true carnivore approach.
Store raw thighs in the coldest part of your fridge for up to 2 days. Cooked? Keeps 4-5 days refrigerated or 3 months frozen. Reheat in the oven to maintain that crispy skin texture. The rendered fat? Save it—it’s liquid gold for roasting potatoes or cooking eggs.
Why You’ll Love This Recipe
- One Pan Wonder: I toss the thighs with salt, pepper, and those powders, then roast—no chopping, no fuss, just flavor.
- Crispy Perfection: That skin gets so golden and crackly while the meat stays juicy, and the garlic-onion combo? Ridiculously good.
- Meal Prep Hero: I make a big batch Sunday and it’s my lunch all week—still tastes amazing cold or reheated.
- Budget Friendly: Thighs are cheap, the spices are pantry staples, and it feeds my family for pennies per serving.
Step-by-Step Instructions for Crispy Chicken Thighs
This method delivers perfectly crispy skin and juicy meat with minimal effort.
Step 1: Season the Chicken Thighs Generously
Pat the 2 lb Chicken Thighs completely dry with paper towels—this is essential for achieving crispy skin. I press down firmly to remove every bit of moisture from the surface and cavity.
In a small bowl, combine the 1.5 tbsp Coarse Sea Salt, 1 tsp Black Pepper, 1 tsp Garlic Powder, 1 tsp Onion Powder, and 0.5 tsp Smoked Paprika. Rub this mixture all over the chicken thighs, ensuring every surface is evenly coated. Let the seasoned chicken rest at room temperature for 30 minutes to allow the salt to penetrate.
Step 2: Sear in Hot Avocado Oil
Heat a large, heavy skillet (cast iron works best) over medium-high heat. Add the 1 tbsp Avocado Oil and let it heat until it shimmers—this indicates it’s hot enough for searing. Place the chicken thighs skin-side down in the pan, being careful not to crowd them.
Cook undisturbed for 8-10 minutes until the skin turns deep golden brown and crispy. The fat will render out, creating a pool of flavorful liquid in the pan. Resist the urge to move the chicken—this ensures even browning and a perfect crust.
Step 3: Baste with Butter and Herbs
Flip the chicken thighs and reduce the heat to medium. Add the 2 tbsp Unsalted Butter, 2 sprigs Fresh Rosemary, and 2 sprigs Fresh Thyme to the pan. Tilt the skillet slightly and use a spoon to baste the chicken with the melted butter and herb-infused oil continuously for 3-4 minutes.
This basting technique ensures the skin stays crispy while the meat remains juicy and infused with aromatic flavors. The herbs will sizzle and release their fragrance, enhancing the depth of the dish.
Step 4: Finish with Lemon and Rest
Squeeze the juice from the 0.5 whole Lemon over the chicken thighs during the last 1 minute of cooking. This adds a bright, citrusy note that cuts through the richness of the meat.
Transfer the chicken to a plate and let it rest for 5-10 minutes before serving. Resting allows the juices to redistribute, ensuring each bite is tender and flavorful. The skin will stay crispy if you avoid covering it while resting.
Pro Tips For Making Carnivore Chicken Thigh
- Dry the Skin: Pat the chicken thighs thoroughly with paper towels before seasoning—I learned this the hard way after my first few batches came out soggy instead of crispy.
- Use More Salt: Coarse sea salt needs a heavy hand; don’t be shy, especially since there are no other seasonings competing for flavor.
- Skip the Crowding: Leave space between thighs in the pan or they’ll steam instead of sear, and nobody wants rubbery skin.
- Rest Before Serving: Give them 5 minutes off the heat, tented with foil, so the juices redistribute—your plate will stay cleaner and the meat will taste richer.
Common Mistakes When Making This Recipe
Crowding the Pan
Never overcrowd your skillet with chicken thighs. Each piece needs space for proper browning and crisping. I use my 12-inch cast iron for 2 lb Chicken Thighs—any more and you’ll steam instead of sear. 🔥
Skipping the Dry
Moisture is the enemy of crispy skin. Pat those Chicken Thighs completely dry before seasoning. I press firmly with paper towels, especially around the skin and cavity. Even a little moisture creates steam in the pan.
Moving Too Soon
Let the chicken cook undisturbed for 8-10 minutes skin-side down. Resist the urge to peek or flip early. The skin needs this time to render fat and develop that golden crust. I count to 60 in my head before checking.
Under-seasoning
Don’t be shy with the 1.5 tbsp Coarse Sea Salt. The flavor needs to penetrate deep into the meat. I season aggressively, ensuring every surface is coated. Remember, this is a carnivore dish—salt enhances the natural meat flavors beautifully.
Skipping the Rest
Always let your chicken rest for 5-10 minutes after cooking. This allows juices to redistribute throughout the meat. I learned this the hard way early in my career—cutting too soon sends all that flavor straight to the cutting board.
Wrong Heat Level
Start with medium-high heat for searing, then reduce to medium when flipping. Too high heat burns the butter and herbs, while too low heat won’t crisp the skin properly. My vintage cast iron helps maintain even temperature.
Nutrition Facts
Frequently Asked Questions
What’s the best pan for crispy skin?
Use a heavy cast iron skillet for even heat distribution. A 12-inch pan fits 2 lb comfortably without crowding.
Can I use boneless thighs?
Yes, but bone-in yields juicier meat and crispier skin. Boneless cooks faster—reduce searing time to 6-7 minutes per side.
How do I know when it’s done?
Use a meat thermometer: 165°F in the thickest part. Skin should be deep golden and crispy to the touch.
What if my skin isn’t crispy?
Pat the thighs drier next time, and don’t move them during searing. Finish under the broiler for 2-3 minutes if needed.

- Rice Mix Recipe: Fluffy Grains With Customizable Flavor Boost - September 25, 2026
- Soupy Rice Recipe: Broth-Soaked Grains With Rustic Depth - September 25, 2026
- Rice Paper Pancakes Recipe: Crispy Vietnamese Breakfast Delight - September 25, 2026