
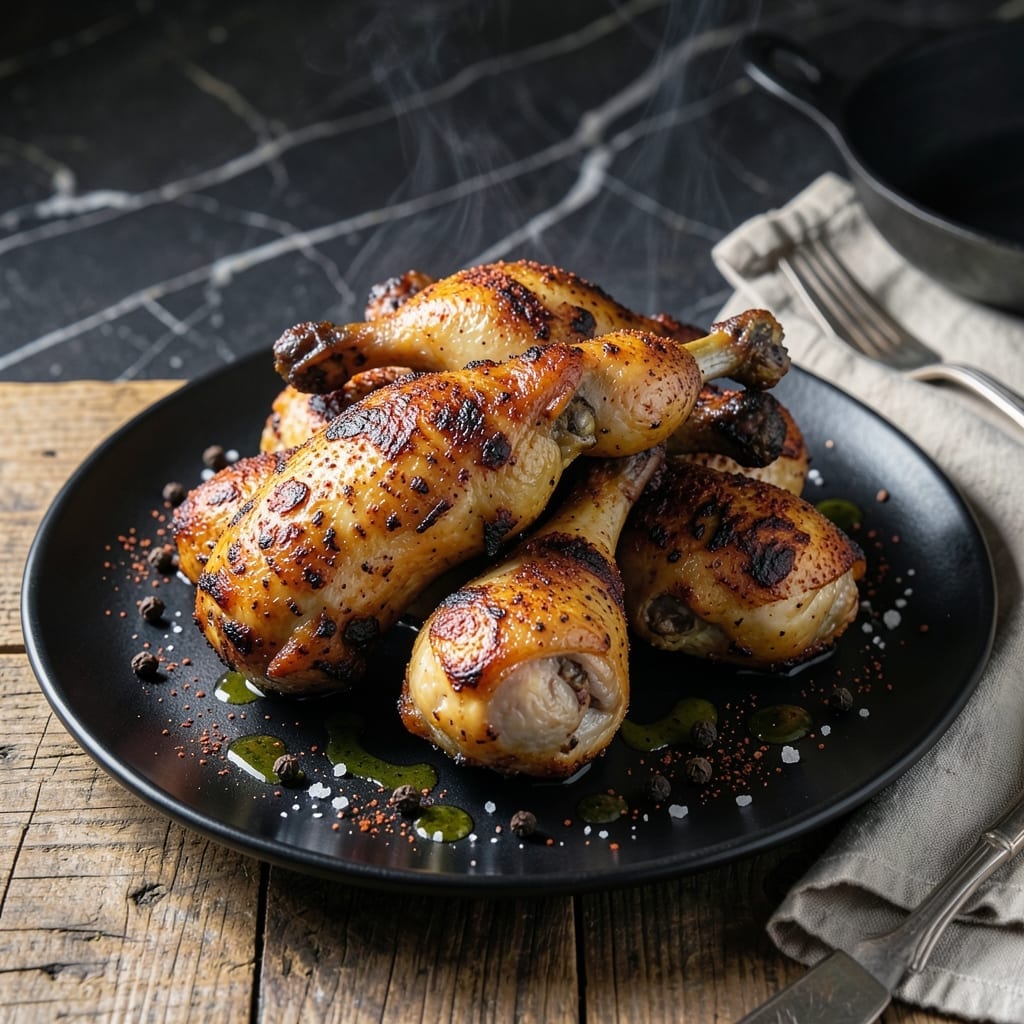
This recipe delivers crispy, char-kissed chicken with smoky depth that elevates any meal. The secret lies in high heat and precise timing to achieve that perfect sear without drying out the meat.
I developed this method after years of experimenting with different techniques to get that restaurant-quality char at home. The result is tender, juicy chicken with a deep, smoky crust that’s packed with flavor.
What you’ll get is a dish that looks as impressive as it tastes, with beautiful char marks and a rich, caramelized exterior. The contrast between the crispy skin and moist meat makes every bite satisfying.
Serve it with fresh herbs and a squeeze of lemon to brighten the smoky notes. This technique works with any cut, but thighs and drumsticks handle the high heat especially well.
Ingredients for Charred Chicken
Thighs and drumsticks bring the crispy, smoky magic to this dish with bold seasonings.
| Ingredient | Amount | Notes |
|---|---|---|
| Chicken Thighs 🍗 | 2 lb | Bone-in, skin-on preferred |
| Chicken Drumsticks 🍗 | 2 lb | Bone-in, skin-on preferred |
| Olive Oil 🫒 | 3 tbsp | High smoke point preferred |
| Kosher Salt 🧂 | 1 ½ tsp | Diamond Crystal recommended |
| Black Pepper 🌶️ | 1 tsp | Freshly ground preferred |
| Smoked Paprika 🌶️ | 1 tsp | For smoky depth |
| Garlic Powder 🧄 | 1 tsp | Not garlic salt |
| Onion Powder 🧅 | 1 tsp | Balances the seasoning |
| Dried Thyme 🌿 | ½ tsp | Or use fresh at triple amount |
| Dried Rosemary 🍃 | ½ tsp | Crushed for better flavor |
| Lemon 🍋 | 1 whole | For serving and brightness |
| Fresh Parsley 🌿 | ¼ cup | Chopped, for garnish |
| Fresh Cilantro 🌿 | ¼ cup | Chopped, optional garnish |
The chicken is everything here. Bone-in, skin-on thighs and drumsticks handle high heat best—you get that crispy skin without drying out the meat. Look for plump pieces with smooth skin at your butcher or the meat section at Whole Foods. If you’re using breasts, brine them first or they’ll dry out under this method.
No smoked paprika? Regular paprika plus a pinch of cayenne adds heat but misses the smoke. Fresh herbs work—triple the amount of dried. If you’re out of thyme or rosemary, dried oregano steps in nicely. The lemon is non-negotiable (that brightness cuts through the smoky richness), but lime works in a pinch too.
Chicken stays fresh in the fridge for 3-4 days raw, but cook it within 2 days for best texture. Leftovers keep 4 days cooked—reheat in the oven to maintain crispiness. The dried spices? They’re good for 6-12 months in a cool, dark place.
Why You’ll Love This Recipe
- Five Ingredients: I love that it only needs chicken, olive oil, salt, and pepper—nothing else to buy.
- Crispy Edges: That char gives it a smoky depth that’s ridiculuously good with just salt and pepper.
- Weeknight Savior: It’s my go-to for busy Tuesdays—thighs and drumsticks cook fast and fill everyone up.
- Leftovers Win: Honestly, the chicken tastes even better cold the next day in a sandwich or salad.
Step-by-Step Instructions for Charred Chicken
Here’s the method that guarantees perfectly crispy edges with smoky depth in every bite.
Step 1: Season the Chicken Thoroughly
Pat the 2 lb chicken thighs and 2 lb chicken drumsticks completely dry with paper towels. This removes excess moisture that would steam the skin instead of crisping it. I press down firmly to ensure every surface is dry, especially the skin-side.
In a small bowl, combine the 1.5 tsp kosher salt, 1 tsp black pepper, 1 tsp smoked paprika, 1 tsp garlic powder, 1 tsp onion powder, 0.5 tsp dried thyme, and 0.5 tsp dried rosemary. Rub this mixture evenly over all sides of the chicken, pressing it into the skin so it adheres well during cooking.
Step 2: Sear for Maximum Crispiness
Heat the 3 tbsp olive oil in a large cast-iron skillet over medium-high heat until it shimmers but doesn’t smoke. Place the chicken pieces skin-side down in a single layer, leaving space between each piece. The pan should be hot enough to sizzle immediately when the chicken contacts it.
Cook undisturbed for 8-10 minutes until the skin is deep golden brown and crispy. Resist the urge to move the pieces—this allows the skin to develop that perfect char. You’ll know it’s ready to flip when the edges look crispy and the chicken releases easily from the pan.
Step 3: Finish Cooking Through
Flip the chicken and cook for an additional 6-8 minutes on the other side. The internal temperature should reach 165°F when measured in the thickest part of the meat. For extra smoky depth, I tilt the pan slightly and baste the chicken with the hot oil for the last 2 minutes of cooking.
If the skin isn’t as crispy as you’d like, transfer the chicken to a preheated 425°F oven for 5 minutes to finish. This ensures even cooking while maintaining that coveted char. The skin should be dark brown and crispy with some slightly blackened edges—this is where the smoky flavor develops.
Step 4: Rest and Garnish
Transfer the chicken to a wire rack set over a baking sheet. Let it rest for 5-10 minutes before serving. This allows the juices to redistribute throughout the meat, ensuring every bite is moist and flavorful. The skin will stay crispy on the rack, while resting on a plate would make it soggy.
Just before serving, squeeze 1 whole lemon over the chicken for a bright contrast to the smoky, charred flavors. Garnish with the 0.25 cup fresh parsley and 0.25 cup fresh cilantro for a pop of color and freshness. The herbs add a final layer of aroma that complements the deep, charred notes perfectly.
Pro Tips For Making Charred Chicken
- Preheat the Pan: Get your pan screaming hot before adding the chicken—about 2 minutes on medium-high. I learned this the hard way after too many pale, sad-looking thighs.
- Pat Dry First: Blot the chicken with paper towels until completely dry. Sounds tedious, but it guarantees that deep char instead of steamed skin.
- Skip the Crowding: Leave space between pieces or they’ll steam instead of char. After burning three batches, I finally figured out the pan needs room to breathe.
- Rest Before Serving: Give it 5-10 minutes under foil after cooking. My grandmother swore by this, and she was right: it keeps the juices where they belong.
Wine and Beer Pairings for This charred chicken
Bold Red Wines
A medium-bodied Zinfandel from California pairs beautifully with the smoky, charred flavors. Its jammy fruit notes and peppery finish complement the crispy edges. I love Ravenswood Old Vine for this dish. 🍷
Crisp White Wines
For white wine lovers, a dry Riesling from Washington state offers bright acidity that cuts through the richness. Chateau Ste. Michelle is my go-to—its citrus notes balance the char perfectly.
Rich Dark Beers
A porter or stout enhances the smoky depth of the chicken. Try Guinness or Founders Porter—their roasted malt flavors mirror the charred edges beautifully. 🍺
Light Lager Options
A crisp Mexican lager like Modelo Negra offers a refreshing contrast to the bold flavors. Its light body and slight sweetness cleanse your palate between bites.
Rosé Pairings
A dry Provence rosé with its subtle berry notes and mineral finish works surprisingly well. Whispering Angel is widely available and pairs beautifully with the smoky, crispy chicken.
Non-Alcoholic Choices
For a non-alcoholic option, try sparkling water with a squeeze of lemon or lime. The effervescence cuts through the richness while the citrus echoes the dish’s bright finish.
Nutrition Facts
Frequently Asked Questions
What’s the best oil for charring?
Use oils with a high smoke point like avocado, grapeseed, or refined coconut oil. Olive oil works but may smoke. Avoid butter—it burns at high temps.
How do I prevent the chicken from sticking?
Ensure the pan is ripping hot before adding chicken, and don’t move it for at least 8 minutes. A well-seasoned cast-iron skillet helps create a natural non-stick surface.
Can I use boneless thighs?
Yes, but reduce cooking time by 2-3 minutes per side. Bone-in pieces tolerate high heat better and stay juicier. Boneless may dry out faster.
Why is my skin not crispy?
Pat the skin completely dry before cooking, and don’t crowd the pan. Excess moisture or low heat steams instead of crisps.

- Jollof Rice Sauce Recipe: West African Tomato and Spice Infusion - September 25, 2026
- Japanese Rice Soup Recipe: Umami-Rich Comfort in a Bowl - September 25, 2026
- Homemade Cream Of Rice Recipe: Silk-Smooth Breakfast in Minutes - September 25, 2026