
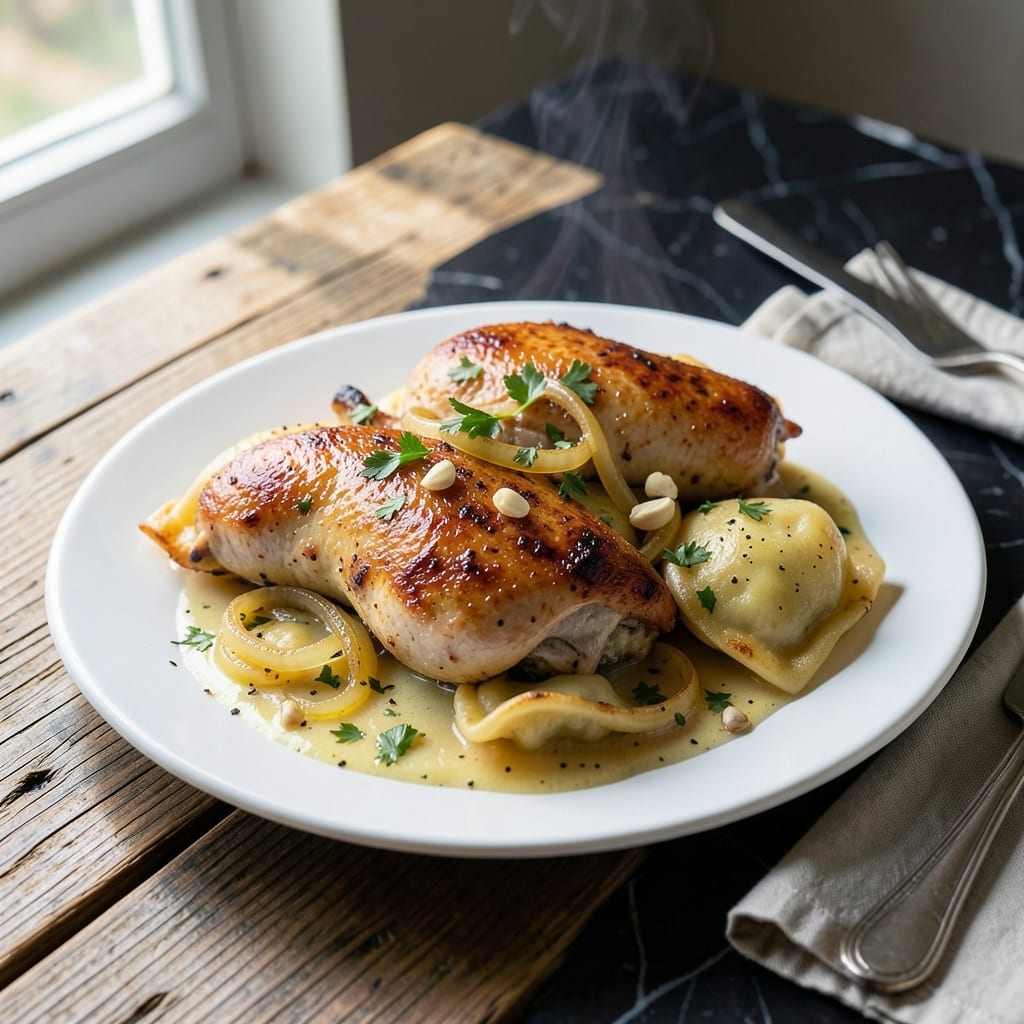
This one-skillet dish brings comfort food to a new level with tender chicken and plump pierogies in a rich, savory sauce. The beauty lies in its simplicity—everything cooks together for maximum flavor with minimal cleanup.
I developed this method to streamline dinner without sacrificing taste. The chicken sears to golden perfection while the pierogies absorb the flavorful broth, creating a meal that’s hearty and satisfying. No complicated techniques are required.
What you’ll get is a balanced plate with juicy chicken, soft pierogies, and a sauce that ties it all together. It’s the kind of dish that feels like a hug on a busy weeknight.
Ready in about 30 minutes, this recipe proves that filling meals don’t need hours in the kitchen.
Ingredients for Chicken and Pierogies
A handful of quality ingredients transform into this comforting one-skillet wonder with minimal effort.
| Ingredient | Amount | Notes |
|---|---|---|
| Boneless, Skinless Chicken Thighs 🍗 | 1 ½ lb | Patted dry for even searing |
| Frozen Potato and Cheddar Pierogies 🥟 | 16 pieces | Thawed slightly, do not cook |
| Unsalted Butter 🧈 | 3 tbsp | Divided for searing and sauce |
| Yellow Onion 🧅 | 1 whole | Medium, finely diced |
| Garlic Cloves 🧄 | 3 cloves | Minced for depth of flavor |
| All-Purpose Flour 🌾 | 2 tbsp | For thickening the sauce |
| Chicken Broth 🍲 | 1 ½ cups | Low-sodium preferred for control |
| Heavy Cream 🥛 | ½ cup | Full-fat for creaminess |
| Dijon Mustard 🟡 | 1 tbsp | Adds tangy depth to sauce |
| Dried Thyme 🌿 | 1 tsp | Crushed between fingers |
| Paprika 🌶️ | 1 tsp | Sweet or smoked for color |
| Kosher Salt 🧂 | 1 tsp | Diamond Crystal preferred |
| Freshly Ground Black Pepper 🌶️ | ½ tsp | Coarsely ground for texture |
| Fresh Parsley 🌿 | 2 tbsp | Chopped, for garnish |
| Olive Oil 🫒 | 1 tbsp | For initial searing |
The chicken thighs are non-negotiable here—bone-in works too but takes longer to cook, and you’ll want skin-on for maximum crisp. Mrs. T’s or Sargo pierogies are my go-to brands; look for them in the freezer aisle near the frozen potatoes. Chicken broth quality matters: Swanson or Better Than Bouillon deliver consistent flavor without being overly salty. The heavy cream? Full-fat only—it’s what makes the sauce luxurious.
Out of pierogies? Fresh gnocchi cook up just as well. No Dijon? Whole-grain mustard at the same amount works. Short on time? Pre-minced garlic from a jar is fine (but fresh is always better). Want more veg? Sauté a diced red bell pepper with the onion. The flour can be swapped for cornstarch at half the amount if you’re avoiding gluten, though the texture will be slightly different.
Leftovers keep beautifully—3-4 days in the fridge, and the flavors only deepen. Reheat gently on the stove with a splash of broth to loosen the sauce. This dish freezes surprisingly well for up to 2 months, though the pierogies may soften slightly. Always garnish with fresh parsley just before serving for that pop of color.
Why You’ll Love This Recipe
- One Pan Magic: I love that I can sear the chicken, sauté the onions and garlic, then toss in the frozen pierogies—all in the same pan. No mountain of dishes afterward.
- Garlicky Comfort: The butter, garlic, and caramelized onions coat those cheesy pierogies so well. Honestly, it’s the kind of meal that tastes like a hug.
- Weeknight Hero: This is my go-to when I need something fast but satisfying. It’s ready before the kids finish arguing over who gets the last fork.
- Stretches Far: Leftovers taste even better the next day, and the ingredients are budget-friendly. I’ll be real: it’s saved me on more than one paycheck-to-paycheck week.
Step-by-Step Instructions for Chicken and Pierogies
This one-skillet method delivers tender chicken and creamy pierogies with minimal cleanup.
Step 1: Sear the Chicken Thighs
Heat the 1 tbsp olive oil in a large skillet over medium-high heat until shimmering. Pat the 1.5 lb boneless, skinless chicken thighs dry, then season both sides with the 1 tsp kosher salt and 0.5 tsp freshly ground black pepper.
Add the chicken to the hot oil in a single layer. Sear undisturbed for 5-6 minutes per side until the skin is deep golden brown and the internal temperature reaches 165°F. The chicken should release easily from the pan when properly seared. Transfer to a plate and tent with foil to keep warm.
Step 2: Sauté Aromatics and Toast Pierogies
Reduce heat to medium and add 1 tbsp unsalted butter to the same skillet. Add the finely diced 1 whole yellow onion and cook for 4-5 minutes until softened and translucent, stirring occasionally to prevent browning.
Stir in the minced 3 cloves garlic cloves, 1 tsp dried thyme, and 1 tsp paprika, cooking for 30 seconds until fragrant. Add the 16 pieces frozen potato and cheddar pierogies (thawed slightly) to the skillet in a single layer. Cook undisturbed for 2-3 minutes until lightly browned on one side.
Step 3: Create the Creamy Sauce
Sprinkle the 2 tbsp all-purpose flour over the pierogies and stir to coat evenly. Slowly pour in the 1.5 cups chicken broth, whisking constantly to prevent lumps. Add the 1 tbsp Dijon mustard and remaining 2 tbsp unsalted butter, stirring until the butter melts.
Bring the mixture to a gentle simmer and cook for 3-4 minutes until the sauce thickens enough to coat the back of a spoon. Reduce heat to low, then stir in the 0.5 cup heavy cream. Simmer for 2 minutes until the sauce is rich and velvety.
Step 4: Finish and Serve
Return the seared chicken and any accumulated juices to the skillet, nestling the pieces into the sauce and pierogies. Cover and cook for 3-4 minutes until the chicken is heated through and the pierogies are tender.
Garnish with the 2 tbsp fresh parsley and serve immediately. The sauce should cling to both the chicken and pierogies, with a glossy finish and balanced seasoning. Ensure each serving includes an equal portion of chicken, pierogies, and creamy sauce for a complete meal.
Pro Tips For Making Chicken And Pierogies
- Brown the Chicken First: Sear the chicken thighs in butter over medium-high until golden—about 5-6 minutes per side. This builds flavor and keeps them juicy while they finish cooking with the pierogies.
- Thaw Pierogies Slightly: Let frozen pierogies sit at room temp for 10 minutes before cooking. They’ll brown faster and won’t stick to the pan as much.
- Skip Crowded Pans: Cook chicken in batches if needed—overcrowding steams instead of sears. I learned this the hard way after ending up with soggy pierogies and pale chicken.
- Deglaze with Garlic: After removing chicken, sauté minced garlic in the same pan for 30 seconds before adding onions. Sounds simple, but it pulls up all those browned bits for extra flavor.
Storing and Reheating Leftovers
Refrigerator Storage
Let this dish cool for no more than 2 hours before transferring to airtight containers. I use glass containers with locking lids—they keep the flavors fresh and prevent the pierogies from drying out. Store in the fridge at 40°F or below for up to 3-4 days. ❄️
Freezer Storage
For longer storage, freeze in quart-size freezer bags with excess air removed. The meal freezes well for up to 2 months. I recommend portioning into individual servings for easy reheating later. Label with the date to track freshness.
Stovetop Reheating
This is my preferred method. Transfer the meal to a skillet, add 2-3 tbsp chicken broth or water, and heat over medium-low heat for 8-10 minutes. Stir occasionally until everything is heated through and the sauce loosens. 🔥
Microwave Reheating
For quick meals, microwave individual portions covered with a damp paper towel. Heat on 70% power for 2-3 minutes, stir, then continue in 30-second intervals until reaching 165°F. Add a splash of broth if it looks dry.
Pro Tips
The pierogies may soften slightly after freezing, but the flavor remains delicious. Always garnish with fresh parsley after reheating for that pop of color. I’ve found that reheating on the stovetop maintains the best texture for both chicken and pierogies.
Nutrition Facts
Frequently Asked Questions
Can I use chicken breasts instead of thighs?
Yes, but they cook faster and can dry out. Reduce searing time to 4-5 minutes per side and monitor internal temperature closely. Thighs stay juicier and are more forgiving for beginners.
Do I need to thaw the pierogies first?
Slightly thawing helps prevent sticking, but frozen works in a pinch. Add 1-2 extra minutes to the toasting step if using straight from the freezer. Avoid overcrowding the pan.
Why is my sauce too thin?
Simmer uncovered for 1-2 extra minutes or mix 1 tsp cornstarch with cold water and stir in. The flour needs time to fully activate—patience is key for that perfect creamy consistency.

- Jollof Rice Sauce Recipe: West African Tomato and Spice Infusion - September 25, 2026
- Japanese Rice Soup Recipe: Umami-Rich Comfort in a Bowl - September 25, 2026
- Homemade Cream Of Rice Recipe: Silk-Smooth Breakfast in Minutes - September 25, 2026