
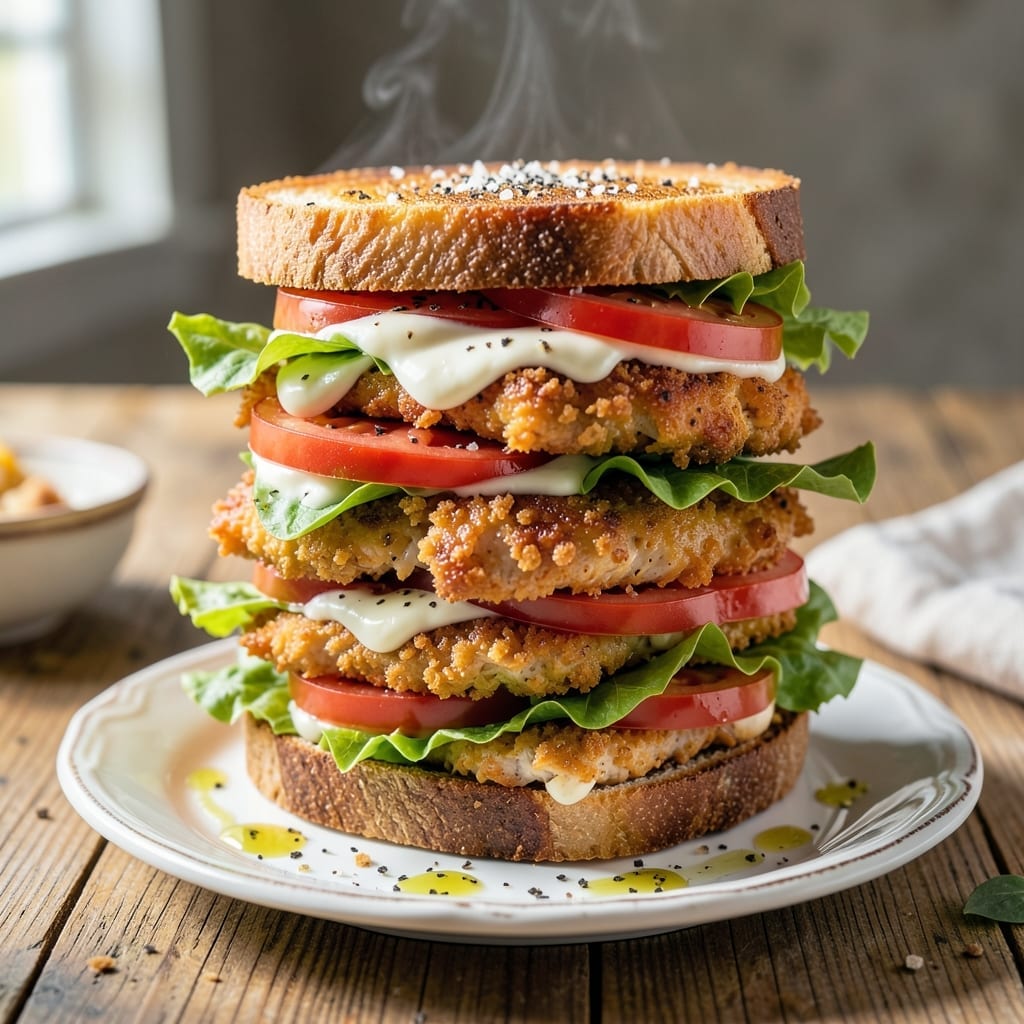
There’s a reason chicken bread sandwiches have become a beloved classic—they deliver crispy perfection in every bite. I’ve refined this method to ensure the chicken stays golden and crunchy while the bread remains soft and fresh.
The secret lies in the double-breading technique and frying at the right temperature. This creates a shatteringly crispy coating that locks in juices, while the roll acts as the perfect vessel for every layer of flavor.
What you’ll get is a sandwich where the contrast between the tender chicken, the crunch of the breading, and the softness of the roll makes it irresistible. It’s a balance of textures that keeps you coming back for more.
Perfect for lunch, dinner, or a satisfying snack. Here’s how to build it.
Ingredients for Chicken Bread Sandwich
Every crispy bite starts with these quality ingredients for the perfect sandwich experience.
| Ingredient | Amount | Notes |
|---|---|---|
| Boneless Skinless Chicken Breasts 🍗 | 1 ½ lb | Pounded to 1/2-inch thickness |
| All-Purpose Flour 🌾 | 1 cup | For initial dredging |
| Large Eggs 🥚 | 2 whole | Beaten for egg wash |
| Panko Breadcrumbs 🍞 | 2 cups | Japanese-style for extra crunch |
| Vegetable Oil 🫒 | 2 cups | For frying, neutral flavor |
| Salt 🧂 | 1 tsp | Kosher or sea salt |
| Black Pepper 🌶️ | ½ tsp | Freshly ground preferred |
| Garlic Powder 🧄 | 1 tsp | For seasoning breading |
| Paprika 🌶️ | 1 tsp | Sweet or smoked variety |
| Soft Hamburger Rolls 🍔 | 4 whole | Fresh or lightly toasted |
| Mayonnaise 🥫 | ½ cup | For sandwich spread |
| Lettuce Leaves 🥬 | 4 pieces | Iceberg or romaine |
| Sliced Tomatoes 🍅 | 4 slices | Ripe, for topping |
| Dill Pickle Slices 🥒 | 8 slices | Optional for tangy crunch |
The chicken is the foundation here. Optimal quality requires boneless, skinless breasts pounded to even thickness for consistent cooking. Panko breadcrumbs are non-negotiable—they deliver the shatteringly crispy coating the intro promises. Find them in the Asian aisle at most grocery stores or grab a bag at Trader Joe’s for a great price.
No panko on hand? Regular breadcrumbs work at half the quantity, though the texture won’t be as dramatic. Swap chicken thighs for breasts if you prefer darker meat (adjust cooking time). The vegetable oil can be canola or peanut oil instead—just avoid olive oil, as its low smoke point burns easily during frying.
Store raw chicken in the coldest part of your fridge—use within 2 days or freeze. Panko keeps in a sealed container for 6-12 months. Assemble sandwiches just before serving to maintain that perfect crunch and softness contrast the intro describes.
Why You’ll Love This Recipe
- Ready in 20: I can get crispy chicken sandwiches on the table faster than takeout arrives.
- Crispy Perfection: The panko breadcrumbs give that golden crunch with every bite.
- Lunchbox Hero: Pack leftovers for school or work – they stay delicious cold or reheated.
- Pantry Friendly: I always have these ingredients on hand, so dinner is never a last-minute panic.
Step-by-Step Instructions for Chicken Bread Sandwich
Here’s the method to achieve perfectly crispy cutlets and assemble the ultimate sandwich every time.
Step 1: Prep and Season Chicken
Begin by pounding the 1.5 lb Boneless Skinless Chicken Breasts to an even ½-inch thickness between plastic wrap. This ensures even cooking and prevents dry spots. Season both sides with 1 tsp Salt, 0.5 tsp Black Pepper, 1 tsp Garlic Powder, and 1 tsp Paprika.
Let the seasoned chicken rest for 5 minutes at room temperature. This allows the spices to adhere better and the meat to cook more evenly. The paprika adds a subtle smokiness while the garlic powder enhances the overall savory profile.
Step 2: Bread and Fry the Chicken
Set up a breading station with three shallow dishes. Place the 1 cup All-Purpose Flour in the first, beat the 2 whole Large Eggs in the second, and put the 2 cups Panko Breadcrumbs in the third. Dredge each breast in flour, shaking off excess, then dip in egg, and finally coat thoroughly with panko.
Heat the 2 cups Vegetable Oil in a deep skillet over medium-high heat to 350°F. Fry the breaded chicken for 4-5 minutes per side until golden brown and the internal temperature reaches 165°F. The panko creates an extra-crispy crust that stays crunchy even after assembly.
Step 3: Toast and Prepare Rolls
While the chicken cooks, lightly toast the 4 whole Soft Hamburger Rolls if desired. This adds a subtle crunch that complements the crispy chicken. Spread 0.5 cup Mayonnaise evenly on both halves of all rolls—this moisture barrier prevents the rolls from getting soggy.
Place one Lettuce Leaf on the bottom half of each roll. The lettuce acts as another barrier against moisture while adding freshness. Arrange one Sliced Tomato slice on each bed of lettuce for a juicy, slightly sweet contrast.
Step 4: Assemble the Sandwich
Place one fried chicken breast on each prepared roll bottom. The chicken should still be hot and crispy at this point. Top each with 2 slices Dill Pickle Slices for a tangy crunch that cuts through the richness.
Cap with the roll tops and press down gently. The heat from the chicken will slightly wilt the lettuce and warm the tomatoes, creating a perfect balance of textures and temperatures. Serve immediately while the chicken is still crispy.
Pro Tips For Making Chicken Bread Sandwich
- Pound the Chicken: Use a rolling pin or meat mallet to pound the chicken breasts to an even ½-inch thickness—this guarantees even cooking and prevents dry, chewy edges.
- Double Dredge: Dip the chicken in flour, then egg, then panko, and repeat the egg and panko step for an extra-crispy crust that actually stays put.
- Skip Cold Chicken: I learned this the hard way—let the chicken sit at room temperature for 15 minutes before frying, or the coating will slide right off.
- Heat the Oil: Drop a pinch of panko into the oil first; if it sizzles immediately, it’s ready—no guessing, no soggy breading.
Essential Equipment for Great chicken bread sandwich
Deep Fryer Setup
For the crispiest results, I use my Cuisinart Deep Fryer set to 350°F. The precise temperature control ensures even browning without burning the panko crust. A 5-quart capacity handles 4 chicken breasts without overcrowding. 🔥
Breading Station Tools
Three shallow dishes work perfectly for the flour, egg, and panko stations. I prefer stainless steel mixing bowls from OXO—they’re durable and the sloped sides make dredging easier. Place them in this exact order: flour, egg, then panko.
Frying Essentials
A candy thermometer clipped to the pot is non-negotiable for monitoring oil temp. I use Taylor’s Classic for its accuracy. Also, keep a slotted metal spoon nearby for removing chicken—it lets excess oil drain better than tongs.
Draining Station
Line a baking sheet with a wire cooling rack for draining fried chicken. This keeps the crust crispy by allowing air circulation underneath. I place paper towels below the rack to catch any drips. The chicken stays hot and crispy until assembly.
Roll Prep Tools
For even mayo spread, I use an offset spatula—it glides smoothly over the soft rolls without tearing them. A serrated knife works best for slicing rolls if they’re not pre-split. These small tools make a big difference in presentation.
Safety Gear
Always wear heat-resistant gloves when handling hot oil. I keep a fire extinguisher rated for grease fires nearby—safety first! A splatter screen also helps contain any oil pops during frying.
Nutrition Facts
Frequently Asked Questions
Can I bake the chicken instead of frying?
Yes! Bake at 400°F for 20-25 minutes on a wire rack for crispiness. Brush with oil first for better browning. It won’t be as crispy as fried, but still delicious.
What’s the best way to keep the sandwich from getting soggy?
Spread mayo on both roll halves as a moisture barrier. Assemble just before eating, and place lettuce directly against the roll. This keeps everything crisp.
Can I use chicken thighs instead of breasts?
Thighs stay juicier and are more forgiving. Pound them to ½-inch thickness and fry for 5-6 minutes per side to reach 165°F.
How do I know when the oil is hot enough?
A candy thermometer is most accurate—aim for 350°F. Without one, test with a panko crumb: it should sizzle and brown within 30 seconds.

- Jollof Rice Sauce Recipe: West African Tomato and Spice Infusion - September 25, 2026
- Japanese Rice Soup Recipe: Umami-Rich Comfort in a Bowl - September 25, 2026
- Homemade Cream Of Rice Recipe: Silk-Smooth Breakfast in Minutes - September 25, 2026