
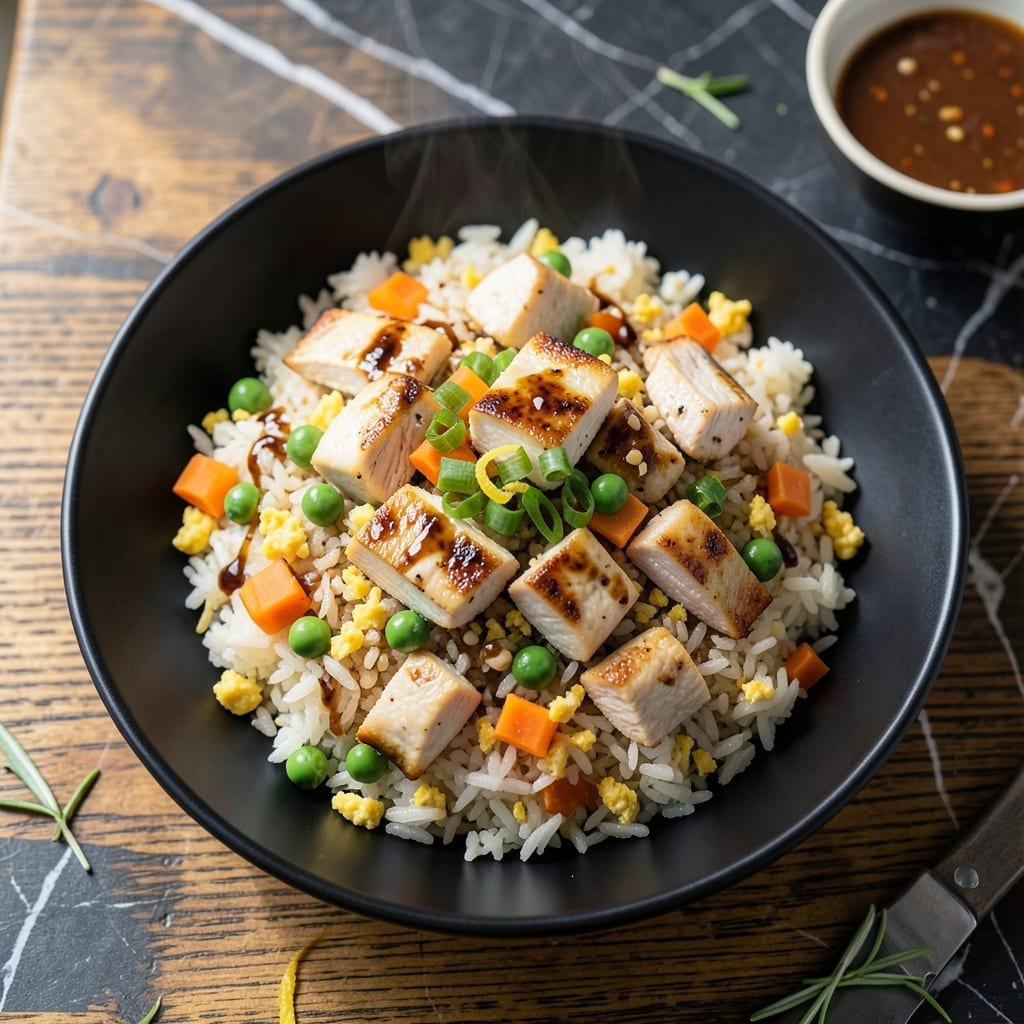
This fried rice is my go-to for busy weeknights when I need dinner on the table fast. The chicken breast stays tender while the rice gets that perfect wok-tossed texture with just the right amount of char.
Between you and me, the secret is using day-old rice and keeping everything moving in the pan. You’ll have a meal that’s quick, filling, and packed with flavor in no time.
Ingredients for Chicken Breast Fried Rice
Pantry staples plus a quick stop at the meat counter. Nothing exotic, just weeknight magic.
| Ingredient | Amount | Notes |
|---|---|---|
| Cooked White Rice 🍚 | 4 cups | Day-old, chilled preferred |
| Chicken Breast 🍗 | 1 lb | Boneless, skinless, diced |
| Large Eggs 🥚 | 2 whole | Lightly beaten |
| Green Onions 🧅 | 4 whole | Thinly sliced, whites and greens separated |
| Garlic Cloves 🧄 | 3 cloves | Minced finely |
| Frozen Peas and Carrots 🥕 | 1 cup | Thawed if frozen |
| Soy Sauce 🫒 | 3 tbsp | Low-sodium preferred |
| Sesame Oil 🫒 | 1 tbsp | Toasted variety for depth |
| Vegetable Oil 🫒 | 2 tbsp | High smoke point for frying |
| Salt 🧂 | ½ tsp | Adjust to taste |
| Black Pepper 🌶️ | ¼ tsp | Freshly ground |
| Fresh Ginger 🌿 | 1 tbsp | Grated or minced |
The rice is the foundation here. Day-old from the fridge (not fresh) gives you that perfect separated texture—no mushy bites. I grab my chicken breast from Costco when I’m stocking up, but any supermarket will do. Look for boneless, skinless to save time. The ginger? Fresh is non-negotiable (that jarred stuff tastes like sadness). Asian markets usually have the best quality for cheap.
No chicken? Shrimp or tofu work great—just cook them first and set aside. Short on veggies? Bell peppers or corn can jump in the pan. Want more punch? Fish sauce or oyster sauce adds depth (a teaspoon does the trick). The soy sauce can be tamari for gluten-free, but taste as you go—some brands are saltier than others. Frozen peas and carrots are fine (frozen works in a pinch).
Leftovers keep 3-4 days in the fridge—actually taste better the next day. Freeze for up to 3 months if you’ve got extras. I always make a double batch so lunches are sorted (worth the extra minute).
Why You’ll Love This Recipe
- One Pan Wonder: I toss everything—the rice, chicken, eggs, and garlic—into a single skillet and call it dinner.
- Garlic & Egg Magic: The sizzling garlic with those fluffy scrambled eggs? That’s the flavor combo I crave every time.
- Meal Prep MVP: I make a big batch on Sunday, and it tastes just as good reheated for lunch all week.
- Budget Stretcher: A pound of chicken breast and leftover rice feeds my family of four without breaking the bank.
Step-by-Step Instructions for Chicken Breast Fried Rice
This method delivers that takeout flavor with minimal effort—perfect for busy evenings.
Step 1: Prep All Ingredients Before Cooking
Start by dicing the 1 lb Chicken Breast into ½-inch pieces and seasoning lightly with 0.5 tsp Salt and 0.25 tsp Black Pepper. Lightly beat the 2 whole Large Eggs in a small bowl. I like to have everything ready to go—this dish cooks fast once you start.
Thinly slice the 4 whole Green Onions, separating the white and green parts. Mince the 3 cloves Garlic Cloves and grate the 1 tbsp Fresh Ginger. Thaw the 1 cup Frozen Peas and Carrots if needed. Having all your ingredients prepped ensures you won’t burn anything while scrambling for the next addition.
Step 2: Cook Chicken and Scramble Eggs
Heat 1 tbsp Vegetable Oil in a wok or large skillet over high heat until shimmering. Add the diced chicken breast and cook for 4-5 minutes until no longer pink and lightly browned. Remove the chicken to a plate and set aside.
In the same pan, add the remaining 1 tbsp Vegetable Oil and pour in the beaten eggs. Scramble quickly with a spatula for 30-45 seconds until just set but still slightly runny. Transfer the eggs to the plate with the chicken. The residual heat will finish cooking them perfectly.
Step 3: Sauté Aromatics and Vegetables
Return the wok to high heat and add the white parts of the green onions, minced garlic, and grated ginger. Stir-fry for 30-45 seconds until fragrant—this builds the flavor base. Toss in the thawed peas and carrots and cook for 2 minutes until heated through.
I keep the ingredients moving constantly to prevent burning. The aromatics should sizzle and release their scent, but not brown. If they start to darken too quickly, lower the heat slightly.
Step 4: Combine Everything and Season
Add the 4 cups Cooked White Rice to the wok, breaking up any clumps with your spatula. Stir-fry for 2-3 minutes until the rice is hot and starting to crisp slightly. Return the chicken and eggs to the pan.
Drizzle the 3 tbsp Soy Sauce and 1 tbsp Sesame Oil over everything. Toss well for 1-2 minutes until all ingredients are evenly coated and the rice has a lightly toasted appearance. The soy sauce should darken the rice slightly, and the sesame oil adds a nutty aroma.
Step 5: Finish and Garnish
Remove from heat and stir in the green parts of the green onions. Taste and adjust seasoning with additional salt if needed. The final result should be fragrant with a balance of savory, slightly sweet, and umami flavors.
Serve immediately while hot. Each bite should have a mix of tender chicken, fluffy eggs, crisp vegetables, and perfectly seasoned rice. This dish comes together in under 30 minutes, making it ideal for a quick weeknight meal.
Pro Tips For Making Chicken Breast Fried Rice
- Chill Your Rice: Use day-old rice straight from the fridge—it’s drier and fries up fluffier instead of turning mushy. I learned this the hard way after making soggy fried rice one too many times.
- Velvet the Chicken: Slice the chicken breast thin, then toss with 1 teaspoon cornstarch and a pinch of salt before cooking. It stays tender and juicy, even if you overcook it slightly.
- Cook Eggs Separately: Scramble the eggs first, then set them aside. Throwing them in with the chicken leads to rubbery bits—this way, they stay soft and distinct.
- High Heat, Fast Stir: Crank the heat to max and keep the rice moving constantly. Sounds obvious, but that’s how you get those coveted crispy edges without burning the garlic or green onions.
Storing and Reheating This chicken breast fried rice
Refrigerator Storage
Let your fried rice cool for no more than 2 hours before transferring to airtight containers. I use glass containers with snap-tight lids. Store in the fridge at 40°F or below for up to 3-4 days. The flavors actually deepen overnight as everything melds together. ❄️
Freezer Storage
For longer storage, portion into freezer-safe bags or containers. Squeeze out excess air to prevent freezer burn. Fried rice freezes well for up to 3 months without texture loss. I always label with the date so I
Stovetop Reheating
This is my preferred method. Heat 1 tbsp vegetable oil in a skillet over medium heat. Add the fried rice and spread it out. Sprinkle 1-2 tbsp water to add moisture, cover, and heat for 4-5 minutes, stirring occasionally. 🔥
Microwave Reheating
Place a single portion on a microwave-safe plate and sprinkle 1 tbsp water over it. Cover with a damp paper towel. Microwave on high for 1-2 minutes, stir, then heat in 30-second intervals until reaching 165°F.
Reviving Texture
If your fried rice seems dry after reheating, add a drizzle of sesame oil and toss well. For extra crispiness, spread it on a baking sheet and broil for 2-3 minutes under high heat. This brings back that fresh wok-tossed texture.
Nutrition Facts
Frequently Asked Questions
Can I use fresh rice instead of day-old?
Fresh rice has too much moisture and will turn mushy. Always use day-old, chilled rice for the perfect texture. Spread fresh rice on a tray to dry out for 1 hour if you’re in a pinch.
How do I keep the chicken tender?
Cut into uniform ½-inch pieces and cook over high heat for just 4-5 minutes. Overcooking makes it tough. Removing it before fully done lets residual heat finish cooking.
Why does my fried rice taste bland?
Likely under-seasoned. Use low-sodium soy sauce so you can control saltiness. Add a dash of fish sauce or oyster sauce for extra umami depth.
Can I make this gluten-free?
Yes! Swap soy sauce for tamari or coconut aminos. Check all labels for hidden gluten. The rest of the ingredients are naturally gluten-free.

- Rice Cake Cereal Recipe: Crunchy Homemade Breakfast Delight - September 25, 2026
- Pancake Recipe Using Rice Flour: Light and Airy Gluten-Free Stacks - September 25, 2026
- Japanese Rice Porridge Recipe: Silky Congee With Umami Depth - September 25, 2026