
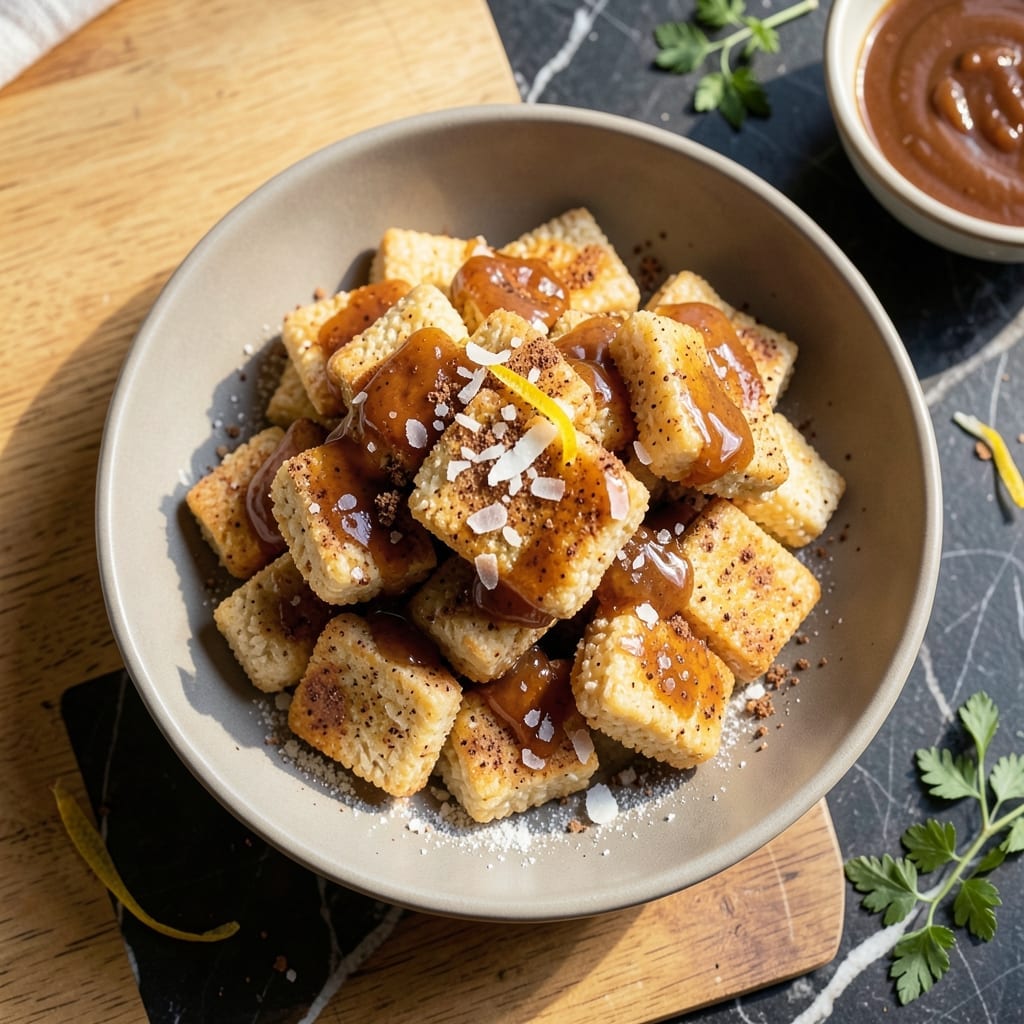
I developed this fast breakfast solution when store-bought options felt too processed. The result is a homemade cereal with satisfying crunch and natural sweetness.
Simple ingredients transform into crispy rice cakes that stay fresh for days. The baking process creates uniform texture without special equipment.
Each bite delivers light, airy crunch with subtle flavor. This method proves you can make superior cereal at home with minimal effort.
Perfect for busy mornings or snacking straight from the jar. The recipe scales easily for meal prep.
Ingredients for Rice Cake Cereal
Simple pantry staples create this crispy, naturally sweetened breakfast in minutes.
| Ingredient | Amount | Notes |
|---|---|---|
| White Rice 🍚 | 2 cups | Short-grain for best texture |
| Maple Syrup 🍁 | ½ cup | Grade A for pure flavor |
| Coconut Oil 🥥 | ¼ cup | Melted for even coating |
| Vanilla Extract 🌿 | 2 tsp | Pure extract recommended |
| Ground Cinnamon 🌶️ | 1 tbsp | Freshly ground preferred |
| Sea Salt 🧂 | ½ tsp | Fine grain for even distribution |
| Almond Milk 🥛 | ½ cup | Unsweetened for balance |
| Chia Seeds 🌱 | 2 tbsp | Optional for extra crunch |
| Sliced Almonds 🌰 | ¼ cup | Lightly toasted for flavor |
| Coconut Flakes 🥥 | ¼ cup | Unsweetened for texture |
| Baking Powder ⚗️ | ½ tsp | Ensures light texture |
The rice is critical here—short-grain white rice (like sushi rice) gives the right crispy texture. Whole Foods or Trader Joe’s have reliable options. Avoid instant rice; it lacks the starch needed for cohesion. The coconut oil should be unrefined and virgin for best flavor. I source mine from Costco for bulk savings without sacrificing quality.
No maple syrup? Agave nectar or date syrup work in a pinch at a 1:1 ratio. Out of almond milk? Any plant-based milk (oat, soy, cashew) substitutes seamlessly. Skip the chia seeds? No problem—add sunflower seeds or pumpkin seeds instead. The cinnamon can be swapped for cardamom or nutmeg for a different warmth.
Store in an airtight container at room temperature for up to 2 weeks. For longer storage, freeze for 3 months. The cereal stays crisp if kept dry—add a silica packet if humidity is an issue. Perfect for grab-and-go mornings or late-night snacking straight from the jar.
Why You’ll Love This Recipe
- One Pot Wonder: I just toss white rice with coconut oil and maple syrup in a single pan—minimal mess, maximum flavor.
- Warm Spiced Comfort: The cinnamon and vanilla make it taste like a cozy hug in cereal form, honestly.
- Breakfast or Snack: I’ve served this for rushed mornings and midnight cravings—it works for both.
- Budget Friendly: A big batch costs pennies and keeps well, so I make it weekly without guilt.
Step-by-Step Instructions for Rice Cake Cereal
This method ensures a perfectly crispy texture with balanced sweetness and warm spice notes.
Step 1: Prepare the Rice Mixture
In a large mixing bowl, combine the 2 cups White Rice with 0.5 cup Maple Syrup, 0.25 cup Coconut Oil, 2 tsp Vanilla Extract, 1 tbsp Ground Cinnamon, and 0.5 tsp Sea Salt. Stir until the rice is evenly coated and the mixture looks slightly sticky.
The coconut oil should be melted to ensure even distribution, and the maple syrup will bind everything together as it bakes. This step is crucial for achieving the right consistency before baking.
Step 2: Add Leavening and Mix-Ins
Sprinkle the 0.5 tsp Baking Powder over the rice mixture and stir to incorporate. Then fold in the 0.5 cup Almond Milk, 2 tbsp Chia Seeds, 0.25 cup Sliced Almonds, and 0.25 cup Coconut Flakes. The almond milk adds moisture, while the chia seeds and coconut flakes provide texture.
Ensure all ingredients are evenly distributed. The baking powder will help create a light texture, while the almonds and coconut flakes add a satisfying crunch to each bite.
Step 3: Spread and Shape the Mixture
Preheat your oven to 325°F. Line a baking sheet with parchment paper and lightly grease it to prevent sticking. Spread the rice mixture evenly onto the prepared baking sheet, pressing it down gently to form a thin, uniform layer.
The mixture should be about ¼-inch thick to ensure even baking and crispiness. Use a spatula to smooth the surface, and check that the edges are not too thick, as they may burn before the center cooks through.
Step 4: Bake Until Golden and Crisp
Bake in the preheated oven for 25-30 minutes, or until the edges turn golden brown and the center is firm to the touch. Rotate the baking sheet halfway through the baking time to ensure even browning.
Watch closely during the last 5 minutes to prevent over-browning. The cereal is done when the entire surface is golden and crisp. Remove it from the oven and let it cool completely on the baking sheet.
Step 5: Break and Store
Once cooled, break the cereal into bite-sized pieces. The texture should be crisp and crunchy, with a light, airy feel. Store the cereal in an airtight container at room temperature for up to 2 weeks.
If the cereal loses its crispness over time, you can revive it by spreading it on a baking sheet and warming it in a 300°F oven for 5-10 minutes. Serve with your favorite milk or yogurt for a delightful breakfast.
Pro Tips For Making Rice Cake Cereal
- Toast the Rice: Cook the rice in a dry pan for 3-4 minutes before adding liquids—this brings out a nutty depth that plain rice lacks. I learned this the hard way after my first batch tasted flat.
- Warm the Syrup: Gently heat the maple syrup with the coconut oil before mixing—cold syrup seizes up and makes the cereal clump. About 30 seconds on low does the trick.
- Skip the Overmix: Stir just until the rice is coated, then stop. Overworking it turns the cereal gummy instead of crisp.
- Add Cinnamon Last: Fold in the cinnamon after baking, not before. Adding it early can make the cereal bitter—I was skeptical until I tried it both ways.
Serving Suggestions for rice cake cereal
Breakfast Bowl Style
Serve this in a deep bowl with 1 cup chilled almond milk for the classic cereal experience. The milk softens the crunch just enough while keeping the texture satisfying. I love adding a handful of fresh berries for natural sweetness. 💛
Yogurt Parfait Layers
Layer pieces between ½ cup dairy-free yogurt and ¼ cup granola for a protein-packed parfait. The yogurt’s creaminess contrasts beautifully with the crispy cereal. Drizzle with 1 tbsp maple syrup for extra indulgence.
Trail Mix Fusion
Break into smaller pieces and mix with ¼ cup dark chocolate chips and ¼ cup dried cranberries for a portable snack. This combination gives energy-boosting crunch perfect for hiking or office snacking.
Smoothie Topper
Crush lightly and sprinkle over any smoothie bowl for added texture. Works especially well with banana-berry blends. The cereal stays crisp for 10-15 minutes before softening—enough time to enjoy.
Ice Cream Accompaniment
Use as a topping for vanilla coconut milk ice cream. The temperature contrast between cold ice cream and room-temperature cereal creates a delightful experience. Sprinkle with cinnamon for warmth.
Lunchbox Snack
Pack in small reusable containers for a healthy lunchbox addition. Pair with apple slices or peanut butter for dipping. The cereal maintains its crunch for 3-4 days in airtight containers. ✨
Nutrition Facts
Frequently Asked Questions
Can I use brown rice instead?
Short-grain white rice works best for crispiness. Brown rice has more fiber and may not get as crunchy. If trying brown rice, soak it for 1 hour first and extend baking time by 5-10 minutes.
Why did my cereal turn out soggy?
This usually happens if the mixture is too thick or not baked long enough. Spread it thinly (¼-inch) and bake until golden brown. Store in an airtight container immediately after cooling.
Can I make this without an oven?
An air fryer works at 300°F for 12-15 minutes, shaking halfway. For stovetop, use a nonstick pan on low heat, stirring constantly until crisp.
How do I adjust the sweetness?
Reduce maple syrup by 2 tbsp for less sweetness or add 1 tbsp for more. Agave or date syrup can replace maple at a 1:1 ratio.

- Rice Cake Cereal Recipe: Crunchy Homemade Breakfast Delight - September 25, 2026
- Pancake Recipe Using Rice Flour: Light and Airy Gluten-Free Stacks - September 25, 2026
- Japanese Rice Porridge Recipe: Silky Congee With Umami Depth - September 25, 2026