
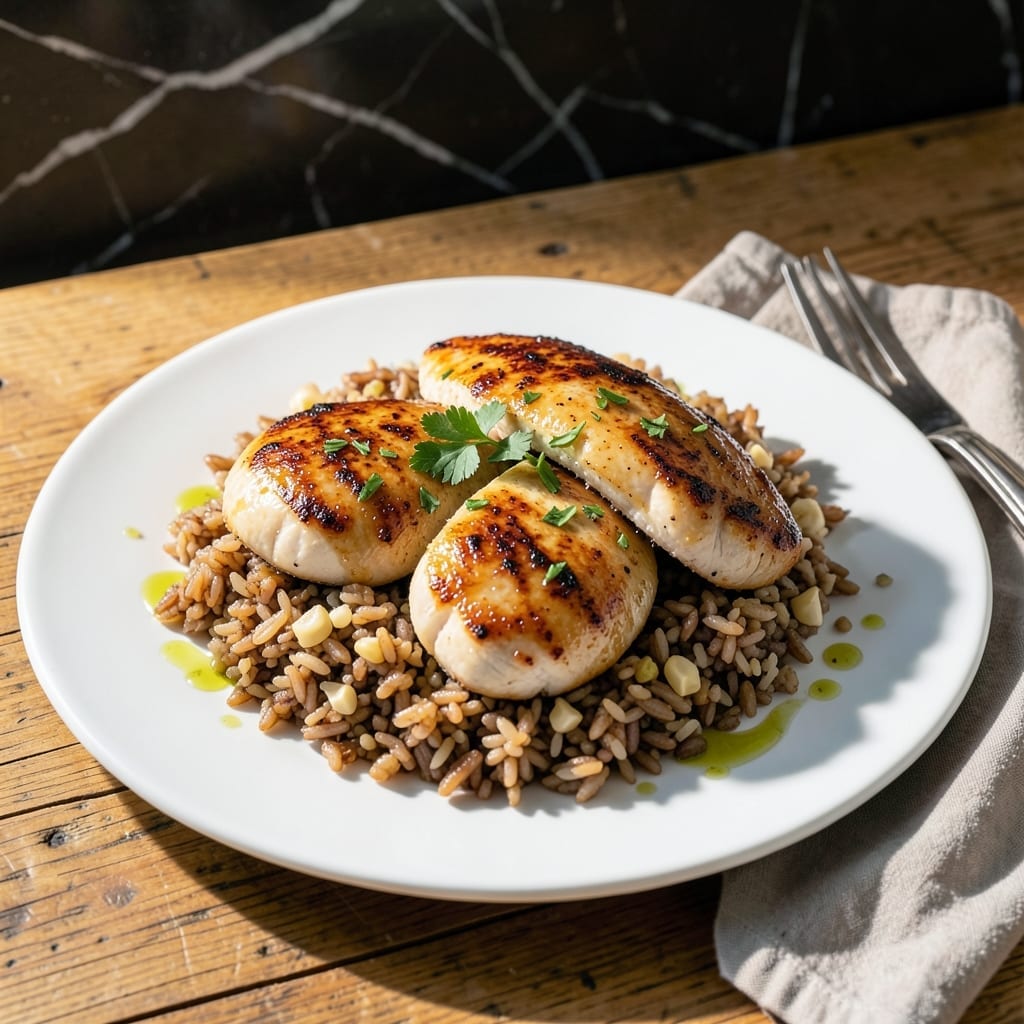
This protein-packed bowl combines tender chicken with the nutty richness of brown rice and quinoa for a satisfying meal. The textures alone make it worth trying.
I developed this recipe to create a balanced dish that’s both hearty and nutritious. It’s simple, flavorful, and perfect for meal prep.
Ingredients for Chicken Brown Rice and Quinoa
Tender chicken, nutty grains, and bold seasonings build a satisfying, protein-rich bowl.
| Ingredient | Amount | Notes |
|---|---|---|
| Boneless, Skinless Chicken Breasts 🍗 | 1 ½ lb | Cut into bite-sized pieces |
| Brown Rice 🍚 | 1 cup | Uncooked, long-grain preferred |
| Quinoa 🌾 | ¾ cup | Uncooked, rinsed well |
| Chicken Broth 💧 | 3 cups | Low-sodium preferred |
| Olive Oil 🫒 | 2 tbsp | Extra-virgin for best flavor |
| Garlic Cloves 🧄 | 3 cloves | Minced finely |
| Yellow Onion 🧅 | 1 whole | Diced medium |
| Salt 🧂 | 1 tsp | Kosher or sea salt |
| Black Pepper 🌶️ | ½ tsp | Freshly ground preferred |
| Dried Thyme 🍃 | 1 tsp | Or use fresh at triple amount |
| Bay Leaf 🌿 | 1 whole | Removed before serving |
| Lemon Juice 🍋 | 1 tbsp | Freshly squeezed |
| Fresh Parsley 🌿 | ¼ cup | Chopped, for garnish |
The chicken is the foundation here. Boneless, skinless breasts stay tender when cooked properly—avoid overcooking. Costco has great bulk options if you’re meal prepping. For the grains, brown rice and quinoa need a good rinse to remove excess starch. Look for organic options at Whole Foods if quality is a priority.
No chicken broth? Vegetable broth works in a pinch, though the flavor profile shifts slightly. Fresh herbs can replace dried—use triple the amount. If you’re short on time, pre-cooked quinoa from Trader Joe’s cuts prep by 15 minutes. The lemon juice brightens everything up—don’t skip it.
This keeps beautifully for 4-5 days in the fridge, making it ideal for meal prep. Reheat with a splash of water to keep grains moist. Freezes well for up to 3 months (thaw overnight before reheating).
Why You’ll Love This Recipe
- One Pot Wonder: I toss everything in a single pot—chicken, rice, quinoa, broth—and let the stove do the work.
- Rich, Savory Depth: The chicken broth infuses every bite of rice and quinoa with a warmth that plain water just can’t match.
- Meal Prep Magic: I make a big batch on Sunday and portion it out for lunches all week—still tastes fresh reheated.
- Budget Stretcher: Boneless chicken breasts and pantry staples keep this dish filling without breaking the bank.
Step-by-Step Instructions for Chicken Brown Rice and Quinoa
Follow this method for perfectly cooked grains and tender chicken with robust, layered flavors.
Step 1: Sear the Chicken
Heat the 2 tbsp olive oil in a large skillet over medium-high heat. Add the 1.5 lb boneless, skinless chicken breasts (cut into bite-sized pieces) and cook for 5-6 minutes, turning occasionally, until the pieces are golden brown on all sides and cooked through to 165°F internally.
Season with 1 tsp salt, 0.5 tsp black pepper, and 1 tsp dried thyme as it cooks. Remove the chicken from the skillet and set aside. This searing step builds a flavorful foundation and ensures the chicken stays juicy.
Step 2: Sauté the Aromatics
In the same skillet, add the diced yellow onion and cook over medium heat for 3-4 minutes until softened and just beginning to turn translucent. Add the 3 cloves minced garlic and cook for an additional 30 seconds until fragrant.
Be careful not to let the garlic burn—it should smell sweet and aromatic, not bitter. This base will infuse the grains with rich, savory depth as they cook.
Step 3: Toast the Grains
Stir in the 1 cup brown rice and 0.75 cup quinoa into the skillet with the onions and garlic. Cook for 1-2 minutes, stirring constantly, until the grains are lightly toasted and smell nutty. This step enhances their natural flavors and prevents a starchy aftertaste.
Add the 1 whole bay leaf to the skillet, then carefully pour in the 3 cups chicken broth. Stir to combine, scraping up any browned bits from the bottom of the pan.
Step 4: Simmer Until Tender
Bring the mixture to a boil, then reduce the heat to low, cover, and let it simmer for 35-40 minutes. Do not stir during cooking, as this can break the grains and release excess starch. The liquid should be fully absorbed, and the grains should be tender with a slight bite.
If the mixture looks dry before the grains are done, add a splash of water and continue cooking. Once finished, remove the skillet from heat and let it sit covered for 5 minutes to steam.
Step 5: Finish and Serve
Remove the bay leaf and discard. Stir in the 1 tbsp lemon juice to brighten the flavors. Gently fold the reserved chicken into the grain mixture, ensuring it is evenly distributed and heated through.
Taste and adjust seasoning if needed. Garnish with the 0.25 cup chopped fresh parsley before serving. The parsley adds a fresh, vibrant contrast to the hearty, nutty flavors of the dish.
Pro Tips For Making Chicken Brown Rice And Quinoa
- Toast the Grains: Before adding liquid, cook the brown rice and quinoa in olive oil for 2-3 minutes until nutty and fragrant. I learned this the hard way—skipping it leaves the dish tasting flat. —
- Pound the Chicken: Use the flat side of a knife or a rolling pin to even out the chicken breasts to ½-inch thickness. Sounds weird, but it works: they cook through at the same time without drying out. —
- Use Warm Broth: Pour in chicken broth that’s been heated in the microwave or on the stove. After burning three batches, I finally figured out cold broth stalls the cooking and makes the grains gummy. —
- Rest Before Serving: Let the finished dish sit covered for 10 minutes off the heat. My grandmother swore by this, and she was right: the grains absorb the last bit of liquid and plump up perfectly.
Troubleshooting chicken brown rice and quinoa
Grains Still Crunchy
If your grains are undercooked, it’s likely due to insufficient liquid. Brown rice and quinoa need 3 cups chicken broth for 1.75 cups total grains. Check your lid fit—if steam escapes, add ¼ cup hot water and cook 5-10 more minutes. 💡
Mushy Texture
Overcooked or stirred grains release too much starch. Never lift the lid during simmering, and avoid stirring after adding liquid. If mushy, spread on a baking sheet to dry slightly in a 300°F oven for 5 minutes.
Dry Mixture
If the dish looks dry before grains are tender, add ½ cup hot water or broth and continue cooking. For meal prep, store with a damp paper towel on top to retain moisture when reheating.
Bland Flavor
Boost flavor by toasting grains longer in step 3—aim for a deep nutty aroma. Finish with extra lemon juice or a pinch of salt. I always taste before serving and adjust with ½ tsp salt or more dried thyme. 🌟
Chicken Overcooked
Sear chicken just until 160°F internal temp—it will reach 165°F while resting. Cut into even 1-inch pieces for uniform cooking. If already dry, shred and mix with a splash of broth before combining.
Burnt Garlic
Garlic burns in 30 seconds over high heat. Keep heat at medium when sautéing aromatics. If it browns too quickly, remove pan from heat for 10 seconds to cool slightly before adding grains.
Nutrition Facts
Frequently Asked Questions
Can I use chicken thighs instead of breasts?
Yes! Use 1.5 lb boneless, skinless thighs and cook to 175°F for juicier results. They hold up better to long cooking and add richer flavor.
Why toast the grains first?
Toasting for 1-2 minutes deepens their nutty flavor and prevents mushiness. Skipping this step can result in a bland, starchy texture.
How do I store leftovers?
Keep in an airtight container for 4-5 days in the fridge. For longer storage, freeze for up to 3 months.
Can I make this in a rice cooker?
Yes, but sauté aromatics in a pan first. Then combine all ingredients in the cooker and use the standard setting for 40 minutes.

- Jollof Rice Sauce Recipe: West African Tomato and Spice Infusion - September 25, 2026
- Japanese Rice Soup Recipe: Umami-Rich Comfort in a Bowl - September 25, 2026
- Homemade Cream Of Rice Recipe: Silk-Smooth Breakfast in Minutes - September 25, 2026