
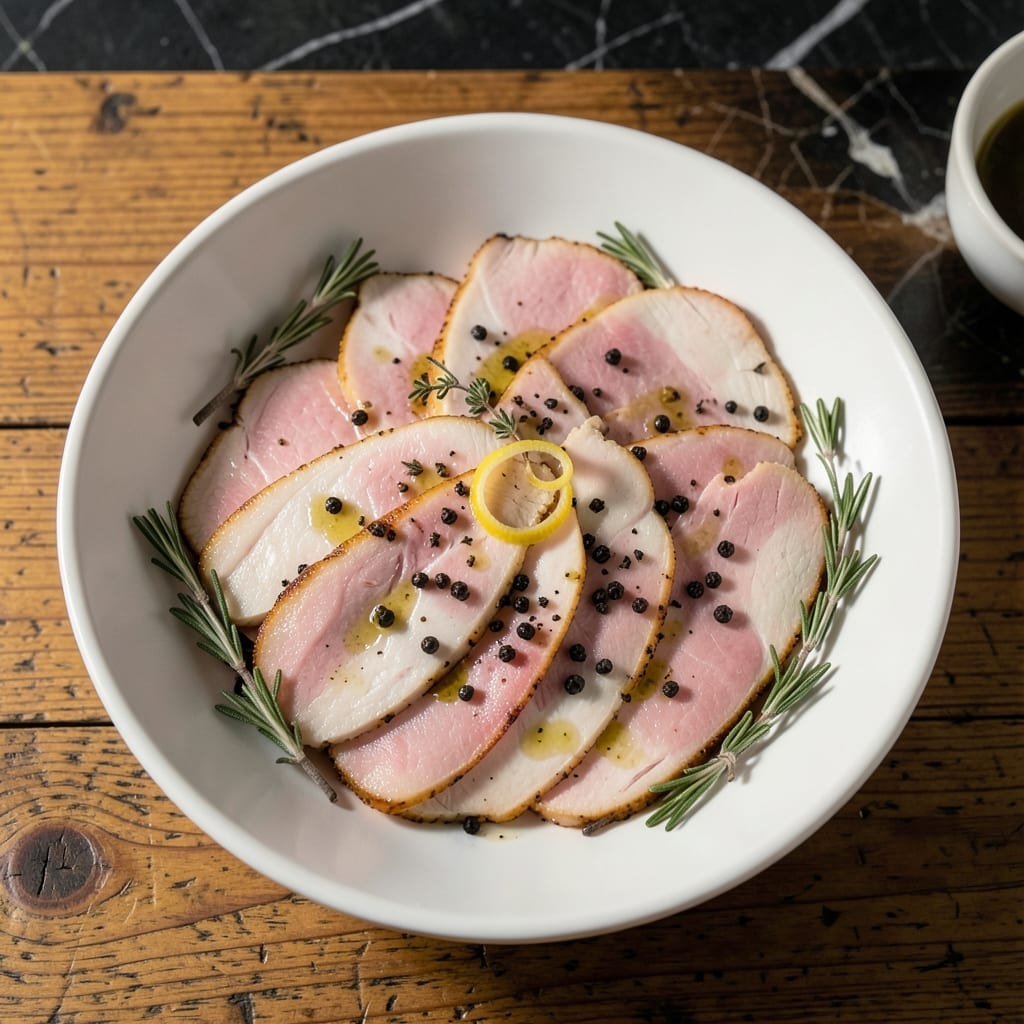
Making deli-style chicken at home puts you in complete control of flavor, texture, and quality. This method transforms simple chicken breast into tender, sliceable meat perfect for sandwiches and charcuterie boards.
The process involves curing the chicken with a precisely balanced salt and sugar mixture, then slowly cooking it to maintain moisture. Proper chilling before slicing ensures clean, paper-thin slices that rival any deli counter.
What you get is homemade chicken deli meat with superior taste and texture—no preservatives, just pure flavor. The meat stays juicy for days when stored properly in the refrigerator.
Use it for classic sandwiches, salads, or as a protein boost in any meal. Here’s how to make it perfectly every time.
Ingredients for Chicken Deli Meat
Transform simple chicken breasts into tender, sliceable deli meat with these ingredients.
| Ingredient | Amount | Notes |
|---|---|---|
| Boneless Skinless Chicken Breasts 🍗 | 2 lb | Uniform thickness for even cooking |
| Kosher Salt 🧂 | ¼ cup | Diamond Crystal preferred for curing |
| Granulated Sugar 🍚 | 2 tbsp | Balances salt in cure |
| Black Peppercorns 🌶️ | 1 tsp | Freshly cracked for best flavor |
| Dried Thyme 🌿 | 1 tsp | Crushed to release oils |
| Dried Rosemary 🌿 | 1 tsp | Crushed to release oils |
| Bay Leaves 🍃 | 2 whole | For aromatic infusion during cooking |
| Garlic Cloves 🧄 | 4 cloves | Smashed but not peeled |
| Olive Oil 🫒 | 1 tbsp | For light coating before cooking |
| White Wine Vinegar 🍷 | 1 tbsp | Adds subtle tang to cure |
| Cold Water 💧 | 2 cups | For brine consistency |
| Ice Cubes ❄️ | 2 cups | For rapid chilling post-cook |
The chicken quality is paramount. Boneless, skinless breasts from Whole Foods or Costco offer consistent thickness and freshness. For the cure, Diamond Crystal kosher salt is ideal due to its coarse texture and clean flavor. The herbs—thyme, rosemary, bay—should be freshly crushed to maximize their aromatic contribution during the curing and cooking process.
No white wine vinegar? Apple cider vinegar works as a substitute with slightly fruitier notes. Dried herbs can be swapped for fresh at one-third the quantity, but dried are preferred here for even distribution. If bay leaves are unavailable, a pinch of ground allspice offers a similar depth. The garlic must be fresh—jarred minced garlic lacks the necessary potency for this application.
The cured chicken keeps remarkably well—5 days in the refrigerator when properly stored in its brine. For longer storage, slice and freeze between parchment layers for up to 3 months. Always chill completely before slicing to achieve those paper-thin deli-style cuts.
Why You’ll Love This Recipe
- Set and Forget: It’s just chicken, salt, sugar, and spices in a brine—pop it in the fridge and walk away.
- Herb-Infused Taste: The thyme and cracked peppercorns give every slice that classic deli counter flavor without the mystery additives.
- Meal Prep Hero: I slice it Sunday and it fuels wraps, sandwiches, and salads straight through Wednesday.
- Stretches the Budget: A couple of chicken breasts turn into a week’s worth of lunches for pennies per serving.
Step-by-Step Instructions for Chicken Deli Meat
This method ensures perfectly seasoned, tender slices every time with professional results.
Step 1: Prepare the Wet Cure Solution
In a large bowl, combine the 2 cups cold water with 0.25 cup kosher salt, 2 tbsp granulated sugar, 1 tbsp white wine vinegar, and 1 tbsp olive oil. Whisk vigorously until the salt and sugar fully dissolve—this may take 2-3 minutes of constant stirring.
This brine solution creates the perfect curing environment, balancing salt for preservation with sugar for caramelization. The vinegar adds a subtle tang that mimics commercial deli meat flavors while keeping the chicken moist.
Step 2: Infuse with Aromatics and Cure
Add the 1 tsp black peppercorns, 1 tsp dried thyme, 1 tsp dried rosemary, 2 whole bay leaves, and 4 cloves garlic cloves to the brine. Crush the peppercorns and dried herbs between your fingers before adding to release their essential oils.
Submerge the 2 lb boneless skinless chicken breasts completely in the brine. If they float, place a small plate on top to keep them immersed. Refrigerate for 12-24 hours—this extended cure time ensures deep flavor penetration and proper texture development.
Step 3: Cook to Perfect Doneness
Remove the chicken from the brine and pat dry with paper towels. Discard the used brine and aromatics. Place the chicken in a pot and cover completely with fresh cold water. Add 1 bay leaf for additional aroma.
Bring to a gentle simmer over medium heat, then reduce to low heat and poach for 15-20 minutes until the internal temperature reaches 160°F. The chicken should be firm to the touch but still juicy—overcooking will result in dry deli meat.
Step 4: Rapid Chill for Slicing
Prepare an ice bath by combining the 2 cups ice cubes with enough cold water to submerge the chicken completely. Transfer the cooked chicken directly from the poaching liquid to the ice bath. This immediate chilling stops the cooking process and helps the meat retain its moisture.
Let the chicken cool in the ice bath for 15-20 minutes, turning occasionally to ensure even chilling. The meat should feel cold throughout when properly chilled. Pat dry before slicing to prevent the blade from dragging.
Step 5: Slice Thinly for Deli-Style Results
Using a sharp slicing knife, trim any irregular edges from the chicken breasts for uniform slices. Slice against the grain into ⅛-inch thick pieces for authentic deli meat texture. The slices should be thin enough to fold without breaking but thick enough to hold their shape.
For best results, slice only what you need immediately and store the remainder whole in the refrigerator for up to 5 days. The meat will continue to absorb flavors as it rests, developing more depth over time.
Pro Tips For Making Chicken Deli Meat
- Brine Overnight: Soak the chicken breasts in the salt-sugar water for at least 12 hours—any less and the seasoning won’t penetrate evenly, leaving you with bland spots.
- Pound to Even Thickness: Use a rolling pin or meat mallet to flatten the breasts to ½-inch thickness so they cook uniformly and don’t dry out on the edges while the center catches up.
- Skip the Boil: I learned this the hard way—poaching in simmering water (not boiling) keeps the meat tender; boiling just turns it into rubbery sadness.
- Ice Bath Finish: Plunge the cooked chicken into an ice water bath for 5 minutes to stop the cooking process and lock in moisture before slicing.
Pro Cooking Tips for Perfect Results
Brining Perfection
For the most even flavor distribution, I recommend using a zip-top bag for curing. It allows you to remove all air, ensuring the chicken stays fully submerged in the brine. I learned this trick from my deli-owner friend—it makes a noticeable difference in texture consistency. 💡
Temperature Control
Maintain 160°F internal temperature precisely during poaching. Use a instant-read thermometer like ThermoWorks for accuracy. If the water simmers too vigorously, the chicken can toughen—keep it at a gentle bubble.
Chilling Technique
The ice bath step is non-negotiable for deli-style results. I add 1 tbsp kosher salt to my ice water to speed up heat transfer. Rotate the chicken every 5 minutes for even chilling and to prevent any part from overcooking in residual heat.
Slicing Pro Tips
A long, thin-bladed knife (like a Wüsthof slicer) glides through the meat cleanly. Partially freeze the chicken for 30 minutes before slicing if you struggle with thin cuts—this firms it up without affecting texture.
Flavor Boost
For extra depth, I add 1 tsp pink curing salt (Prague Powder #1) to my brine. It preserves the meat’s color and adds that classic deli appearance. Just remember—never exceed ¼ tsp per pound of meat for safety. 💪
Storage Trick
Store unsliced chicken in its cooking liquid in the fridge. This keeps it moist for up to 5 days. For longer storage, vacuum-seal sliced portions with a splash of the brine—they’ll keep beautifully for 3 months in the freezer.
Nutrition Facts
Frequently Asked Questions
What’s the ideal curing time for best flavor?
For optimal results, cure the chicken for 12-24 hours in the brine. This ensures deep flavor penetration while maintaining a tender texture. Shorter times may leave the center under-seasoned.
Can I use chicken thighs instead of breasts?
Yes, but they’ll have a richer flavor and slightly different texture. Reduce the curing time to 8-12 hours since thighs are more forgiving. Slice them thinly against the grain for best results.
How do I keep the slices from drying out?
Store unsliced chicken in its cooking liquid in the fridge for up to 5 days. For sliced portions, keep them submerged in a bit of the brine in an airtight container.
Why is the ice bath step important?
Rapid chilling stops the cooking process immediately, preserving moisture and tenderness. Without it, the meat continues cooking in residual heat, which can make it dry and tough.

- Jollof Rice Sauce Recipe: West African Tomato and Spice Infusion - September 25, 2026
- Japanese Rice Soup Recipe: Umami-Rich Comfort in a Bowl - September 25, 2026
- Homemade Cream Of Rice Recipe: Silk-Smooth Breakfast in Minutes - September 25, 2026