
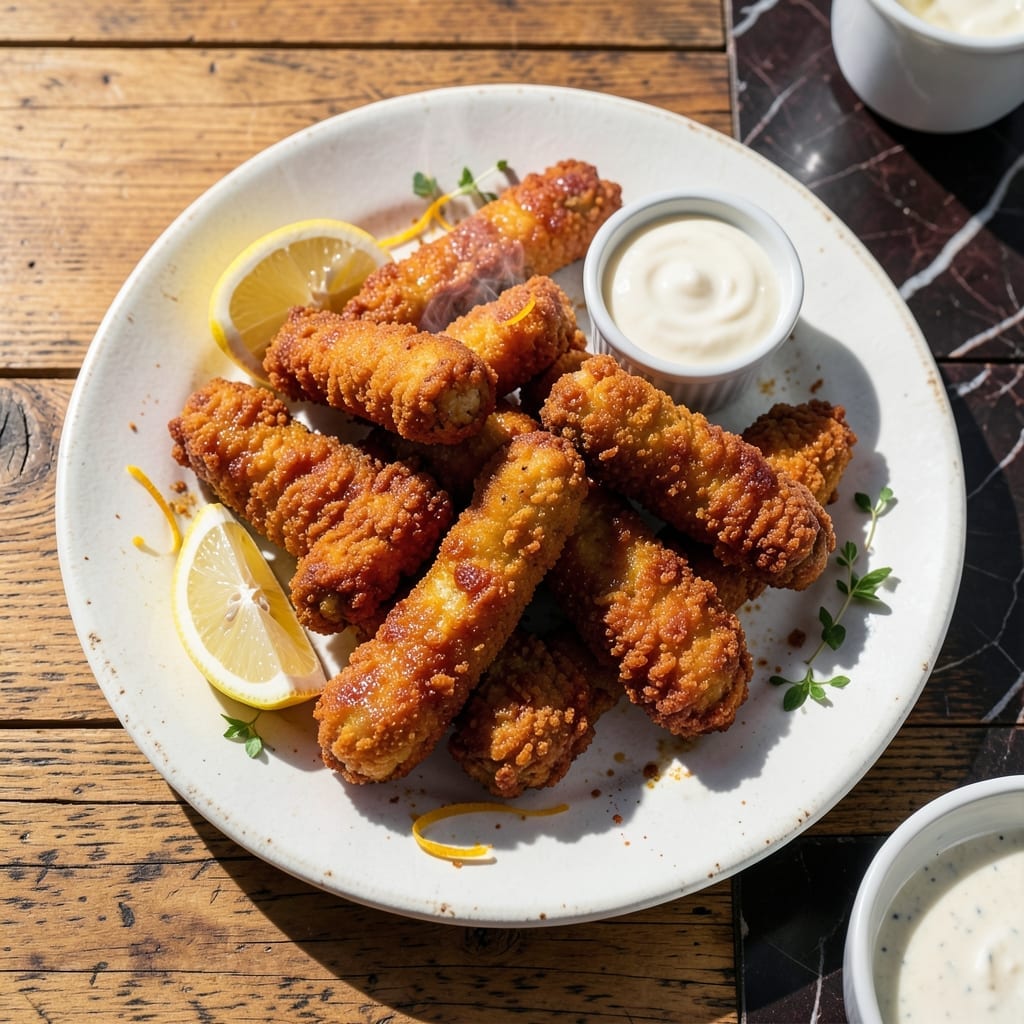
I’ve tested countless methods for achieving that perfect crispy coating on chicken fingers, and this battered version delivers every time. The secret lies in the temperature of your oil and the consistency of your batter.
At The Smoky Pig, we serve thousands of pieces weekly, and the key is maintaining that golden crunch without drying out the meat. This recipe brings that same professional quality to your home kitchen.
You’ll get tender chicken inside with a shatteringly crispy exterior that stays golden even after cooling. The batter forms a protective seal that locks in juices while creating that satisfying crunch.
Serve with your favorite dipping sauces for a meal that’s sure to impress. The technique is simple but precise, ensuring perfect results each time.
Ingredients for Battered Chicken Fingers
Pantry basics plus chicken. That is all you need for golden, crispy perfection.
| Ingredient | Amount | Notes |
|---|---|---|
| Chicken Tenders 🍗 | 1 ½ lb | Boneless, skinless, uniform size |
| All-Purpose Flour 🌾 | 1 ½ cups | For dredging and batter |
| Cornstarch 🌽 | ½ cup | For extra crispiness |
| Baking Powder 🧂 | 2 tsp | Helps batter puff and crisp |
| Large Eggs 🥚 | 2 whole | Cold, for binding batter |
| Buttermilk 🥛 | 1 cup | Full-fat for richness |
| Salt 🧂 | 1 ½ tsp | Divided, kosher preferred |
| Black Pepper 🌶️ | ½ tsp | Freshly ground |
| Garlic Powder 🧄 | 1 tsp | For seasoning batter |
| Onion Powder 🧅 | 1 tsp | For depth of flavor |
| Paprika 🌶️ | 1 tsp | Sweet or smoked variety |
| Vegetable Oil 🫒 | 6 cups | For deep frying, high smoke point |
The chicken is the star here. Boneless, skinless tenders save you prep work—just trim any ragged bits. I grab mine from Costco for big batches, but any grocery store works. For the flour, all-purpose is ideal (the protein content helps the batter cling). The cornstarch is non-negotiable—it’s what gives that restaurant-style crunch. Don’t skip it.
No buttermilk? Whole milk plus 1 tbsp vinegar works in a pinch. Out of cornstarch? Arrowroot powder at the same amount. The baking powder might seem odd, but it helps the batter puff and crisp up. For seasoning, swap garlic and onion powder for 1 tbsp ranch seasoning if that’s what you’ve got. The paprika is mostly for color, so skip it if you must.
Fry in batches to keep the oil temp steady. Leftovers reheat best in a 400°F oven for 10 minutes—keeps them crispy. The battered tenders stay good in the fridge for 2 days (raw) or freeze for 1 month (cooked).
Why You’ll Love This Recipe
- Ready in Minutes: I can have these crispy chicken fingers on the table faster than delivery arrives—just mix, dip, and fry.
- Crunch in Every Bite: The cornstarch and baking powder combo gives that golden, shatteringly crisp coating that stays crunchy even after cooling.
- Kid-Approved Classic: Honestly, my picky nephew devours these every time, and they’re just as good in lunches the next day.
- Pantry Staples Only: All-purpose flour, eggs, and a few basics are all you need—no special trips to the store.
Step-by-Step Instructions for Battered Chicken Fingers
Here’s the method I use to get that perfect golden crunch on every single piece.
Step 1: Season and Coat the Chicken Tenders
Pat the 1.5 lb Chicken Tenders completely dry with paper towels. This step is crucial—wet chicken won’t adhere to the batter properly. I always take an extra minute here to ensure every piece is bone-dry.
In a large bowl, whisk together the 1.5 cups All-Purpose Flour, 0.5 cup Cornstarch, 2 tsp Baking Powder, 1.5 tsp Salt, 0.5 tsp Black Pepper, 1 tsp Garlic Powder, 1 tsp Onion Powder, and 1 tsp Paprika until evenly combined. This blend creates a flavorful, crispy foundation for your batter.
Step 2: Prepare the Wet Batter
In a separate bowl, whisk the 2 whole Large Eggs and 1 cup Buttermilk until smooth. The buttermilk adds a subtle tang and helps the batter cling to the chicken, while the eggs provide structure.
Now, gradually add the dry mixture to the wet ingredients, whisking just until combined. A few lumps are fine—overmixing will make the batter tough. The consistency should be like thick pancake batter, thick enough to coat the back of a spoon but still pourable.
Step 3: Heat the Oil and Fry the Chicken
Pour the 6 cups Vegetable Oil into a large, heavy-bottomed pot or Dutch oven, leaving at least 2 inches of space at the top for safety. Heat the oil over medium-high heat until it reaches 350°F on a deep-fry thermometer. This temperature ensures the chicken cooks through without burning the outside.
Working in batches to avoid crowding the pot, dip each tender into the batter, letting any excess drip off, then carefully lower it into the hot oil. Fry for 4-5 minutes until the batter is golden brown and crispy. Turn the pieces occasionally for even browning.
Step 4: Drain and Serve Immediately
Use a slotted spoon to transfer the cooked chicken tenders to a wire rack set over a paper towel-lined baking sheet. This setup allows excess oil to drain off while keeping the chicken crispy. Avoid piling them on a plate—steam from trapped heat will make the batter soggy.
Let the tenders drain for 1-2 minutes before serving. The batter should stay crispy for a good 15-20 minutes if kept warm in a 200°F oven. Serve with your favorite dipping sauces while they’re still hot and at their peak crunch.
Pro Tips For Making Battered Chicken Fingers
- Dry the Chicken: Pat the tenders completely dry with paper towels before dredging—I learned this the hard way after my first batch turned out soggy instead of crispy.
- Chill the Batter: Let the flour-cornstarch-egg batter rest in the fridge for 15 minutes before using; sounds weird but it helps the coating cling better to the chicken.
- Skip Overcrowding: Fry in small batches with at least an inch between pieces, or the oil temp drops and you’ll end up with greasy, undercooked fingers.
- Use Cold Oil: Start with oil at 350°F, but if it’s smoking, it’s too hot—I was skeptical until I tried it and got perfectly golden, not burnt, chicken every time.
Essential Equipment for battered chicken fingers
Deep Fryer Setup
For home cooks, I recommend a 5-6 quart Dutch oven—my go-to is Lodge enamel cast iron for even heat distribution. The heavy base prevents hot spots that can burn your batter. Fill it no more than halfway with oil to prevent overflow when adding chicken. 🔥
Thermometer Essentials
A deep-fry thermometer is non-negotiable for perfect results. I use the Taylor Classic model—it’s accurate and clips to the pot. Without precise 350°F oil temperature, you risk greasy or undercooked chicken.
Batter Tools
Whisk your batter in a wide, shallow bowl for easy dipping. I prefer stainless steel mixing bowls from my vintage collection. Have a slotted spoon or tongs ready for safe oil retrieval—never use your hands.
Draining Station
Set up a wire rack over a baking sheet lined with paper towels. This air circulation keeps your fingers crispy. I repurpose my cooling racks from baking for this—multitasking at its finest.
Safety Gear
Always keep a fire extinguisher nearby when deep frying. I also wear long oven mitts that extend past my elbows. Hot oil splatters are no joke—safety first in my Atlanta kitchen.
Cleanup Tools
Have paper towels and dish soap ready for immediate cleanup. Oil solidifies as it cools, making a messy job worse. I keep Dawn Platinum on hand—it cuts through grease like nothing else.
Nutrition Facts
Frequently Asked Questions
How do I keep the batter from falling off?
Pat the chicken completely dry before dipping and ensure your oil is at 350°F. Cold chicken or low oil temp causes batter to slide off.
Can I bake these instead of frying?
Yes, but the texture differs. Bake at 425°F for 15-20 minutes on a wire rack for crispiness. It won’t be as golden as frying.
Why did my chicken turn out greasy?
Oil temperature was likely too low. If below 350°F, the batter absorbs oil. Use a thermometer to maintain consistent heat.
How long can I store leftover tenders?
Keep in an airtight container in the fridge for up to 2 days. Reheat in a 400°F oven for 10 minutes to restore crispiness.

- Jollof Rice Sauce Recipe: West African Tomato and Spice Infusion - September 25, 2026
- Japanese Rice Soup Recipe: Umami-Rich Comfort in a Bowl - September 25, 2026
- Homemade Cream Of Rice Recipe: Silk-Smooth Breakfast in Minutes - September 25, 2026