
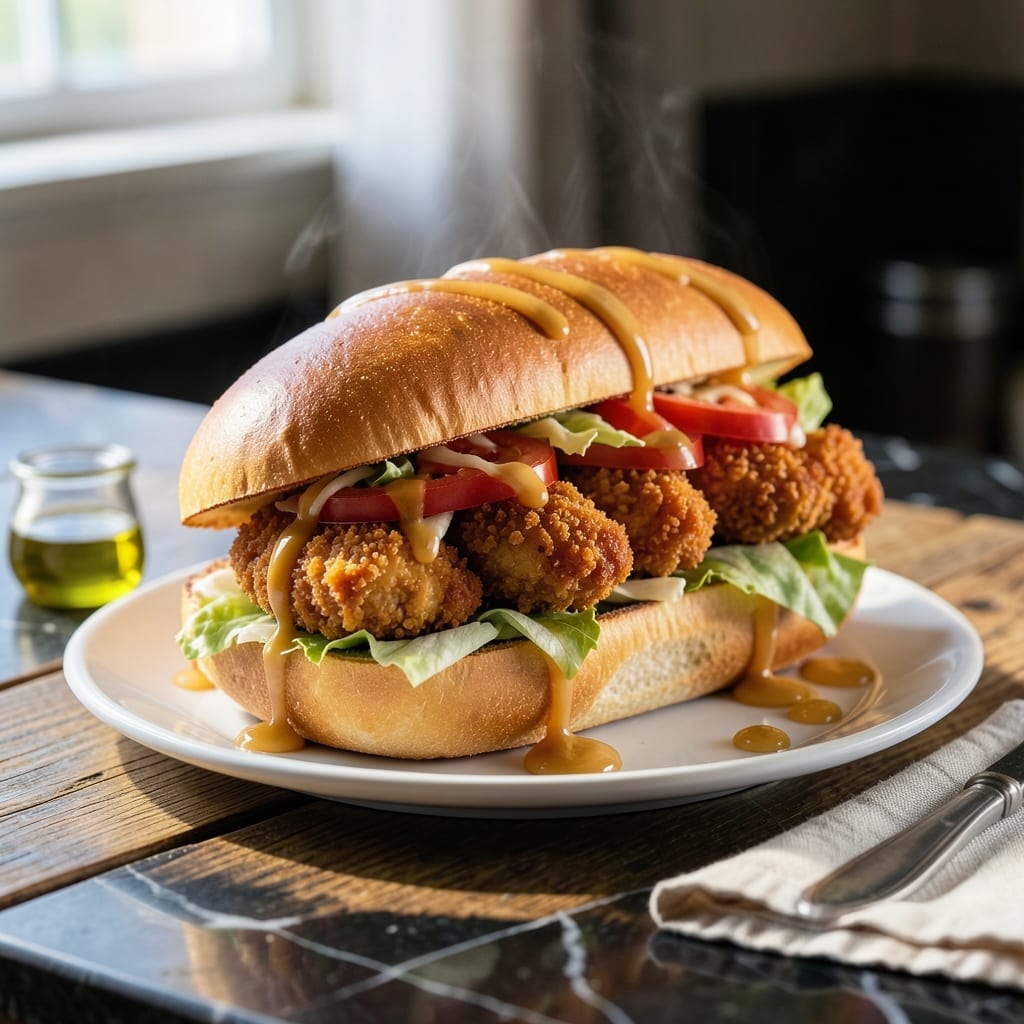
This chicken finger sub brings together crispy breaded tenders and soft rolls for the ultimate handheld meal.
I’ve refined the technique to ensure every bite delivers maximum crunch and juicy flavor. The secret lies in a double-dipping breading process and precise frying temperature.
The assembly is simple: pile the hot chicken fingers onto a buttered sub roll, add your favorite sauce, and top with shredded lettuce for freshness.
This dish turns a classic comfort food into a satisfying, restaurant-worthy sandwich.
Ingredients for Chicken Finger Sub
Crispy chicken, soft rolls, and a handful of pantry staples make this sandwich shine.
| Ingredient | Amount | Notes |
|---|---|---|
| Boneless Skinless Chicken Breasts 🍗 | 1 ½ lb | Cut into 1-inch strips |
| All-Purpose Flour 🌾 | 1 cup | For initial dredging |
| Large Eggs 🥚 | 2 whole | Beaten for egg wash |
| Buttermilk 🥛 | 1 cup | For soaking chicken |
| Panko Breadcrumbs 🍞 | 2 cups | For crispy coating |
| Cornstarch 🌾 | ¼ cup | Mixed with flour for crunch |
| Vegetable Oil 🫒 | 4 cups | For deep frying |
| Sub Rolls 🥖 | 4 whole | Soft, hoagie-style |
| Unsalted Butter 🧈 | 4 tbsp | For toasting rolls |
| Mayonnaise 🥫 | ½ cup | For dipping or spreading |
| Shredded Lettuce 🥬 | 2 cups | Iceberg or romaine |
| Salt 🧂 | 1 tsp | Kosher or sea salt |
| Black Pepper 🌶️ | ½ tsp | Freshly ground preferred |
| Garlic Powder 🧄 | 1 tsp | For seasoning breading |
| Paprika 🌶️ | 1 tsp | Sweet or smoked variety |
The breading is everything here. Panko breadcrumbs give that restaurant-level crunch you can’t get from regular crumbs. I grab mine from Whole Foods or the Asian aisle at Kroger—both have great quality. For the chicken, boneless, skinless breasts are easiest, but thighs work too if you prefer darker meat (just trim any excess fat first).
No buttermilk? Whole milk plus a tbsp of lemon juice or vinegar gets you close. Swap panko for crushed cornflakes or Ritz crackers in a pinch. Want extra flavor? Add one-third the amount of cayenne to the breading mix. The sub rolls can be any soft hoagie-style—Publix or Subway brands are solid.
Fry the chicken in batches to avoid overcrowding (keeps the oil temp steady). Leftovers keep in the fridge for 2-3 days—reheat in the oven to stay crispy. Freeze uncooked breaded tenders for up to 3 months (thaw before frying).
Why You’ll Love This Recipe
- One Pan Wonder: I love that I only need a baking sheet and a bowl—no fancy equipment, just crispy panko-crusted chicken ready for stacking.
- That Crunch, Though: The buttermilk soak keeps the chicken juicy while the panko gives it a satisfying crunch that holds up even in a sub roll.
- My Go-To Weeknight: Honestly, it’s my solution for picky eaters and last-minute dinners—adults and kids alike devour these.
- Budget Stretcher: A pound of chicken breasts turns into four hearty subs, and leftovers (if there are any) reheat perfectly the next day.
Step-by-Step Instructions for Chicken Finger Subs
Here’s the method I use to get maximum crunch with every bite.
Step 1: Prep and Season the Chicken Strips
Cut the boneless skinless chicken breasts into 1-inch wide strips. Pat them completely dry with paper towels—moisture is the enemy of crispy coating. I always take this extra moment to ensure each piece is uniform in size.
In a shallow dish, whisk together the all-purpose flour, cornstarch, salt, black pepper, garlic powder, and paprika. This flour mixture creates the first layer of your coating and adds serious flavor. The cornstarch is my secret for extra crunch.
Step 2: Create the Breading Station
Set up your breading station with three shallow dishes. Place the seasoned flour mixture in the first dish. Pour the buttermilk into the second dish. In the third dish, beat the large eggs, then stir in the panko breadcrumbs until fully combined.
Working with one piece at a time, dredge each chicken strip in the seasoned flour, shaking off any excess. Then dip it in the buttermilk, letting any excess drip off. Finally, press it firmly into the panko-egg mixture, ensuring it’s completely coated on all sides. This triple-coating method guarantees that crispy texture.
Step 3: Fry to Golden Perfection
Heat the vegetable oil in a deep, heavy-bottomed pot to 350°F. Use a thermometer for accuracy—this temperature is crucial. The oil should be deep enough to submerge the chicken strips completely.
Carefully lower 3-4 breaded chicken strips into the hot oil. Don’t overcrowd the pot or the temperature will drop. Fry for 4-5 minutes until golden brown and crispy on all sides. The internal temperature should reach 165°F. Transfer to a paper towel-lined plate to drain.
Step 4: Toast the Sub Rolls and Assemble
Spread the unsalted butter on the cut sides of the sub rolls. Heat a skillet over medium heat and toast the rolls, butter-side down, for 1-2 minutes until golden brown. This adds a delicious buttery crunch to complement the chicken.
Spread mayonnaise on both sides of each toasted sub roll. Place a generous portion of shredded lettuce on the bottom half of each roll. Arrange 3-4 chicken fingers on top of the lettuce, then cap with the top half of the roll. Serve immediately while the chicken is still hot and crispy.
Pro Tips For Making Chicken Finger Sub
- Use Buttermilk Longer: Soak the chicken strips in buttermilk for at least 30 minutes—I learned this the hard way after dry, bland fingers ruined my first few subs.
- Double Coat Crumbs: Dip the chicken in flour, egg, then panko twice for extra crunch. Sounds tedious, but it actually changes the outcome.
- Skip Overcrowding: Fry in batches with space between each piece, or the breading steams instead of crisps—yes, even if you’re impatient like me.
- Rest Before Assembly: Give the cooked fingers 5 minutes on a rack before building the sub. My grandmother swore by this, and she was right: it keeps the breading crisp.
Troubleshooting This Dish
Oil Temperature Drops
If your chicken comes out greasy instead of crispy, your oil temperature likely dropped too low. Use a thermometer to maintain 350°F and fry in small batches to prevent overcrowding. I keep a Taylor digital thermometer clipped to my pot for constant monitoring.
Breading Falls Off
The coating slides off when the chicken isn’t dry before breading. Pat pieces completely dry with paper towels and let them rest 5 minutes after buttermilk dip. Press firmly into the panko mixture to ensure adhesion.
Uneven Cooking
Chicken strips should be uniform in thickness—about ½ inch. Cut thicker pieces in half lengthwise. If some cook faster, remove them early and keep warm in a 200°F oven while finishing the batch. 🌡️
Soggy Sub Rolls
Toast rolls just before assembly to prevent sogginess. Butter and toast on medium heat for 1-2 minutes until golden. Assemble subs immediately and serve open-faced if not eating right away.
Dry Chicken
Overcooking is the culprit. Pull strips when they reach 165°F internal temperature—this takes 4-5 minutes at proper oil temp. Use a meat thermometer for accuracy. Resting 2 minutes on a rack keeps them juicy.
Sauce Soaks Rolls
Spread sauces sparingly or serve them on the side for dipping. For assembled subs, layer lettuce first to create a barrier. I use mayonnaise as a base—it sticks better than thinner sauces. 💡
Nutrition Facts
Frequently Asked Questions
Can I bake the chicken fingers instead of frying?
Yes! Place breaded tenders on a wire rack over a baking sheet. Bake at 400°F for 15-20 minutes, flipping halfway. Spray with oil first for extra crispiness.
What sauces work best with this sub?
Honey mustard, BBQ, or ranch are classic choices. For a twist, try sriracha mayo or chipotle aioli. Spread lightly to avoid soggy rolls.
How do I prevent the breading from falling off?
Pat chicken completely dry first. Let buttermilk-coated pieces rest 5 minutes before final breading. Press firmly into panko mixture.
Can I use chicken tenders instead of breasts?
Chicken tenders work perfectly and may require less trimming. Adjust frying time to 3-4 minutes as they cook faster.

- Jollof Rice Sauce Recipe: West African Tomato and Spice Infusion - September 25, 2026
- Japanese Rice Soup Recipe: Umami-Rich Comfort in a Bowl - September 25, 2026
- Homemade Cream Of Rice Recipe: Silk-Smooth Breakfast in Minutes - September 25, 2026