
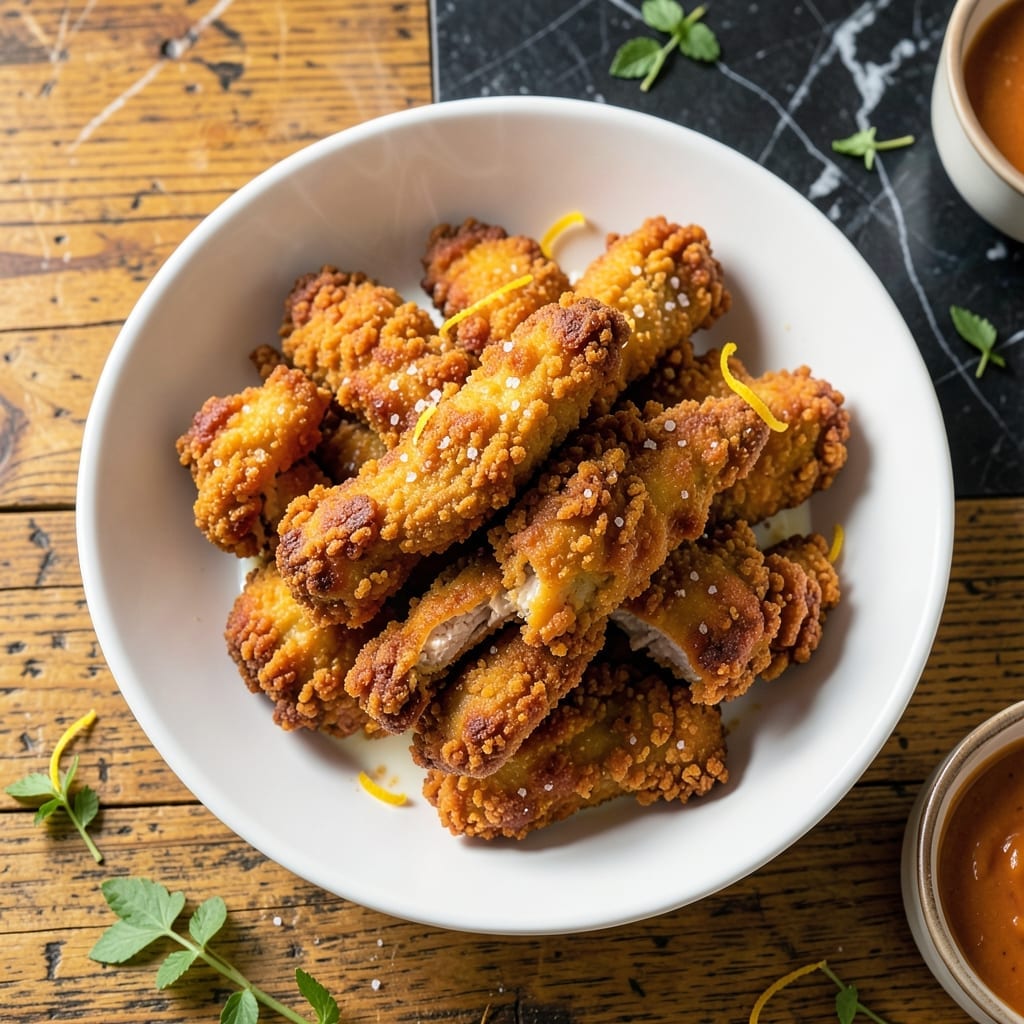
Achieving a crispy crust on fried chicken without buttermilk is entirely possible with a simple substitution. This method delivers the same golden, crunchy coating you expect from traditional recipes.
The secret lies in using regular milk combined with egg to create a binding base for the flour coating. This mixture provides the necessary moisture and adhesion for the breading to cling to the chicken during frying.
Each piece emerges from the oil with a perfectly crispy exterior that gives way to juicy, tender meat inside. The milk and egg wash ensures the coating stays in place throughout cooking.
This approach proves you don’t need buttermilk to create exceptional fried chicken at home. The technique is straightforward yet delivers professional-quality results every time.
Ingredients for Chicken Fried Chicken Recipe Without Buttermilk
Simple ingredients for crispy fried chicken without buttermilk. Milk and egg create the perfect wash.
| Ingredient | Amount | Notes |
|---|---|---|
| Chicken Thighs 🍗 | 2 lb | Boneless, skinless, cut into strips |
| All-Purpose Flour 🌾 | 2 cups | For dredging chicken |
| Cornstarch 🌽 | ½ cup | For extra crispiness |
| Whole Milk 🥛 | 1 cup | Regular milk, not buttermilk |
| Large Eggs 🥚 | 2 whole | For egg wash |
| Salt 🧂 | 2 tsp | Divided for seasoning |
| Black Pepper 🌶️ | 1 tsp | Freshly ground preferred |
| Garlic Powder 🧄 | 1 tsp | For seasoning flour |
| Onion Powder 🧅 | 1 tsp | For seasoning flour |
| Paprika 🌶️ | 1 tsp | Sweet or smoked variety |
| Vegetable Oil 🫒 | 4 cups | For deep frying |
| Baking Powder 🧂 | ½ tsp | Makes coating extra crispy |
The chicken is key here. Thighs stay juicier than breasts—boneless, skinless are easiest to work with. Cut them into even strips so everything cooks at the same rate. For the flour, all-purpose with a touch of cornstarch gives that restaurant-style crunch. I grab my chicken from Whole Foods or the local butcher, but any supermarket will do. Look for pieces that are similar in size for even cooking.
No buttermilk? Whole milk plus egg works just as well for the wash. Out of cornstarch? Replace with an extra 1/4 cup flour. Want more flavor? Add cayenne or Cajun seasoning to the flour mix. The paprika can be sweet or smoked—your call. If you’re frying in batches, keep the cooked chicken warm in a 200°F oven on a wire rack so it stays crispy.
Fry in small batches to avoid crowding the pan. Drain on a wire rack (not paper towels) to keep it crispy. Leftovers keep in the fridge for 2-3 days, but honestly, they’re best fresh. Reheat in the oven at 375°F for 10-15 minutes to revive the crunch.
Why You’ll Love This Recipe
- No Buttermilk Needed: I love that this uses whole milk and eggs instead—no last-minute grocery runs for buttermilk.
- Crispy Perfection: The cornstarch in the coating gives it that extra crunch I crave with every bite.
- Weeknight Hero: Honestly, I can get this on the table faster than takeout.
- Budget Friendly: Chicken thighs stay juicy and cost less than breasts, so my wallet thanks me.
Step-by-Step Instructions for Chicken Fried Chicken Without Buttermilk
This method delivers a perfectly crispy crust using milk and egg for the ultimate texture.
Step 1: Prepare and Season the Chicken
Cut the 2 lb Chicken Thighs into even strips, about 1-inch thick. Pat them dry with paper towels—this is crucial for the coating to adhere properly. I like to trim any excess fat, but leave a little for flavor.
Season the chicken strips generously with 1 tsp Salt and 1 tsp Black Pepper. This step ensures every bite is flavorful, not just the crust. Let the seasoned chicken rest for 10 minutes while you prepare the dredging mixture.
Step 2: Create the Crispy Coating Mixture
In a large bowl, whisk together the 2 cups All-Purpose Flour, 0.5 cup Cornstarch, 0.5 tsp Baking Powder, 1 tsp Salt, 1 tsp Garlic Powder, 1 tsp Onion Powder, and 1 tsp Paprika. The cornstarch is the secret to that extra-crispy texture, while the baking powder adds a light, airy quality to the crust.
The mixture should be uniform in color and texture. If you see any lumps, break them up with your fingers or the back of a spoon. This ensures an even coating on every piece of chicken.
Step 3: Set Up the Dredging Station
In a separate shallow bowl, whisk together the 1 cup Whole Milk and 2 whole Large Eggs until fully combined. This egg wash will act as the glue for your coating, helping it stick to the chicken.
Place the bowl of seasoned flour next to the egg wash. Working in batches, dip each piece of chicken into the egg wash, letting any excess drip off. Then, dredge it in the flour mixture, pressing gently to ensure the coating adheres evenly. Shake off any excess flour before setting it aside on a plate.
Step 4: Fry to Golden Perfection
Heat the 4 cups Vegetable Oil in a deep, heavy-bottomed skillet or Dutch oven over medium-high heat until it reaches 350°F. Use a deep-fry thermometer for accuracy—this temperature is essential for a crispy crust without undercooking the chicken.
Carefully place the coated chicken strips into the hot oil, a few at a time, to avoid overcrowding the pan. Fry for 6-8 minutes per side, or until the coating is deep golden brown and the internal temperature reaches 165°F. Transfer the fried chicken to a paper towel-lined plate to drain any excess oil.
Real talk: if the oil temperature drops too much when you add the chicken, the coating will absorb oil instead of crisping up. Keep an eye on the thermometer and adjust the heat as needed to maintain 350°F.
Pro Tips For Making Chicken Fried Chicken Recipe Without Buttermilk
- Double Dredge: Dip the chicken in the milk-egg wash, then flour, then back in the wash and flour again—this builds a thicker, crunchier crust that actually stays put.
- Heat the Oil: Get that oil to 350°F before adding the chicken. I learned this the hard way—any cooler and you’ll get greasy, soggy breading instead of that golden crunch.
- Pat Thighs Dry: Blot the chicken thighs with a paper towel before dredging. Sounds like a small thing, but wet meat makes the coating slide right off.
- Rest Before Frying: Let the dredged chicken sit for 10 minutes before hitting the oil. This gives the flour time to adhere, so you don’t end up with bare spots in your crust.
Common Mistakes When Making Perfect Results
Inconsistent Oil Temperature
Frying at the wrong temperature causes greasy or unevenly cooked chicken. Use a deep-fry thermometer to maintain 350°F. If the oil drops below 325°F, the coating absorbs oil instead of crisping. I adjust my burner to medium-high to keep it steady. 🌡️
Overcrowding the Pan
Adding too many pieces at once lowers the oil temperature and steams the chicken. Fry in small batches—about 3-4 strips at a time in a standard skillet. This gives each piece space to cook evenly and develop that perfect golden crust.
Skipping the Rest Step
Letting the coated chicken rest for 5-10 minutes before frying helps the coating adhere better. Without this step, the breading can slide off during cooking. I place mine on a wire rack to allow air circulation underneath.
Improper Drying
Pat the chicken completely dry with paper towels before dredging. Excess moisture creates steam between the meat and coating, causing the breading to lift. This simple step makes a huge difference in achieving that restaurant-quality crunch.
Using Cold Ingredients
Cold chicken straight from the fridge can shock the hot oil, lowering the temperature. Let your chicken sit at room temperature for 15-20 minutes before starting. I also take my milk and eggs out of the fridge at the same time. 💡
Neglecting Seasoning Layers
Season both the chicken and the flour mixture. I use 1 tsp Salt directly on the meat and another 1 tsp in the flour. This ensures flavor in every bite, not just on the surface.
Nutrition Facts
Frequently Asked Questions
What can I use instead of buttermilk?
Whole milk mixed with egg works perfectly for the wash. The combination provides the right consistency and helps the coating stick to the chicken
You can also use a splash of vinegar or lemon juice in regular milk as a substitute.
How do I keep the coating from falling off?
Pat the chicken completely dry before dredging. Excess moisture prevents the flour from adhering properly.
Let the coated chicken rest for 5-10 minutes before frying to help the coating set.
Can I bake this instead of frying?
Yes, bake at 400°F for 20-25 minutes, flipping halfway through. For extra crispiness, spray the chicken lightly with oil before baking.
The texture won’t be identical to frying but will still be delicious.
How do I know when the chicken is done?
Use a meat thermometer to check the internal temperature. Chicken is safe to eat when it reaches 165°F in the thickest part.
The coating should be deep golden brown and crispy when fully cooked.

- Jollof Rice Sauce Recipe: West African Tomato and Spice Infusion - September 25, 2026
- Japanese Rice Soup Recipe: Umami-Rich Comfort in a Bowl - September 25, 2026
- Homemade Cream Of Rice Recipe: Silk-Smooth Breakfast in Minutes - September 25, 2026