
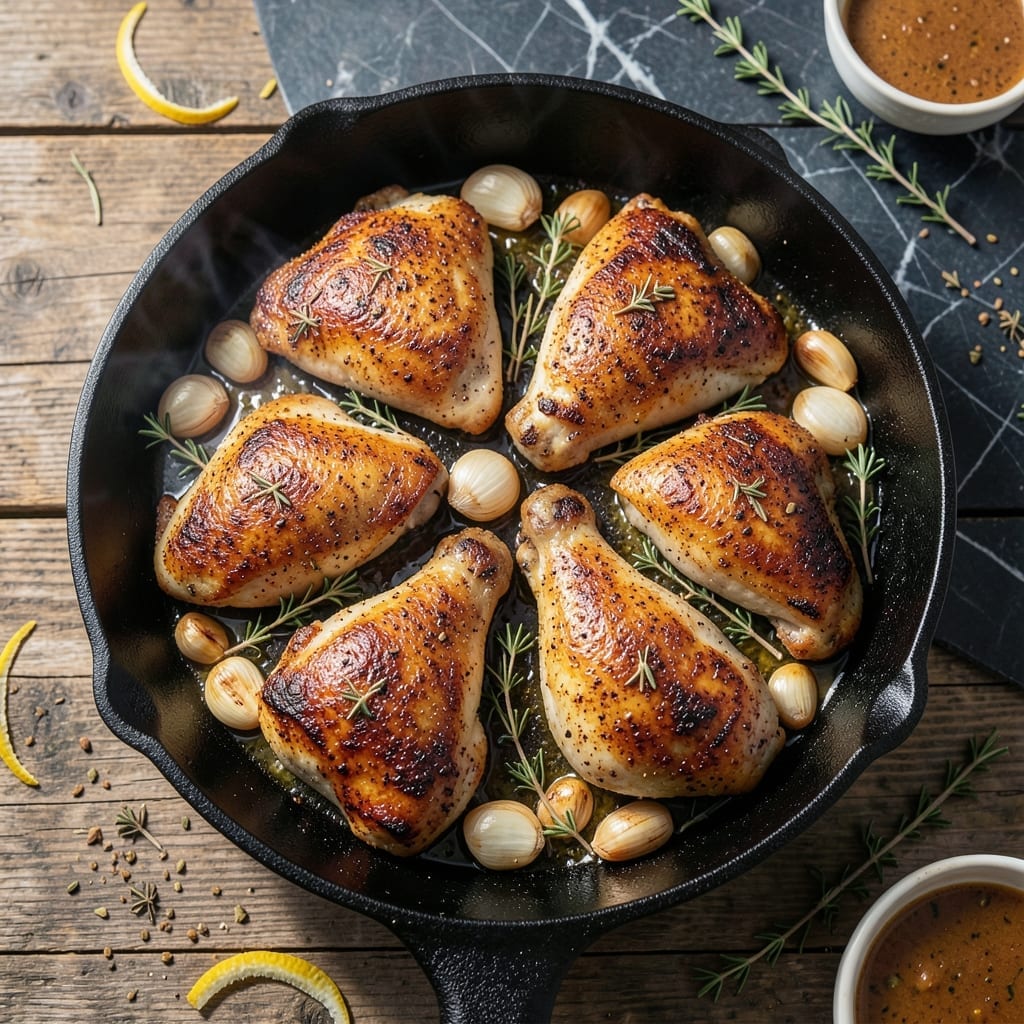
Achieving that perfect smoky charred flavor doesn’t require an outdoor grill or special equipment. This method uses a cast iron skillet and a simple technique to replicate those coveted grill marks and deep, smoky taste right on your stovetop.
The key is high heat and a two-step searing process that locks in juices while creating a crispy, caramelized exterior. With just 20 minutes of active cooking, you’ll have chicken that’s tender inside and beautifully charred outside.
What makes this dish stand out is its versatility—it works with thighs, breasts, or even drumsticks. The result is juicy, flavorful chicken with that unmistakable grilled essence, no matter the weather or your living situation.
Serve it hot with your favorite sides for a meal that tastes like it came straight off the grill.
Ingredients for Chicken Griller
Pantry staples plus a quick stop at the meat counter. Nothing fancy, just big flavor.
| Ingredient | Amount | Notes |
|---|---|---|
| Chicken Thighs 🍗 | 2 lb | Boneless, skin-on preferred |
| Olive Oil 🫒 | 2 tbsp | Divided for cooking and brushing |
| Kosher Salt 🧂 | 1 ½ tsp | Plus more to taste |
| Black Pepper 🌶️ | 1 tsp | Freshly ground preferred |
| Smoked Paprika 🌶️ | 1 tsp | For that classic grill flavor |
| Garlic Powder 🧄 | 1 tsp | Or 2 fresh cloves minced |
| Onion Powder 🧅 | 1 tsp | Adds depth to the crust |
| Dried Thyme 🌿 | ½ tsp | Crushed between fingers |
| Dried Oregano 🍃 | ½ tsp | Mediterranean variety ideal |
| Lemon Juice 🍋 | 1 tbsp | Freshly squeezed for brightness |
| Worcestershire Sauce 💧 | 1 tbsp | Adds umami depth |
| Butter 🧈 | 2 tbsp | For basting during searing |
The chicken is the star here. Thighs give you that juicy, fall-off-the-bone texture—breasts work too but need closer watching to avoid drying out. I grab mine from Whole Foods or Costco when they’re on sale. Look for skin-on thighs for extra crispiness (the fat renders down beautifully). If using drumsticks, they’ll need a few extra minutes to cook through.
No smoked paprika? Regular paprika plus a pinch of cayenne gets you close. Swap fresh garlic for the powder (double the amount). Liquid smoke at a quarter teaspoon works if you’re really craving that smoky depth. The Worcestershire can be soy sauce in a pinch—just ease up on the salt. Frozen chicken works, but thaw it completely first for even cooking.
Leftover chicken keeps 4-5 days in the fridge—great for salads or sandwiches. Reheat in a skillet to revive that crispy skin. Freezes beautifully for 3 months if you’re prepping ahead. I like to double the spice mix so I’ve got it ready for next time.
Why You’ll Love This Recipe
- 5-Minute Prep: Honestly, just toss the thighs with olive oil and spices, then grill—no marinating, no fuss.
- Smoky Depth: That smoked paprika gives it a rich, almost campfire-like flavor that’s ridiculously good with the crispy skin.
- Feeds the Week: I double the batch and use leftovers in tacos, salads, or sandwiches—never boring.
- Budget Hero: Chicken thighs stay cheap, and a little smoked paprika goes a long way for big taste.
Step-by-Step Instructions for Chicken Griller
Here’s how to achieve that smoky charred flavor indoors with perfect results every time.
Step 1: Season the Chicken Thighs
Pat the 2 lb chicken thighs dry with paper towels to ensure crispy skin. In a small bowl, mix the 1.5 tsp kosher salt, 1 tsp black pepper, 1 tsp smoked paprika, 1 tsp garlic powder, 1 tsp onion powder, 0.5 tsp dried thyme, and 0.5 tsp dried oregano.
Rub the spice mixture all over the chicken thighs, pressing gently so it adheres well. This blend creates the bold, smoky flavor characteristic of grilled chicken. Let the seasoned thighs sit at room temperature for 15 minutes to allow the spices to penetrate.
Step 2: Sear the Chicken for Crispy Skin
Heat 1 tbsp olive oil in a large cast-iron or heavy-bottomed skillet over medium-high heat until it shimmers. Place the chicken thighs skin-side down in the pan. Don’t crowd the pan—work in batches if necessary.
Cook undisturbed for 6-7 minutes until the skin turns deep golden brown and crispy. The fat will render out, creating a flavorful base. Flip the thighs and cook for another 5 minutes on the other side until golden and cooked through.
Step 3: Baste with Flavorful Liquids
Reduce the heat to medium and add the 2 tbsp butter, 1 tbsp lemon juice, and 1 tbsp Worcestershire sauce to the skillet. Tilt the pan slightly and use a spoon to baste the chicken thighs with the melted butter mixture continuously.
This step adds moisture and a glossy, flavorful finish. Baste for 2-3 minutes until the chicken is coated and the internal temperature reaches 165°F. The aroma will be rich and savory, signaling the dish is nearly ready.
Step 4: Rest and Serve
Transfer the chicken thighs to a plate and tent loosely with foil. Let them rest for 5-10 minutes to allow the juices to redistribute. This ensures every bite is tender and flavorful.
Drizzle any remaining pan juices over the chicken before serving. The skin will stay crispy, and the meat will be juicy and infused with smoky, charred flavors reminiscent of outdoor grilling.
Pro Tips For Making Chicken Griller
- Pat the Chicken Dry: I learned this the hard way—wet chicken steams instead of searing, so grab a paper towel and dry each thigh thoroughly before seasoning.
- Season Twice: Hit the thighs with kosher salt, pepper, and smoked paprika before grilling, then give them another light sprinkle right after flipping for deeper flavor.
- Skip the Cold Meat: Pull the chicken out of the fridge 20-30 minutes before grilling—cold meat cooks unevenly and sticks like glue to the grates.
- Let It Rest: After grilling, tent the thighs with foil and wait 5 minutes before cutting—this keeps the juices where they belong, in the meat, not on your plate.
Wine and Beer Pairings for chicken griller
Crisp White Wines
A chilled Sauvignon Blanc from New Zealand cuts through the richness with its bright acidity and citrus notes. I love how the grapefruit and lime flavors complement the smoky paprika. Serve at 45-50°F for the best experience.
Light Red Options
A light-bodied Pinot Noir from Oregon adds earthy undertones that pair beautifully with the charred exterior. The 13-14% ABV won’t overpower the dish. I reach for King Estate when I want a reliable choice.
Hoppy Beer Choices
An American IPA with citrusy hop notes mirrors the lemon in this dish. Try Sierra Nevada Pale Ale—its crisp finish cleanses your palate between bites. The carbonation also helps cut through the fat. 🍺
Wheat Beer Pairings
A German Hefeweizen with its banana and clove esters provides an interesting contrast to the smoky flavors. I prefer Weihenstephaner served in its traditional glass at 44-48°F. The wheat malt sweetness balances the spices perfectly.
Non-Alcoholic Option
For a zero-proof pairing, try a sparkling lemonade with rosemary. The effervescence and tartness mimic the acidity of wine. I make mine with fresh-squeezed lemons and a rosemary simple syrup. 💡
Nutrition Facts
Frequently Asked Questions
What’s the best way to get crispy skin?
Pat the chicken completely dry before seasoning and use medium-high heat in a cast iron skillet. Avoid moving the pieces for 6-7 minutes per side to let the skin crisp properly.
Can I use chicken breasts instead of thighs?
Yes, but reduce cooking time to 5-6 minutes per side to prevent drying out. Breasts cook faster and benefit from a meat thermometer to hit 165°F without overcooking.
How do I know when it’s done?
Use a thermometer—165°F in the thickest part means it’s safe. If you don’t have one, pierce the meat; juices should run clear, not pink.
Can I make this ahead of time?
Cook and store in the fridge for up to 4-5 days. Reheat in a skillet over medium heat to revive crispiness. Avoid microwaving to keep the skin from getting soggy.

- Jollof Rice Sauce Recipe: West African Tomato and Spice Infusion - September 25, 2026
- Japanese Rice Soup Recipe: Umami-Rich Comfort in a Bowl - September 25, 2026
- Homemade Cream Of Rice Recipe: Silk-Smooth Breakfast in Minutes - September 25, 2026