
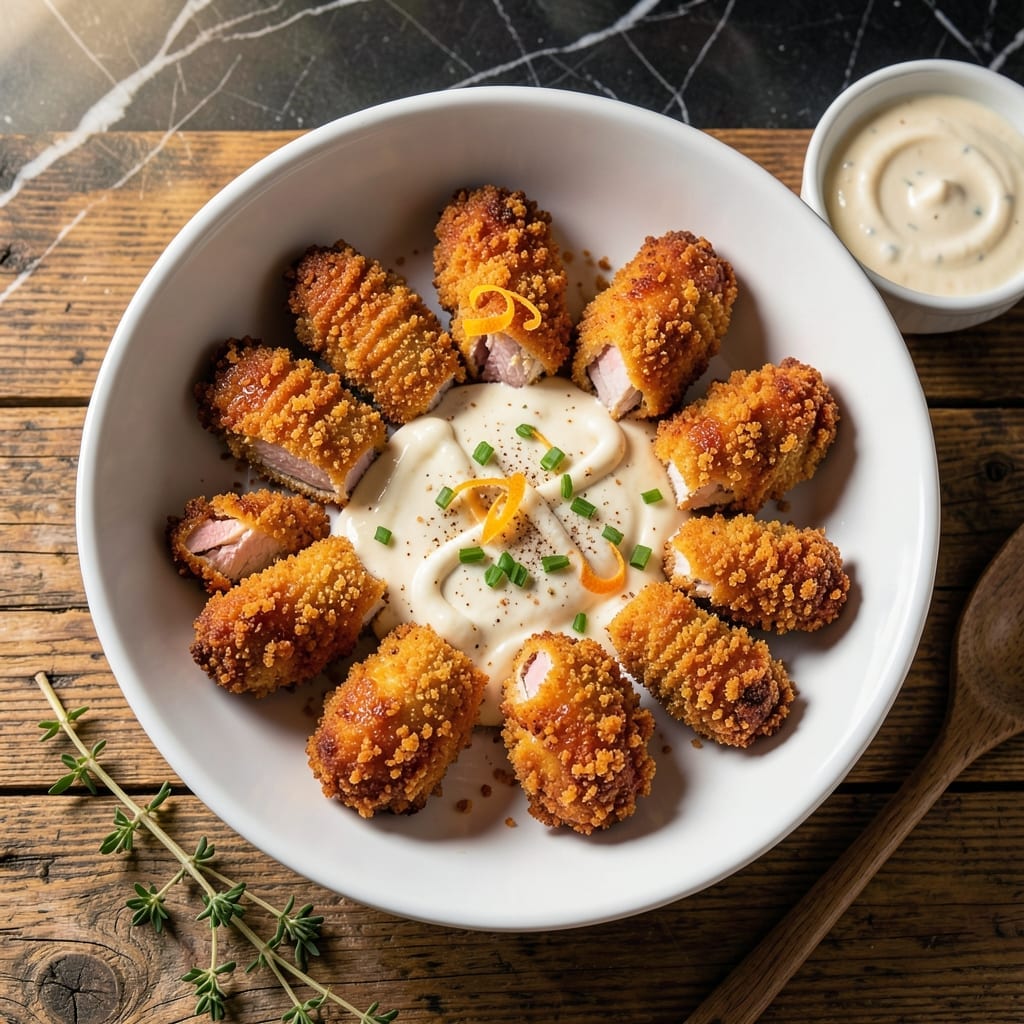
This recipe transforms a nostalgic snack into a hearty main dish that’s surprisingly satisfying. The familiar crunch of Chicken in a Biskit crackers becomes the star, reimagined as a flavorful coating or base.
I developed this to prove that comfort food can be both playful and filling. The crackers add a salty, buttery note that pairs perfectly with tender chicken, creating a dish that feels both familiar and new.
What you’ll get is a meal that’s crispy, savory, and packed with texture. It’s a fun twist on classic techniques, using an ingredient you might not expect in a main course.
Ready in under 30 minutes, this dish is perfect for a quick weeknight dinner.
Ingredients for Chicken in a Biskit
Pantry raid time. These familiar ingredients make something wonderfully new and crispy.
| Ingredient | Amount | Notes |
|---|---|---|
| Chicken in a Biskit Crackers 🍪 | 4 cups | Crushed into coarse crumbs |
| Boneless Skinless Chicken Breasts 🍗 | 1 ½ lb | Pounded to 1/2-inch thickness |
| All-Purpose Flour 🌾 | ½ cup | For dredging chicken |
| Large Eggs 🥚 | 2 whole | Beaten for egg wash |
| Buttermilk 🥛 | ½ cup | For tenderizing chicken |
| Garlic Powder 🧄 | 1 tsp | For seasoning coating |
| Onion Powder 🧅 | 1 tsp | For savory depth |
| Paprika 🌶️ | 1 tsp | Sweet or smoked variety |
| Salt 🧂 | 1 tsp | Kosher or sea salt |
| Black Pepper 🌶️ | ½ tsp | Freshly ground preferred |
| Vegetable Oil 🫒 | 1 cup | For frying chicken |
| Mayonnaise 🥄 | ½ cup | For creamy dipping sauce |
| Dijon Mustard 🟡 | 2 tbsp | For tangy dipping sauce |
| Honey 🍯 | 1 tbsp | For sweetening sauce |
The crackers are the hero here. Grab the classic Chicken in a Biskit—the original flavor has that perfect buttery, salty profile. Most grocery stores stock them in the cracker aisle (usually near the Goldfish). I’ve seen the best selection at Walmart or Target. If you’re crushing them yourself, pulse in a food processor for even crumbs, or crush in a sealed bag with a rolling pin (worth the extra minute).
No buttermilk? Milk plus a tablespoon of vinegar or lemon juice works in a pinch. Swap the chicken breasts for thighs if you prefer darker meat (they stay juicier). For a gluten-free version, crushed gluten-free crackers or panko with a little cornstarch can replace the biscuit crumbs. The paprika can be omitted, but it adds a nice color and subtle smokiness.
Leftovers keep well in the fridge for 3-4 days, though they’re best fresh. Reheat in the oven at 350°F to keep the coating crispy. The dipping sauce can be made a day ahead—store it in an airtight container. Freezing isn’t ideal for the coated chicken, but the sauce freezes beautifully for 1 month.
Why You’ll Love This Recipe
- One Bowl Wonder: I just dump the crushed crackers, flour, eggs, and buttermilk in a bowl—no fancy steps, no extra dishes.
- That Cracker Crunch: The Chicken in a Biskit coating gives it this salty, buttery crunch that’s way better than plain breadcrumbs.
- Weeknight MVP: I’ve served this for quick dinners, packed it for lunches, and even made it for picky nieces—always a hit.
- Stretches the Budget: Chicken breasts and a sleeve of crackers feed four for less than takeout. Honestly, it’s my wallet’s favorite meal.
Step-by-Step Instructions for Chicken in a Biskit Chicken
Here’s how I transform this nostalgic snack into a crispy, flavorful chicken dish.
Step 1: Prep the Chicken and Coating Station
Start by pounding the 1.5 lb Boneless Skinless Chicken Breasts to an even ½-inch thickness between plastic wrap. This ensures even cooking and maximum crispiness. I use a rolling pin if I don’t have a meat mallet handy.
Crush the 4 cups Chicken in a Biskit Crackers into coarse crumbs in a food processor or by sealing them in a bag and rolling with a pin. Set up a breading station with three shallow dishes: one with the 0.5 cup All-Purpose Flour, one for the egg wash, and one for the crushed crackers.
Step 2: Create the Egg Wash and Season the Coating
In a bowl, whisk together the 2 whole Large Eggs and 0.5 cup Buttermilk until fully combined. This buttermilk egg wash adds tenderness and helps the coating adhere beautifully to the chicken.
To the crushed cracker crumbs, add the 1 tsp Garlic Powder, 1 tsp Onion Powder, 1 tsp Paprika, 1 tsp Salt, and 0.5 tsp Black Pepper. Stir well to distribute the seasonings evenly throughout the crumbs.
Step 3: Bread and Fry the Chicken
Dredge each piece of chicken in the flour, shaking off any excess. Then dip it in the egg wash, letting any extra drip off. Finally, press the chicken into the seasoned cracker crumbs, coating all sides completely. I like to press firmly to ensure a thick, even layer of crumbs.
Heat the 1 cup Vegetable Oil in a large skillet over medium-high heat to 350-375°F. Carefully place the breaded chicken in the hot oil and fry for 4-5 minutes per side until golden brown and the internal temperature reaches 165°F. Don’t crowd the pan—work in batches if needed.
Step 4: Drain and Keep Warm
Transfer the cooked chicken to a paper towel-lined plate to drain excess oil. The crust should be crispy and deeply golden, with the chicken juicy inside. If you’re frying in batches, keep the finished pieces warm in a 200°F oven while you cook the rest.
This step is crucial for maintaining that perfect crispness. The paper towels absorb any residual oil without steaming the coating, while the low oven keeps everything hot until serving time.
Step 5: Prepare the Dipping Sauce
While the chicken is hot, whisk together the 0.5 cup Mayonnaise, 2 tbsp Dijon Mustard, and 1 tbsp Honey in a small bowl. The sauce should be smooth and slightly sweet with a tangy kick.
Taste and adjust the seasoning if needed—sometimes I add an extra pinch of salt or a squeeze of lemon for brightness. Serve the crispy chicken immediately with the dipping sauce on the side for a perfect crunch in every bite.
Pro Tips For Making Chicken In A Biskit
- Pound the Chicken: Use a meat mallet to evenly flatten the chicken breasts to ½-inch thickness—this guarantees even cooking and prevents dry, overdone edges.
- Crush Crackers Fine: Pulse the Chicken in a Biskit crackers in a food processor until they’re fine crumbs, almost like panko; coarse pieces won’t stick as well to the chicken.
- Rest the Coating: After dredging in flour, egg, and buttermilk, then cracker crumbs, let the breaded chicken rest for 10 minutes before frying—this keeps the coating from sliding off.
- Use Peanut Oil: Skip the vegetable oil and fry in peanut oil at 350°F; it handles the high heat better and gives the crust a richer, crunchier finish.
Essential Equipment for chicken in a biskit
Frying Essentials
For perfect crispiness, use a heavy-bottomed 12-inch cast iron skillet—I swear by my Lodge. Its even heat distribution prevents hot spots that can burn the coating. A deep-fry thermometer is non-negotiable for maintaining that 350-375°F oil temperature. 🌡️
Breading Station
Set up three shallow dishes: one for flour, one for egg wash, and one for cracker crumbs. I prefer stainless steel mixing bowls from OXO—they’re durable and easy to clean. A meat mallet helps pound chicken to even thickness for consistent cooking.
Draining Setup
A wire cooling rack set over a baking sheet is ideal for draining fried chicken. This allows air circulation on all sides, keeping the coating crispy. Line with paper towels to catch drips. I use Bounty for its absorbency.
Temperature Tools
An instant-read thermometer like the ThermoWorks ThermoPop ensures chicken reaches 165°F internally. For oil temp, a candy thermometer clipped to the pan works perfectly. These tools remove all guesswork from frying. 💡
Sauce Prep
Small glass mixing bowls are perfect for whisking the dipping sauce. I like the Pyrex 1-cup for easy pouring. A mini whisk from Cuisinox makes quick work of combining mayonnaise, mustard, and honey.
Serving Gear
Use a large platter with a lip to catch any stray crumbs. Stoneware from Le Creuset keeps food warm while serving. Have tongs ready for easy handling—OXO Good Grips are my go-to for comfort and control.
Nutrition Facts
Frequently Asked Questions
Can I use chicken thighs instead of breasts?
Thighs stay juicier and can handle frying better. Just pound them to ½-inch thickness and cook until 165°F internally. The coating will crisp up beautifully.
How do I make the coating extra crispy?
Double-dip the chicken in the egg wash and cracker crumbs for a thicker crust. Also, ensure oil stays at 350-375°F throughout frying. Drain on a wire rack, not paper towels, for maximum crunch.
Can I bake instead of fry?
Yes, bake at 400°F for 20-25 minutes, flipping halfway. Spray with oil before baking for crispiness. The texture won’t be identical but still delicious.
How long can I store leftovers?
Keep in an airtight container in the fridge for 3-4 days. Reheat in the oven at 350°F to revive crispiness. The sauce keeps separately for up to 5 days.

- Jollof Rice Sauce Recipe: West African Tomato and Spice Infusion - September 25, 2026
- Japanese Rice Soup Recipe: Umami-Rich Comfort in a Bowl - September 25, 2026
- Homemade Cream Of Rice Recipe: Silk-Smooth Breakfast in Minutes - September 25, 2026