
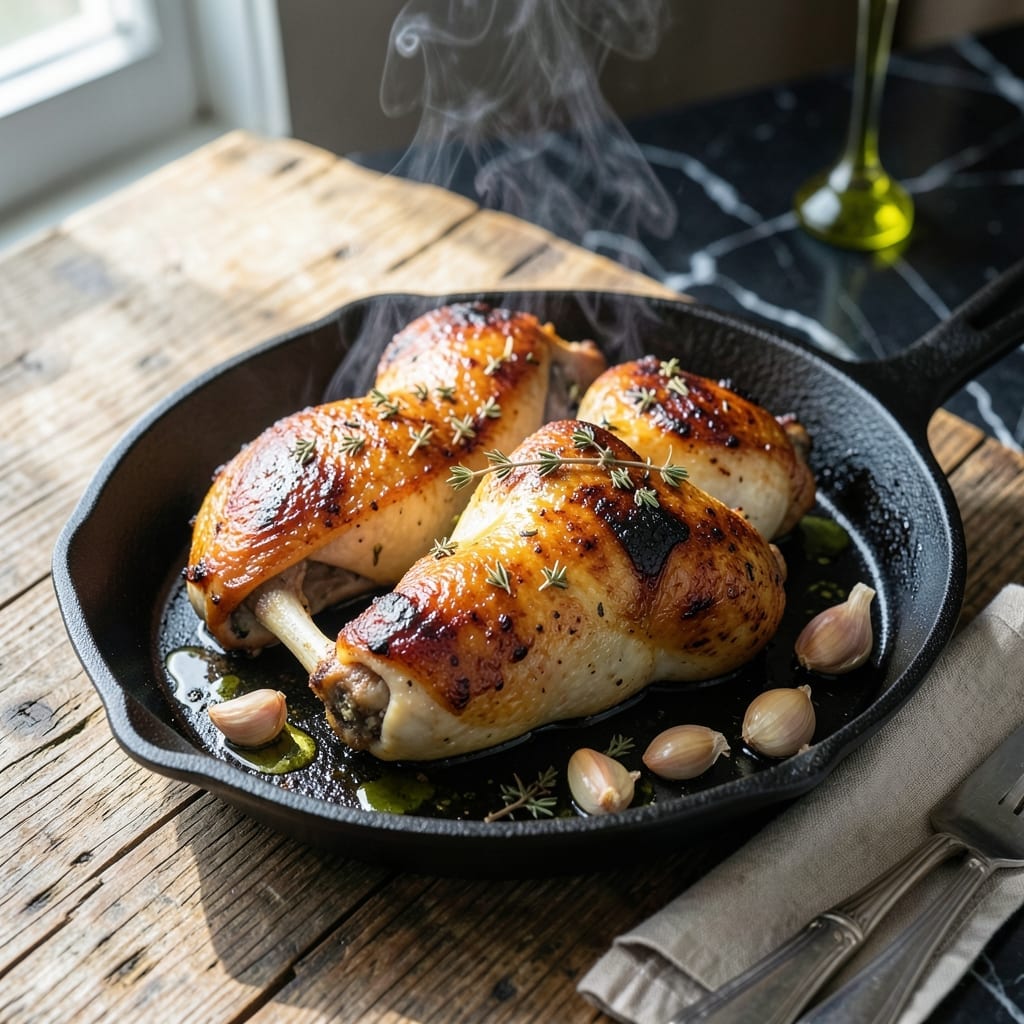
There’s a science to achieving crispy chicken skin and a golden-brown finish in a pan. This method delivers restaurant-quality results every time with minimal effort.
The key lies in proper heat control and patience. Start with a hot pan, then let the chicken cook undisturbed to develop that perfect crust. A simple seasoning blend enhances the natural flavors without overpowering them.
You’ll end up with juicy meat and shatteringly crispy skin that crackles with every bite. The golden-brown color isn’t just for looks—it signals the Maillard reaction that creates complex, savory depth.
Perfect for weeknight dinners or impressive enough for guests. Here’s how to master this technique.
Ingredients for Chicken in Pan
Bone-in, skin-on thighs and a few pantry spices create that golden-brown, crispy finish everyone loves.
| Ingredient | Amount | Notes |
|---|---|---|
| Chicken Thighs 🍗 | 2 lb | Bone-in, skin-on preferred |
| Kosher Salt 🧂 | 1 ½ tsp | Diamond Crystal preferred |
| Freshly Ground Black Pepper 🌶️ | 1 tsp | Coarsely ground for texture |
| Garlic Powder 🧄 | 1 tsp | Not garlic salt |
| Smoked Paprika 🌶️ | 1 tsp | For depth of flavor |
| Dried Thyme 🌿 | ½ tsp | Crushed between fingers |
| Dried Rosemary 🍃 | ½ tsp | Crushed between fingers |
| Avocado Oil 🫒 | 2 tbsp | High smoke point essential |
| Unsalted Butter 🧈 | 2 tbsp | For basting the chicken |
| Fresh Thyme Sprigs 🌿 | 4 sprigs | Optional, for garnish |
| Fresh Rosemary Sprigs 🍃 | 2 sprigs | Optional, for garnish |
| Lemon 🍋 | 1 whole | Sliced, for serving |
The chicken is non-negotiable: bone-in, skin-on thighs deliver the crispiest skin and juiciest meat. Whole Foods or Costco have excellent quality, but any supermarket will do—just avoid pre-marinated cuts. For the seasoning, Diamond Crystal kosher salt is the professional standard (its coarse texture and clean flavor are unmatched). The avocado oil must have a high smoke point—olive oil burns at these temps.
No smoked paprika? Regular paprika plus a pinch of cayenne mimics the smokiness. Short on fresh herbs? Dried at one-third the amount works fine, but fresh sprigs add that restaurant-quality aroma. If you only have chicken breasts, brine them first—they dry out faster. The butter can be salted, but reduce the added salt by half to compensate.
Cooked chicken keeps 3-4 days refrigerated in an airtight container. For best crispiness, reheat in a skillet rather than the microwave. The garnish herbs? Wrap in damp paper towels and store in the fridge for up to 1 week.
Why You’ll Love This Recipe
- One Pan Magic: I toss the thighs in with those spices, let them sizzle, and dinner’s done—no extra bowls, no fuss.
- Smoky Depth: The smoked paprika and garlic powder turn simple chicken into something I crave all week.
- Feeds My Week: I make a double batch on Sunday and it’s my lunch hero for days.
- Budget Winner: Thighs stay juicy and cost half what breasts do, and that spice blend makes every bite feel special.
Step-by-Step Instructions for Chicken in a Pan
Here’s the method to achieve that ideal crispy skin and golden-brown finish with every batch.
Step 1: Season and Prepare the Chicken Thighs
Pat the 2 lb Chicken Thighs completely dry with paper towels—this is non-negotiable for achieving crispy skin. I use bone-in, skin-on thighs as they stay juicier and crisp up better than boneless.
In a small bowl, combine the 1.5 tsp Kosher Salt, 1 tsp Freshly Ground Black Pepper, 1 tsp Garlic Powder, 1 tsp Smoked Paprika, 0.5 tsp Dried Thyme, and 0.5 tsp Dried Rosemary. crush the dried herbs between your fingers as you add them to release their aromatics. Rub this mixture evenly over all sides of the chicken thighs, pressing it into the skin so it adheres well.
Step 2: Sear the Chicken for Maximum Crispiness
Heat the 2 tbsp Avocado Oil in a large, heavy skillet (I prefer cast iron) over medium-high heat until it shimmers but doesn’t smoke. Carefully place the chicken thighs skin-side down in the pan. You should hear a satisfying sizzle immediately—if not, wait for the oil to get hotter.
Cook undisturbed for 8-10 minutes until the skin is deep golden brown and crispy. Don’t be tempted to move the chicken around during this time—this is when the magic happens. The skin should release easily from the pan when it’s ready to flip. If it sticks, let it cook another minute.
Step 3: Finish with Butter Basting
Flip the chicken thighs and immediately add the 2 tbsp Unsalted Butter to the pan. As the butter melts, tilt the pan slightly and use a spoon to baste the chicken with the hot butter continuously for 2-3 minutes. This basting process adds incredible flavor and helps cook the chicken evenly.
Continue cooking for another 5-7 minutes until the chicken is cooked through. The internal temperature should reach 165°F when measured at the thickest part. The skin should remain crispy and the meat should be juicy and tender.
Step 4: Rest and Serve
Transfer the chicken to a wire rack set over a plate (this prevents the skin from getting soggy) and let it rest for 5 minutes. This brief rest allows the juices to redistribute throughout the meat, ensuring every bite is moist and flavorful.
While the chicken rests, arrange the 4 sprigs Fresh Thyme Sprigs, 2 sprigs Fresh Rosemary Sprigs, and 1 whole Lemon (sliced) on a serving platter. Place the chicken on top and serve immediately. The fresh herbs add a beautiful aromatic touch, while the lemon provides a bright contrast to the rich, crispy chicken.
Pro Tips For Making Chicken In Pan
- Dry the Thighs: Pat the chicken thighs completely dry with paper towels before seasoning—I learned this the hard way after my first three batches steamed instead of seared.
- Hot Pan First: Get the pan screaming hot before adding the chicken, about 2 minutes on medium-high. Sounds obvious, but I used to rush this and wondered why my skin never got crispy.
- Skip the Crowding: Leave space between thighs in the pan or they’ll boil in their own juices instead of browning. This isn’t the prettiest method, but it’s the only way to get that golden crust.
- Rest Before Serving: Let the chicken rest 5-10 minutes under foil after cooking—it keeps the juices inside where they belong. I skip this when I’m starving, but the meat is noticeably drier when I do.
Best Sauces and Condiments for This Recipe
Classic Pan Sauce
After removing the chicken, pour out excess fat but leave those flavorful browned bits. Add ½ cup chicken broth and 2 tbsp lemon juice, scraping up the fond. Simmer for 3-4 minutes until slightly reduced. Finish with 1 tbsp cold butter for a glossy, rich sauce that complements the crispy skin perfectly. 💫
Honey-Mustard Glaze
Whisk together 3 tbsp Dijon mustard, 2 tbsp honey, and 1 tsp apple cider vinegar. Brush this sweet-tangy glaze over the chicken during the last 2 minutes of cooking. The heat caramelizes the sugars for a sticky, flavorful coating.
Garlic-Herb Butter
Mix 4 tbsp softened unsalted butter with 2 minced garlic cloves, 1 tbsp chopped parsley, and 1 tsp lemon zest. Dollop this compound butter on each thigh just before serving. It melts beautifully into the crispy skin and juicy meat.
Spicy Sriracha Drizzle
Combine ¼ cup mayonnaise, 2 tbsp sriracha, and 1 tbsp lime juice for a creamy, spicy kick. Drizzle lightly over the chicken or serve on the side for dipping. This adds a nice contrast to the rich, savory flavors. 🔥
Lemon-Pepper Sauce
Melt 3 tbsp butter with 1 tbsp lemon pepper seasoning and 1 tsp lemon zest. Spoon this bright, zesty sauce over the chicken just before serving. The citrus notes cut through the richness beautifully.
Creamy Garlic Aioli
Blend ½ cup mayonnaise, 2 minced garlic cloves, 1 tbsp Dijon mustard, and 1 tsp lemon juice. This velvety aioli is perfect for dipping or as a topping. I love how it clings to the crispy skin.
Nutrition Facts
Frequently Asked Questions
Why pat the chicken dry before cooking?
Moisture prevents crispy skin by creating steam instead of browning. Patting dry removes excess water for that perfect golden crust.
Can I use boneless thighs?
Yes, but bone-in versions give better flavor and juiciness. If using boneless, reduce cooking time by 2-3 minutes per side.
What if the skin sticks to the pan?
It’s not ready to flip yet! Let it cook undisturbed until the skin releases naturally, usually after 8-10 minutes.
How do I keep the skin crispy after cooking?
Rest on a wire rack, not a plate, to prevent steam buildup. Serve immediately for maximum crunch.

- Jollof Rice Sauce Recipe: West African Tomato and Spice Infusion - September 25, 2026
- Japanese Rice Soup Recipe: Umami-Rich Comfort in a Bowl - September 25, 2026
- Homemade Cream Of Rice Recipe: Silk-Smooth Breakfast in Minutes - September 25, 2026