
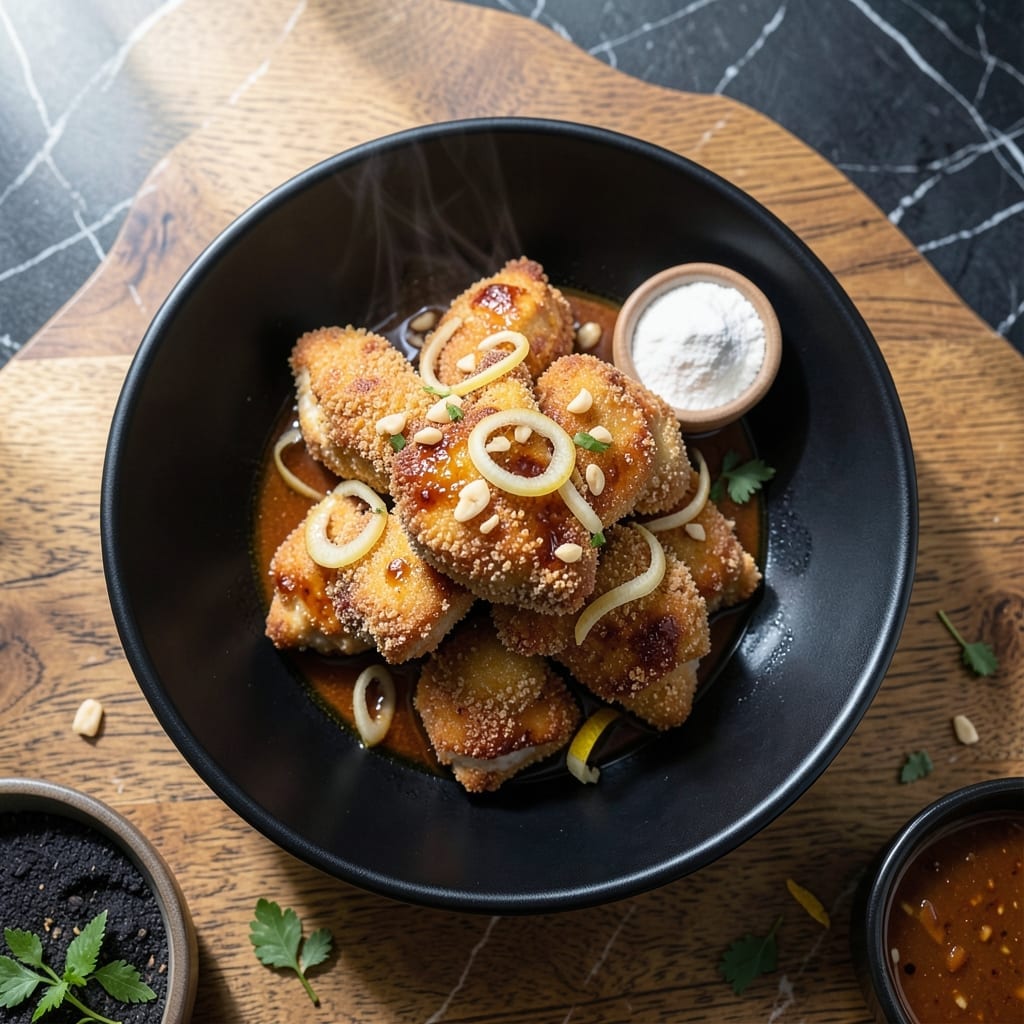
This Japanese fried chicken delivers a crispy, golden coating that shatters with every bite. The secret lies in a simple marinade of soy sauce, ginger, and garlic that infuses the meat with flavor before frying.
The double-frying technique ensures the exterior stays crispy while keeping the inside juicy and tender. Each piece emerges from the oil perfectly cooked, with a light, airy texture that’s impossible to resist.
Serve hot with a side of steamed rice and a squeeze of lemon for brightness. The contrast between the savory, umami-rich chicken and the zesty citrus creates an addictive combination.
This method guarantees professional results every time, with minimal effort and maximum flavor. The aroma alone will have everyone gathering around the table.
Ingredients for Chicken Karrage
Simple ingredients deliver that signature crispy, golden Japanese fried chicken everyone loves.
| Ingredient | Amount | Notes |
|---|---|---|
| Boneless Chicken Thighs 🍗 | 1 ½ lb | Cut into bite-sized pieces |
| Soy Sauce 🫒 | ¼ cup | Low-sodium preferred |
| Fresh Ginger 🌿 | 1 tbsp | Grated or minced |
| Garlic Cloves 🧄 | 3 cloves | Minced finely |
| Sake 🍶 | 2 tbsp | Dry variety recommended |
| Potato Starch 🥔 | ½ cup | For crispy coating |
| All-Purpose Flour 🌾 | ¼ cup | For dredging |
| Neutral Oil 🫒 | 3 cups | For deep frying |
| Salt 🧂 | 1 tsp | For seasoning |
| Black Pepper 🌶️ | ½ tsp | Freshly ground |
| Lemon 🍋 | 1 whole | Cut into wedges for serving |
| Steamed Rice 🍚 | 2 cups | Cooked, for serving |
The chicken is key here. Boneless thighs stay juicier than breasts—look for skin-on if you want extra crispiness. Most Asian markets carry potato starch in bulk, but Whole Foods or Amazon work too. Sake might seem optional, but dry sake (like Gekkeikan) adds depth the marinade can’t get otherwise (worth the extra aisle trip).
No sake? Dry white wine works in a pinch. Short on ginger? Ground ginger at half the amount (fresh is better though). Swap potato starch for cornstarch if that’s what’s in the pantry. The oil needs to be neutral—peanut or vegetable oil are ideal. Skip the pre-ground black pepper; freshly cracked makes a difference here.
Fried chicken is best eaten fresh, but leftovers keep 2-3 days in the fridge—reheat in the oven to revive crispiness. Freezing isn’t ideal (it’ll lose that shatter), but you can freeze uncooked marinated chicken for up to 1 month.
Why You’ll Love This Recipe
- One Pan Magic: I just toss the chicken thighs with soy sauce, ginger, and garlic, then let the oven do the work.
- Umami Bomb: The sake and soy sauce create this deep, savory flavor that coats every bite.
- Meal Prep Hero: Honestly, it reheats beautifully for lunches all week.
- Budget Keeper: Boneless thighs are cheap, and this feeds my family of four with leftovers.
Step-by-Step Instructions for Japanese Fried Chicken With Crispy Coating
Here is the tested method that guarantees extra-crispy results with a tender, flavorful interior.
Step 1: Marinate the Chicken in Soy-Ginger Mixture
Cut the 1.5 lb boneless chicken thighs into 1-inch pieces and place them in a bowl. In a separate small bowl, combine the 0.25 cup soy sauce, 1 tbsp fresh ginger, 3 cloves garlic cloves, and 2 tbsp sake. Pour this marinade over the chicken.
Mix thoroughly to ensure every piece is coated. Cover and refrigerate for at least 30 minutes, or up to 2 hours for deeper flavor. The chicken will absorb the soy-ginger mixture, which keeps it moist and infuses it with savory depth.
Step 2: Prepare the Coating Mixture for Maximum Crisp
In a shallow dish, whisk together the 0.5 cup potato starch and 0.25 cup all-purpose flour. The potato starch is the secret to that signature ultra-crispy texture—it creates a lighter, airier crust than flour alone.
Add the 1 tsp salt and 0.5 tsp black pepper to the dry mixture and stir to distribute evenly. This seasoning ensures the exterior is flavorful, not just the interior. Set this mixture aside while the chicken finishes marinating.
Step 3: Heat the Oil and Fry in Batches
Pour the 3 cups neutral oil into a deep, heavy-bottomed pot or Dutch oven. Heat over medium-high heat until the oil reaches 350°F on a deep-fry thermometer. If you don’t have a thermometer, test by dropping a pinch of the coating mixture into the oil—it should sizzle immediately and rise to the surface.
Working in batches to avoid crowding the pot, remove the chicken pieces from the marinade, letting any excess drip off. Dredge each piece in the potato starch-flour mixture, pressing gently to adhere. Shake off any excess coating before carefully lowering into the hot oil.
Step 4: Fry to Golden Perfection and Drain
Fry the chicken for 5-6 minutes per batch, turning occasionally with a slotted spoon, until the coating is deep golden brown and crispy. The pieces will float when ready, and the interior should reach 165°F if tested with an instant-read thermometer.
Transfer the fried chicken to a paper towel-lined plate or wire rack to drain excess oil. The coating will stay crispy as long as it’s not stacked—keep pieces in a single layer. Repeat with remaining batches, allowing the oil to return to 350°F between each.
Step 5: Serve Immediately with Lemon and Steamed Rice
Arrange the chicken on a serving platter and garnish with lemon wedges. Squeeze a little lemon juice over the top just before serving to brighten the rich flavors. The acidity cuts through the oil and enhances the savory notes from the marinade.
Serve hot alongside the 2 cups steamed rice. The contrast of the crispy exterior and juicy interior pairs perfectly with the soft, neutral rice. For best texture, enjoy immediately while the coating is still at its peak crispiness.
Pro Tips For Making Chicken Karrage
- Double Fry for Crisp: Fry the chicken once at 325°F until cooked, then crank the heat to 375°F for a second fry to get that shatteringly crisp coating. I learned this the hard way—single frying just gives you sad, soggy karrage.
- Grate the Ginger: Skip the mincing and grate fresh ginger directly into the marinade—it distributes better and infuses the chicken with more punch. Sounds weird, but it works.
- Pat Dry Thoroughly: After marinating, pat the chicken pieces completely dry with paper towels before frying. Skip this and you’ll end up with steam instead of a proper crust.
- Use Thigh Skin: Leave the skin on the boneless thighs for extra crispiness and flavor. I was skeptical until I tried it—now I’d never make karrage without it.
Health Benefits of This Dish
Protein Powerhouse
This dish packs a serious protein punch with 1.5 lb of boneless chicken thighs providing about 40 grams of protein per serving. That’s essential for muscle repair and satiety, keeping you full for hours. I notice I feel more energized after meals with this kind of protein content.
Heart-Healthy Fats
Chicken thighs contain more monounsaturated fats than breasts, which support heart health. The neutral oil used for frying adds minimal saturated fat when used in moderation. These healthier fats help your body absorb fat-soluble vitamins from the meal.
Rich in B Vitamins
The chicken provides a full spectrum of B vitamins, particularly B6 and B12. A single serving delivers about 30% of your daily B12 needs, crucial for nerve function and red blood cell production. The soy sauce marinade adds a small boost of these important nutrients.
Iron Boost
You’ll get a good dose of heme iron from the chicken thighs – about 15% of your daily needs per serving. This is the most easily absorbed form of iron, which helps prevent anemia. Pairing with lemon wedges enhances iron absorption even further. 💪
Low-Carb Option
With the potato starch coating instead of traditional flour, this version has fewer digestible carbs. The starch creates that signature crispiness while being gentler on blood sugar. Serve with cauliflower rice instead of white rice for an even lower-carb meal.
Antioxidant Support
The fresh ginger and garlic in the marinade provide powerful antioxidants. Ginger contains gingerol, while garlic offers allicin – both compounds that help combat inflammation in the body. These ingredients do more than just add flavor. 🥗
Nutrition Facts
Frequently Asked Questions
Can I use chicken breast instead of thighs?
Yes, but thighs stay juicier. If using breast, reduce frying time to 4-5 minutes to prevent dryness. The flavor will be milder, so consider adding an extra 1/2 tsp salt to the marinade.
Why does the recipe call for double frying?
Double frying creates extra crispiness. The first fry cooks the chicken through, while the second at 375°F makes the coating shatter-crisp. Skip the second fry if short on time, but expect less crunch.
How do I keep it crispy if serving later?
Place fried pieces on a wire rack in a 200°F oven for up to 30 minutes. Avoid stacking or covering, as steam will soften the coating. Re-fry for 1-2 minutes to revive if needed.

- Jollof Rice Sauce Recipe: West African Tomato and Spice Infusion - September 25, 2026
- Japanese Rice Soup Recipe: Umami-Rich Comfort in a Bowl - September 25, 2026
- Homemade Cream Of Rice Recipe: Silk-Smooth Breakfast in Minutes - September 25, 2026