
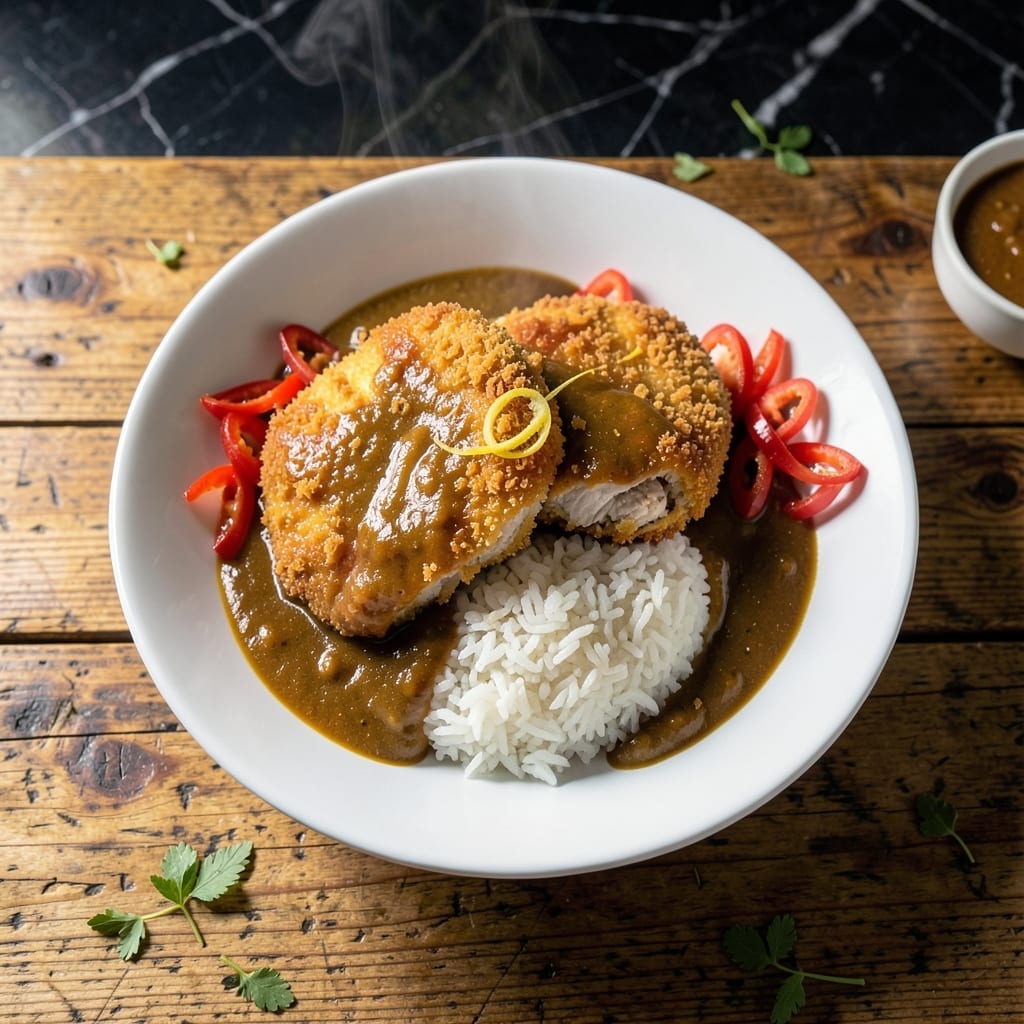
Japanese comfort food doesn’t get more satisfying than this dish. The combination of crispy panko-breaded chicken, fragrant curry sauce, and steamed rice creates a meal that’s both hearty and deeply comforting.
I developed this recipe after years of perfecting each component. The chicken achieves its signature crunch through a double-breading technique, while the curry sauce balances sweet, savory, and spicy notes perfectly. Every element comes together for a restaurant-quality experience at home.
The key is attention to detail at each step. The chicken must reach 350°F oil for that golden, shatteringly crispy coating, and the curry needs time to develop its complex flavors. Serve it all over freshly steamed rice for the ultimate comfort meal.
This dish brings together textures and flavors that define Japanese home cooking. The contrast between the crunchy cutlet and velvety curry sauce makes every bite memorable.
Ingredients for Chicken Katsu Curry Rice
Panko-breaded chicken cutlets, aromatic curry sauce, and steamed rice form this deeply satisfying meal.
| Ingredient | Amount | Notes |
|---|---|---|
| Chicken Breast Cutlets 🍗 | 1 ½ lb | Boneless, skinless, pounded to 1/2-inch thickness |
| Panko Breadcrumbs 🍞 | 2 cups | Japanese-style for maximum crispiness |
| All-Purpose Flour 🌾 | ½ cup | For dredging chicken |
| Large Eggs 🥚 | 2 whole | Beaten for breading adhesion |
| Neutral Oil 🛢️ | 4 cups | For deep frying, canola or vegetable |
| Japanese Curry Roux 🍛 | 3 ½ oz | S&B Golden Curry or Vermont Curry recommended |
| Onion 🧅 | 1 whole | Yellow onion, finely diced |
| Carrots 🥕 | 2 whole | Peeled and diced |
| Potatoes 🥔 | 2 whole | Russet or Yukon Gold, diced |
| Garlic Cloves 🧄 | 3 cloves | Minced for sauce base |
| Fresh Ginger 🌿 | 1 tbsp | Grated for sauce |
| Low-Sodium Chicken Broth 🥣 | 2 cups | For curry sauce base |
| Honey 🍯 | 1 tbsp | For balancing curry sweetness |
| Soy Sauce 🫙 | 1 tbsp | Low-sodium preferred |
| Jasmin Rice 🍚 | 2 cups | Uncooked, rinsed before cooking |
The chicken cutlets require precision. Use boneless, skinless breasts pounded to even 1/2-inch thickness—this ensures even cooking and maximum crispiness. Panko breadcrumbs are non-negotiable; regular breadcrumbs lack the signature crunch. S&B Golden Curry roux is the gold standard for authentic flavor, available at Asian markets or the international aisle of Whole Foods.
No panko? Crush corn flakes or breadsticks for a substitute, though the texture won’t be identical. Vermont Curry roux works if S&B isn’t available. For the sauce, swap honey with maple syrup if needed. The rice must be jasmine or short-grain—long-grain varieties won’t absorb the curry properly. Fresh ginger is ideal, but ground ginger at half the amount works.
Fry the cutlets just before serving to maintain crispiness. The curry sauce can be made 2 days ahead and reheated gently. Store leftovers separately in the fridge for up to 3 days—the chicken loses crispiness but the flavors deepen wonderfully.
Why You’ll Love This Recipe
- One Pan Meal: I fry the cutlets, keep them warm, then use the same pan for the curry—minimal cleanup, maximum flavor.
- Crispy Perfection: That panko crust stays shatteringly crisp even under the rich curry sauce. Honestly, it’s the best texture contrast.
- Crowd Pleaser: Kids devour the chicken, adults love the spiced curry, and it’s my go-to for family dinners.
- Lunch Tomorrow: Leftovers taste even better the next day, and the rice soaks up all that extra sauce. Between us, I sometimes make extra just for this.
Step-by-Step Instructions for Chicken Katsu Curry Rice
Master the technique for achieving perfectly crispy cutlets paired with rich, velvety curry sauce every time.
Step 1: Bread and Fry the Chicken Breast Cutlets
Set up a breading station with three shallow dishes. Place the 0.5 cup all-purpose flour in the first, beat the 2 whole large eggs in the second, and spread the 2 cups panko breadcrumbs in the third. Pat the 1.5 lb chicken breast cutlets dry, then dredge each in flour, dip in egg, and coat thoroughly in panko, pressing gently to adhere.
Heat the 4 cups neutral oil in a deep pot to 350°F. Fry the cutlets in batches for 4-5 minutes per side until golden brown and the internal temperature reaches 165°F. Drain on a wire rack to maintain crispiness—never stack them, as this creates steam and makes the crust soggy.
Step 2: Sauté Aromatics for the Curry Base
While the chicken rests, heat a Dutch oven over medium heat. Add the diced 1 whole onion, 2 whole carrots, and 2 whole potatoes. Cook for 5-6 minutes until the onion softens and begins to turn translucent.
Stir in the minced 3 cloves garlic cloves and grated 1 tbsp fresh ginger, cooking for 30 seconds until fragrant. This aromatic base is essential for building depth in the curry sauce, so don’t rush this step—undercooked garlic or ginger will taste raw and bitter.
Step 3: Build and Simmer the Curry Sauce
Pour the 2 cups low-sodium chicken broth into the pot with the vegetables. Add the 3.5 oz Japanese curry roux, breaking it into small pieces to help it dissolve. Stir in the 1 tbsp honey and 1 tbsp soy sauce for balance.
Bring the mixture to a boil, then reduce heat to low and simmer for 15-20 minutes, stirring occasionally, until the potatoes and carrots are fork-tender and the sauce thickens enough to coat the back of a spoon. If it reduces too much, add a splash of water to achieve your desired consistency.
Step 4: Assemble and Serve
Prepare the 2 cups jasmine rice according to package instructions, rinsing it first to remove excess starch. Slice the fried chicken cutlets into ½-inch strips for easy serving.
To plate, mound rice in bowls, arrange the crispy chicken alongside, and ladle the thick curry sauce over the top. Serve immediately while the chicken is still hot and crispy. The contrast of textures—creamy sauce, tender vegetables, and crunchy cutlets—defines this dish.
Pro Tips For Making Chicken Katsu Curry Rice
- Pound the Chicken: Use a rolling pin or meat mallet to even out the chicken breasts to 1/2-inch thickness—this guarantees they cook through at the same rate and stay juicy. I learned this the hard way after too many dry, uneven cutlets.
- Chill Before Frying: Let the breaded chicken rest in the fridge for 10-15 minutes before frying—it keeps the panko from falling off. Sounds tedious, but it’s the difference between a crispy crust and a sad, patchy one.
- Double Fry for Crisp: Fry the chicken once at 325°F until golden, then again at 375°F for 1-2 minutes. After burning a few batches, I finally figured out this is how you get that shatteringly crisp texture that holds up to the curry.
- Use Fresh Panko: Skip the fine breadcrumbs and go for fresh, coarse panko—they create those dramatic, airy crunch pockets. My grandmother swore by this, and she was right: it’s non-negotiable for proper katsu.
Perfect Pairings for This Recipe
Side Dish Pairings
Crisp cucumber sunomono salad with rice vinegar and sesame seeds cuts through the richness. I toss 2 cups thin-sliced cucumber with 1 tbsp vinegar and ½ tsp sugar. The cool acidity refreshes your palate between bites. 🥗
Pickled Vegetables
Quick-pickled daikon radish and carrots add crunch and tang. Slice 1 cup daikon and 1 cup carrot into matchsticks, then soak in ½ cup rice vinegar with 1 tsp salt for 30 minutes. These keep well in the fridge for 1 week.
Beverage Pairings
Serve with cold Japanese lager like Asahi or Sapporo—the crisp carbonation cleanses your palate. For non-alcoholic, try ramune soda or green tea. The bubbly texture of beer enhances the crunchy chicken coating. 🍺
Condiments
Add Fukujinzuke (Japanese pickled vegetables) on the side for an authentic touch. I find it at Asian markets. A drizzle of tonkatsu sauce over the chicken deepens the flavor. These small additions elevate the meal significantly.
Dessert Follow-Up
End with matcha ice cream or mochi for a light, refreshing finish. The bitterness of matcha contrasts beautifully with the savory meal. I serve 1 scoop per person with a sprinkle of roasted soybeans for texture.
Nutrition Facts
Frequently Asked Questions
Can I use chicken thighs instead of breast?
Yes, boneless thighs work beautifully and stay juicier. Pound them to ½-inch thickness for even cooking. They may need 1-2 minutes less frying time than breasts.
What if my curry sauce is too thick?
Simply thin it with warm water, 1 tablespoon at a time, until it reaches your desired consistency. The sauce should coat the back of a spoon but still pour easily.
How do I keep the chicken crispy while making the curry?
Fry the cutlets last, or keep them warm on a wire rack in a 200°F oven for up to 15 minutes. Avoid covering them, as trapped steam will make the coating soggy.

- Jollof Rice Sauce Recipe: West African Tomato and Spice Infusion - September 25, 2026
- Japanese Rice Soup Recipe: Umami-Rich Comfort in a Bowl - September 25, 2026
- Homemade Cream Of Rice Recipe: Silk-Smooth Breakfast in Minutes - September 25, 2026