
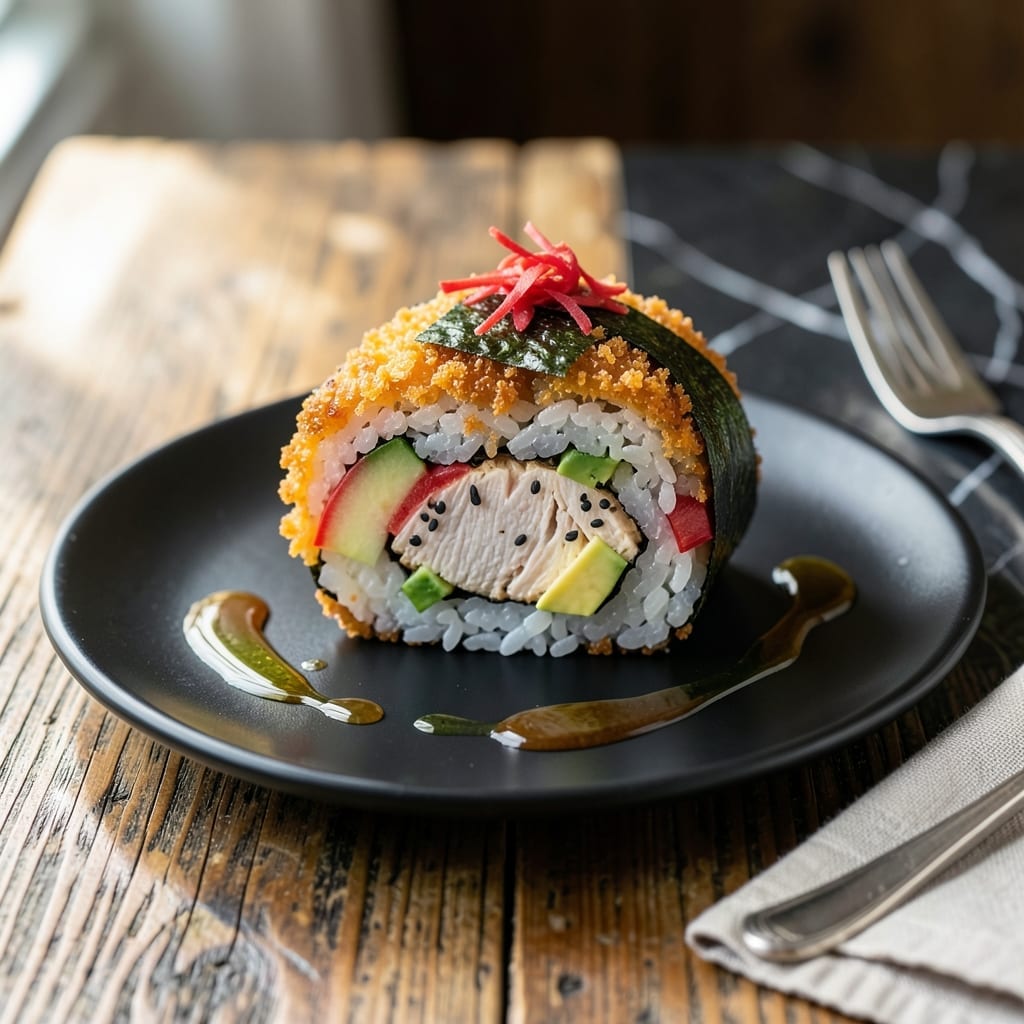
This recipe transforms simple chicken into a crispy, golden-brown katsu roll that delivers pure comfort in every bite. The secret lies in the double-breading technique with panko breadcrumbs, ensuring maximum crunch and flavor.
I’ve perfected this method to create a roll that stays crispy even after assembly, with tender, juicy chicken inside. The panko coating locks in moisture while forming a shatteringly light crust that’s impossible to resist.
What you’ll achieve is a dish that combines the satisfying texture of katsu with the convenience of a handheld roll. Each bite offers layers of crispy breading, seasoned chicken, and a soft, pillowy exterior.
Ideal for a hearty lunch or a fun twist on dinner, this creation brings restaurant-quality comfort to your kitchen with straightforward steps.
Ingredients for Chicken Katsu Roll
Panko, chicken, and a few pantry staples create this restaurant-quality handheld comfort dish.
| Ingredient | Amount | Notes |
|---|---|---|
| Chicken Breast 🍗 | 1 ½ lb | Boneless, skinless, pounded to 1/2-inch thickness |
| All-Purpose Flour 🌾 | ½ cup | For initial dredging |
| Large Eggs 🥚 | 2 whole | Beaten for egg wash |
| Panko Breadcrumbs 🍞 | 2 cups | Japanese-style for maximum crunch |
| Neutral Oil 🫒 | 2 cups | For deep frying (vegetable or canola) |
| Kosher Salt 🧂 | 1 ½ tsp | Diamond Crystal preferred |
| Freshly Ground Black Pepper 🌶️ | ½ tsp | Coarse grind for texture |
| Garlic Powder 🧄 | 1 tsp | For seasoning the flour |
| Onion Powder 🧅 | 1 tsp | For seasoning the flour |
| Paprika 🌶️ | ½ tsp | Sweet or smoked variety |
| Mayonnaise 🥫 | ½ cup | For assembly (Japanese Kewpie preferred) |
| Shredded Cabbage 🥬 | 1 cup | Green or purple, finely shredded |
| Carrot 🥕 | 1 whole | Julienned for filling |
| Soy Sauce 🫙 | 2 tbsp | Low-sodium for seasoning |
| Tonkatsu Sauce 🍯 | ½ cup | Or substitute with BBQ sauce |
The panko is non-negotiable for that signature shatter. Kikkoman brand is widely available at most supermarkets (look in the Asian foods aisle), but Japanese specialty stores offer superior texture. For the chicken, air-chilled breasts from Whole Foods or Costco stay juicier than standard. Always pound to even thickness—this prevents curling during cooking and ensures even crisping.
No panko? Regular breadcrumbs won’t deliver the same crunch, but crushed cornflakes at half the volume can work in a pinch. Out of tonkatsu sauce? Equal parts ketchup and Worcestershire (with a dash of soy sauce) mimics the flavor. The mayonnaise is key for moisture—Kewpie from Asian markets has the right tang. For a lighter version, Greek yogurt works but alters the flavor profile slightly.
Assembled rolls keep 2-3 days in the fridge (reheat in air fryer to revive crispiness). Freeze uncooked breaded cutlets for up to 2 months. Panko breadcrumbs should be stored in an airtight container to maintain their light texture for 6-12 months.
Why You’ll Love This Recipe
- One Pan Magic: I just bread, pan-fry, and roll—no fancy equipment, no mess.
- Crunch in Every Bite: That panko coating fries up so crispy it cracks between your teeth, then gives way to tender chicken.
- Lunchbox Hero: I pack these rolls cold for picnics or slice them into bentos, and they stay tasty for hours.
- Budget Stretcher: A single chicken breast puffs into multiple rolls, so I feed the whole family without breaking the bank.
Step-by-Step Instructions for Chicken Katsu Roll
Master the technique for achieving that perfect crunch and satisfying comfort in every bite.
Step 1: Prepare and Bread the Chicken Breast
Begin by setting up a breading station with three shallow dishes. In the first, combine the 0.5 cup all-purpose flour with 1 tsp garlic powder, 1 tsp onion powder, 0.5 tsp paprika, 1.5 tsp kosher salt, and 0.5 tsp freshly ground black pepper. This seasoned flour creates the first flavorful layer.
Beat the 2 whole large eggs in the second dish until uniform. Place the 2 cups panko breadcrumbs in the third. Pat the 1.5 lb chicken breast dry, then dredge each piece in the flour mixture, shaking off excess. Dip into the beaten eggs, allowing excess to drip off, then press firmly into the panko until fully coated. The panko should adhere completely with no bare spots.
Step 2: Fry to Golden, Crispy Perfection
Heat the 2 cups neutral oil in a deep skillet over medium-high heat to 350°F. To test readiness, drop in a pinch of panko—it should sizzle immediately and float to the surface. Carefully lower the breaded chicken into the hot oil, working in batches to avoid crowding the pan.
Fry for 4-5 minutes per side until the coating is deep golden brown and the internal temperature reaches 165°F. The crust should be audibly crisp when tapped with tongs. Transfer to a wire rack set over a baking sheet to drain, and sprinkle immediately with a pinch of kosher salt to enhance the flavor of the hot crust.
Step 3: Prepare the Fresh Vegetable Filling
While the chicken cooks, julienne the 1 whole carrot into thin matchsticks and toss with the 1 cup shredded cabbage. The vegetables should be fine enough to roll tightly but still provide a satisfying crunch. This fresh component balances the richness of the fried chicken.
In a small bowl, mix the 0.5 cup mayonnaise with the 2 tbsp soy sauce. This creamy, umami-rich sauce will bind the filling together and add moisture to the roll. Set aside until ready to assemble.
Step 4: Assemble and Slice the Rolls
Lay out a large sheet of plastic wrap. Arrange a portion of the julienned carrot and shredded cabbage in a thin, even layer. Place a piece of fried chicken on top, then drizzle with some of the mayonnaise mixture and tonkatsu sauce. The sauce should be distributed evenly but not soak the breading.
Using the plastic wrap as support, tightly roll the chicken and filling into a compact log. Wrap securely and refrigerate for 15 minutes to set the shape. Slice each roll into 1-inch thick pieces, revealing the spiral of crispy chicken and colorful filling. Serve immediately with additional tonkatsu sauce for dipping.
Pro Tips For Making Chicken Katsu Roll
- Pound the Chicken: Use a meat mallet to flatten the chicken breasts to an even 1/2-inch thickness—I learned this the hard way after my first few rolls turned out lumpy and uneven.
- Double Dredge: Dip the chicken in flour, egg, then panko, but repeat the egg and panko step for a thicker, crunchier crust that actually stays put in the roll.
- Skip the Cold Oil: Make sure your neutral oil is hot (about 350°F) before frying, or the panko will absorb oil and turn soggy instead of crispy.
- Rest Before Rolling: Let the fried chicken rest for 5 minutes on a wire rack before rolling it in the sushi mat—this keeps the breading from falling off when you shape it.
Creative Variations of These Flavors
Spicy Sriracha Crunch
Add 1 tbsp Sriracha to the mayonnaise mixture for a spicy kick. I also mix in 1 tsp sriracha powder with the panko for extra heat throughout the crust. The spice cuts through the richness beautifully. 🌶️
Teriyaki Glaze Twist
Brush the fried chicken with ¼ cup teriyaki sauce before rolling. Use store-bought or make your own with soy sauce, brown sugar, and ginger. This adds a sweet-savory dimension that pairs perfectly with the cabbage and carrot filling.
Avocado Lime Freshness
Add ½ cup diced avocado and a squeeze of lime juice to the vegetable filling. The creaminess and acidity brighten up the dish. I recommend using Hass avocados for their rich, buttery texture.
Bacon Cheese Upgrade
Layer 2 slices cooked bacon and ¼ cup shredded cheddar on the chicken before rolling. The bacon adds smokiness, while the melted cheese creates a gooey surprise in every bite. This version is a crowd-pleaser at my gatherings.
Vegetarian Mushroom Swap
Replace chicken with portobello mushroom caps, pounded to ½-inch thickness. Bread and fry the same way. The mushrooms absorb the flavors beautifully and provide a meaty texture. Serve with extra tonkatsu sauce for dipping.
Sesame Garlic Flavor
Stir 1 tbsp toasted sesame seeds and 1 tsp minced garlic into the mayonnaise. This adds nutty, aromatic depth to the creamy filling. I always toast my sesame seeds in a dry pan for 2-3 minutes to enhance their flavor. 💡
Nutrition Facts
Frequently Asked Questions
What’s the best way to keep the breading crispy after rolling?
Assemble rolls and refrigerate for 15 minutes to set the shape. Serve immediately or reheat in an air fryer at 375°F for 3-4 minutes to revive crispiness. Avoid microwaving, as it will make the breading soggy.
Can I bake the chicken instead of frying?
Yes! Bake at 400°F for 20-25 minutes on a wire rack, flipping halfway. Brush with oil and broil for 1-2 minutes to crisp the panko. The texture won’t be as shatteringly crisp, but it’s a lighter option.
Why did my breading fall off during frying?
This usually happens if the chicken isn’t dry before breading or if the oil isn’t hot enough. Pat the chicken thoroughly with paper towels, and ensure oil reaches 350°F before adding the chicken. Press the panko firmly to adhere.

- Jollof Rice Sauce Recipe: West African Tomato and Spice Infusion - September 25, 2026
- Japanese Rice Soup Recipe: Umami-Rich Comfort in a Bowl - September 25, 2026
- Homemade Cream Of Rice Recipe: Silk-Smooth Breakfast in Minutes - September 25, 2026