
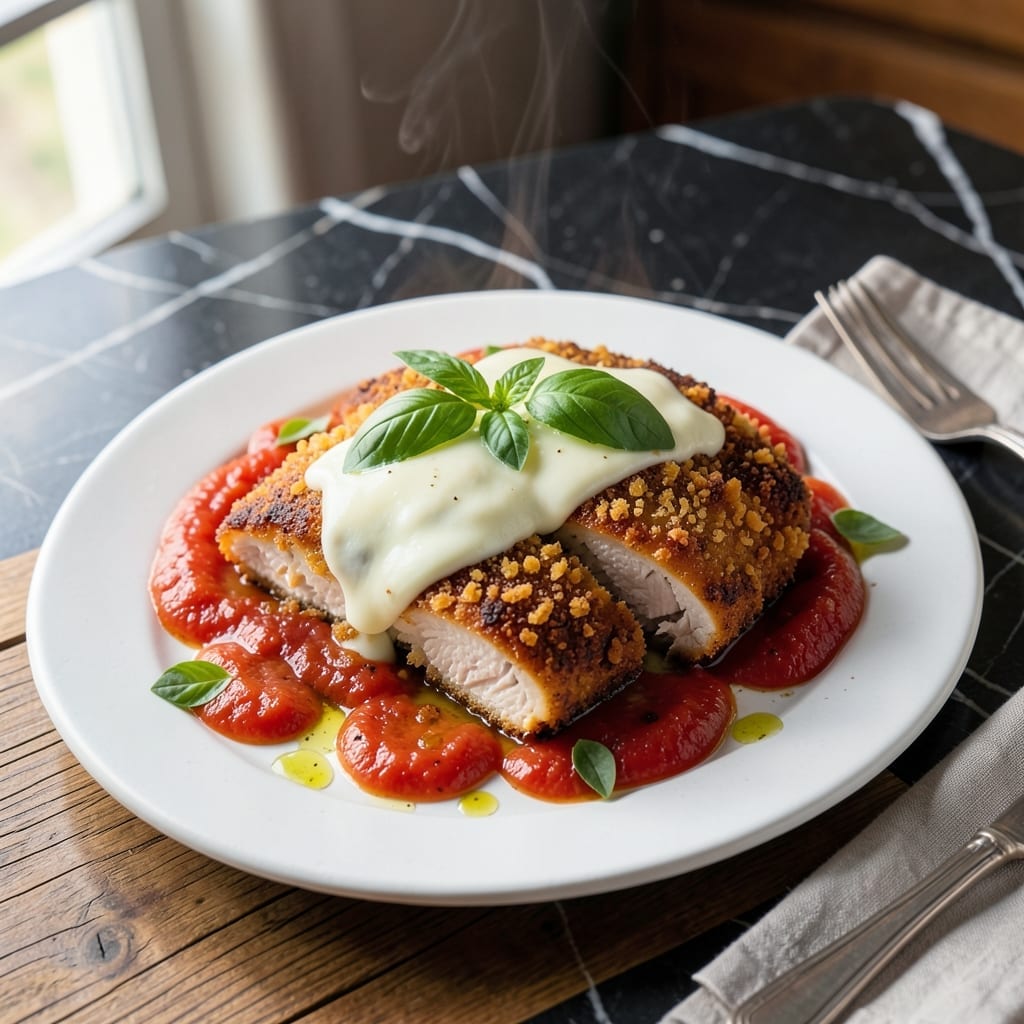
This breading technique delivers crispy, golden chicken parm every time without falling apart during cooking. The secret lies in a three-step process that creates a durable, flavorful crust.
First, the chicken is coated in flour, then dipped in beaten egg, and finally pressed into seasoned breadcrumbs. This method ensures maximum adhesion and even browning in the pan.
When fried in hot oil, the breading transforms into a shatteringly crispy layer that stays put through baking with marinara and cheese. The result is restaurant-quality chicken parm.
Serve with your favorite marinara and melted mozzarella for a complete dish that never disappoints.
Ingredients for Chicken Parm Breading
These precise ingredients create the restaurant-quality crispy coating that defines this dish.
| Ingredient | Amount | Notes |
|---|---|---|
| Chicken Breast Cutlets 🍗 | 1 ½ lb | Boneless, skinless, pounded to 1/4-inch thickness |
| All-Purpose Flour 🌾 | 1 cup | For initial dredging |
| Large Eggs 🥚 | 2 whole | Beaten for egg wash |
| Italian-Style Breadcrumbs 🍞 | 2 cups | Fine, dry variety preferred |
| Parmesan Cheese 🧀 | ½ cup | Freshly grated from wedge |
| Garlic Powder 🧄 | 1 tsp | For seasoning breadcrumbs |
| Onion Powder 🧅 | 1 tsp | For seasoning breadcrumbs |
| Dried Oregano 🌿 | 1 tsp | For seasoning breadcrumbs |
| Dried Basil 🍃 | 1 tsp | For seasoning breadcrumbs |
| Salt 🧂 | 1 tsp | Diamond Crystal kosher preferred |
| Black Pepper 🌶️ | ½ tsp | Freshly ground preferred |
| Olive Oil 🫒 | ¾ cup | For pan-frying cutlets |
| Marinara Sauce 🍅 | 2 cups | For topping before baking |
| Mozzarella Cheese 🧀 | 8 oz | Fresh, low-moisture preferred |
The chicken cutlets must be uniformly pounded to 1/4-inch thickness for even cooking and consistent breading adhesion. Whole Foods or ButcherBox offer high-quality, evenly sized cutlets. For breadcrumbs, Progresso Italian-style provides the ideal fine texture. The Parmesan should be Parmigiano-Reggiano—pre-grated versions contain anti-caking agents that inhibit melting. Diamond Crystal kosher salt delivers optimal seasoning control due to its flake structure.
Panko breadcrumbs may be substituted for Italian-style, though they produce a slightly thicker crust. Fresh breadcrumbs (from day-old Italian bread) work but require toasting first to prevent sogginess. Granular garlic and onion may replace powders at a 1:1 ratio. For the marinara, San Marzano tomato brands like La Valle or Stanislaus offer superior quality. Low-moisture mozzarella prevents excessive browning during baking.
Store raw breaded cutlets on a wire rack (not stacked) for up to 24 hours before cooking. Baked chicken parm holds for 3-4 days refrigerated or 3 months frozen. Reheat in a 375°F oven to restore crispness—microwaving creates a rubbery texture. Prepared breadcrumb mixture keeps for 1 week in an airtight container.
Why You’ll Love This Recipe
- One Pan Wonder: I bread these cutlets on a single plate with flour, eggs, and breadcrumbs—minimal mess, maximum payoff.
- Cheesy Crunch: The Parmesan mixed into the breadcrumbs makes that golden crust irresistibly crispy and savory.
- Weeknight Hero: Honestly, this breading works for chicken tenders, eggplant, even zucchini when I need a quick fix.
- Budget Stretcher: A pound of chicken cutlets and pantry staples feed my family for two meals without breaking the bank.
Step-by-Step Instructions for Chicken Parm Breading
Master the perfect breading technique for a crispy coating that adheres beautifully through frying and baking.
Step 1: Season and Prepare the Breadcrumbs
In a wide, shallow dish, combine the 2 cups Italian-Style Breadcrumbs with 0.5 cup Parmesan Cheese, 1 tsp Garlic Powder, 1 tsp Onion Powder, 1 tsp Dried Oregano, 1 tsp Dried Basil, 1 tsp Salt, and 0.5 tsp Black Pepper. Stir thoroughly until the seasonings are evenly distributed throughout the mixture.
This seasoned breadcrumb blend is the foundation of your crispy coating. The Parmesan adds umami depth while the herbs and spices create that classic Italian flavor profile. I always use fine, dry breadcrumbs for chicken parm—they adhere better than panko and create a more uniform crust.
Step 2: Create the Breading Station
Set up your breading station with three shallow dishes in a row. Place the 1 cup All-Purpose Flour in the first dish. In the second, beat the 2 whole Large Eggs until fully blended and slightly frothy. The third dish should contain your seasoned breadcrumb mixture from Step 1.
This three-step process ensures maximum adhesion and crispiness. The flour creates a dry surface for the egg to cling to, the egg acts as the glue, and the breadcrumbs provide the crispy exterior. I recommend using dishes wide enough to accommodate the 1.5 lb Chicken Breast Cutlets without crowding.
Step 3: Dredge and Coat the Chicken Cutlets
Working with one cutlet at a time, dredge each piece in the flour, shaking off any excess. Then dip it into the beaten eggs, allowing any excess to drip back into the dish. Finally, press the cutlet firmly into the seasoned breadcrumb mixture, turning to coat all sides completely.
For extra crispy results, I like to press the breadcrumbs into the chicken with my fingers, ensuring they adhere well to all surfaces, especially the edges. Place the breaded cutlets on a large plate or baking sheet. Don’t stack them—this could cause the coating to stick together and come off when you try to cook them.
Step 4: Rest the Breaded Cutlets
Let the breaded cutlets rest for 10-15 minutes at room temperature before cooking. This resting period allows the coating to set and adhere more firmly to the chicken, which is crucial for preventing the breading from falling off during frying or baking.
During this time, the flour absorbs some of the egg moisture, creating a stronger bond between the chicken and the breading. You’ll notice the coating becomes slightly drier to the touch—this is exactly what you want. While the cutlets rest, heat the 0.75 cup Olive Oil in a large skillet over medium heat until shimmering.
Pro Tips For Making Chicken Parm Breading
- Pound the Chicken: Use a meat mallet or rolling pin to flatten cutlets to an even 1/4-inch thickness—this guarantees they cook through without burning the breading.
- Grate Fresh Parmesan: Skip the pre-shredded stuff; freshly grated Parmesan melts better and sticks to the breadcrumbs like it’s supposed to.
- Rest the Breaded Cutlets: Let them sit 5-10 minutes after breading so the coating sets—my first few batches fell apart because I rushed this.
- Double-Dip the Egg: After the first egg wash, give the cutlets a second quick dip then back into breadcrumbs for a thicker, crunchier crust that actually holds up to the sauce.
Pro Cooking Tips for Perfect Results
Oil Temperature Control
Maintain oil between 350-375°F for perfect browning. Use a deep-fry thermometer—I rely on Taylor Classic for accuracy. Too low and your breading absorbs oil; too high and it burns before cooking through.
Even Browning Trick
Don’t crowd the pan—fry in batches with 2 cutlets per batch in a 12-inch skillet. This prevents oil temperature drops that lead to greasy, uneven coating. I use my Lodge cast iron for superior heat retention.
The Press Test
After breading, press the coating gently with your palm. If it stays put, it’s ready. If breadcrumbs fall off, your egg wash needs more protein—I add 1 tbsp water to thin it slightly for better adhesion. 💡
Double-Dredge Secret
For extra-crispy results, repeat the egg and breadcrumb steps after the initial coating. This creates a thicker, more durable crust that holds up to marinara and cheese. Just ensure each layer has 5 minutes to set before frying.
Rest Before Baking
After frying, let cutlets rest 5 minutes on a wire rack before adding sauce and cheese. This prevents the breading from turning soggy during baking at 375°F. I learned this the hard way after several failed attempts.
Cheese Shield
Sprinkle a thin layer of breadcrumbs between the sauce and mozzarella. This creates a barrier that keeps the coating crispy. Use ¼ cup extra breadcrumbs for this step—it makes all the difference. 🔥
Nutrition Facts
Frequently Asked Questions
Why does my breading fall off in the pan?
This usually happens if the chicken isn’t dry before breading or if you skip the resting period. Pat cutlets completely dry, then let breaded pieces rest for 10-15 minutes before frying.
Can I use panko instead of Italian breadcrumbs?
Yes, but panko creates a thicker, crunchier crust. For classic texture, stick with fine Italian breadcrumbs. If using panko, press firmly to ensure adhesion.
What’s the ideal oil temperature for frying?
Maintain oil between 350-375°F for even browning without burning. Use a thermometer—too low causes greasy breading, too high burns it before cooking through.
How do I keep the coating crispy after adding sauce?
Sprinkle a thin layer of breadcrumbs between the sauce and cheese. This barrier prevents sogginess during baking at 375°F.

- Japanese Rice Porridge Recipe: Silky Congee With Umami Depth - September 25, 2026
- Rice Bagel Recipe: Chewy Pillows With a Twist - September 25, 2026
- Rice Cheela Recipe: Savory Indian Pancakes With Fresh Herbs - September 25, 2026