
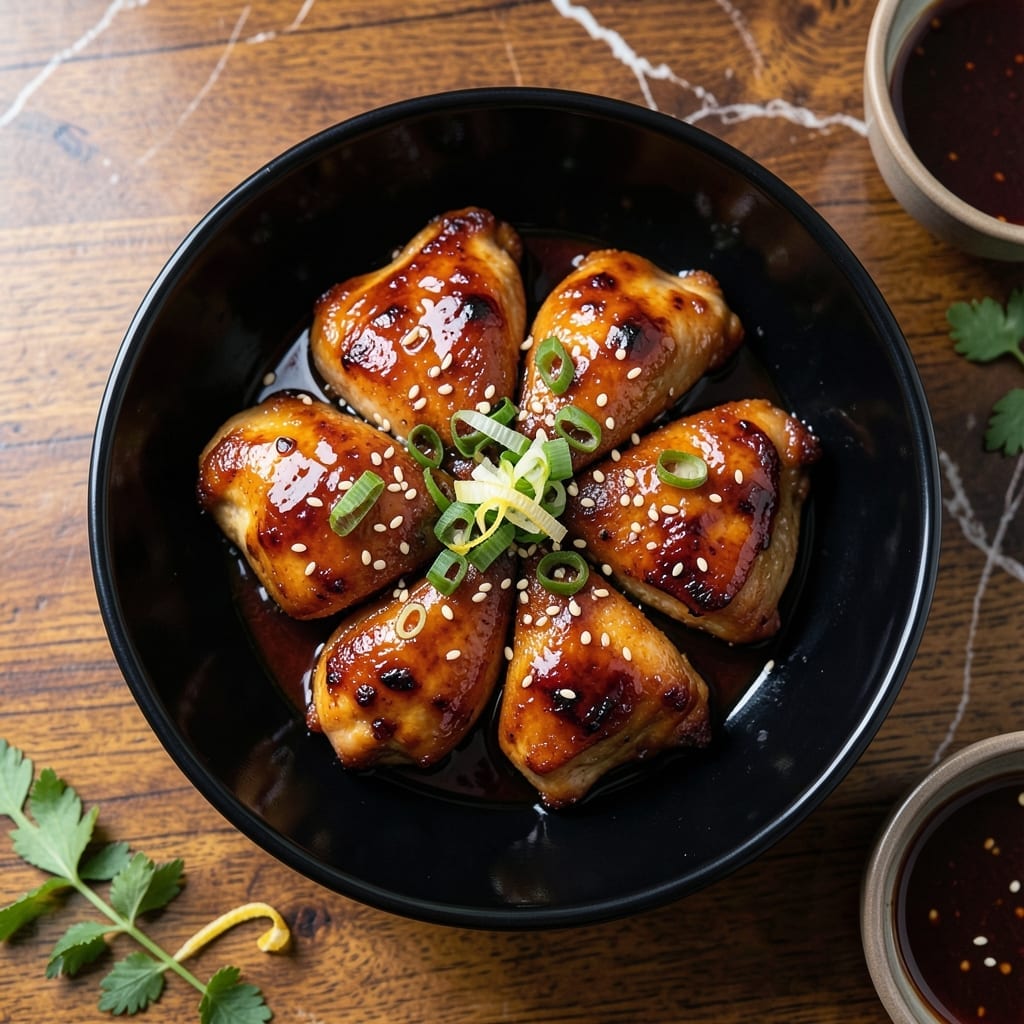
This homemade teriyaki chicken delivers restaurant-quality flavor with a simple, foolproof method. The key is a balanced glaze that’s sweet, savory, and packed with a subtle garlic punch.
I’ve refined this recipe to ensure the sauce clings perfectly to the chicken, creating a glossy finish every time. It’s a dish that feels special but comes together with minimal effort.
With tender chicken and a rich, sticky glaze, this version proves that homemade beats takeout. Serve it over rice or with steamed vegetables for a complete meal.
Here’s how to make teriyaki chicken that’s better than your favorite delivery.
Ingredients for Basic Chicken Teriyaki
A handful of pantry staples and fresh aromatics bring this dish to life beautifully.
| Ingredient | Amount | Notes |
|---|---|---|
| Boneless Skinless Chicken Thighs 🍗 | 1 ½ lb | Or substitute chicken breasts |
| Soy Sauce 🫒 | ½ cup | Low-sodium preferred |
| Brown Sugar 🍚 | ⅓ cup | Packed, for glaze sweetness |
| Garlic Cloves 🧄 | 4 cloves | Minced for bold flavor |
| Fresh Ginger 🌿 | 1 tbsp | Grated or minced |
| Rice Vinegar 🍋 | 2 tbsp | For tangy balance |
| Sesame Oil 🫒 | 1 tbsp | Toasted for depth |
| Cornstarch 🌾 | 1 tbsp | For thickening glaze |
| Water 💧 | ¼ cup | Cold, for slurry |
| Vegetable Oil 🫒 | 2 tbsp | For cooking chicken |
| Green Onions 🧅 | 3 whole | Sliced thin for garnish |
| Sesame Seeds 🌾 | 1 tbsp | Toasted for garnish |
| Black Pepper 🌶️ | ½ tsp | Freshly ground preferred |
The chicken thighs are non-negotiable here. Boneless, skinless stay juicy while absorbing the glaze—breasts work but can dry out. Costco or Whole Foods have great pre-portioned packs. For soy sauce, Kikkoman low-sodium keeps the salt in check without sacrificing depth. Fresh ginger and garlic make all the difference—avoid the jarred stuff if possible.
No brown sugar? Honey or maple syrup at equal volume works in a pinch. Tamari can replace soy sauce for gluten-free needs. Missing rice vinegar? Apple cider vinegar is a decent stand-in. The cornstarch slurry is key for that glossy finish—don’t skip it (or substitute arrowroot at the same ratio).
The glaze thickens as it cools, so serve immediately. Leftovers keep 4-5 days refrigerated, though the chicken is best fresh. Freeze the cooked chicken and glaze separately for up to 3 months—reheat gently to prevent drying.
Why You’ll Love This Recipe
- One Pan Wonder: I toss the thighs, sauce, and aromatics together and let the oven do the work—no babysitting required.
- Sweet-Savory Magic: The brown sugar caramelizes with the soy sauce, while garlic and ginger add that deep, warm kick I crave.
- Meal Prep MVP: I make a double batch on Sunday and it reheats beautifully for lunches all week. (Yes, even on a Tuesday night)
- Budget Hero: Chicken thighs stay juicy and cost half what breasts do, and the pantry staples finish the dish without a special shopping trip.
Step-by-Step Instructions for Chicken Teriyaki
This method ensures a glossy, garlic-rich glaze that clings perfectly to every piece of chicken.
Step 1: Prepare the Teriyaki Glaze
In a medium bowl, combine the 0.5 cup soy sauce, 0.33 cup brown sugar, 4 cloves garlic cloves, 1 tbsp fresh ginger, 2 tbsp rice vinegar, and 1 tbsp sesame oil. Whisk vigorously until the brown sugar dissolves completely and the mixture appears smooth and well-blended.
This base delivers the signature sweet-savory balance. I use a fork to break up any clumps of brown sugar, ensuring it fully incorporates into the liquid. Set this aside while you prepare the chicken—the flavors will meld as you work.
Step 2: Cook the Chicken Thighs
Heat the 2 tbsp vegetable oil in a large skillet over medium-high heat until it shimmers. Season the 1.5 lb boneless skinless chicken thighs with 0.5 tsp black pepper, then add them to the pan. Cook for 5-6 minutes per side until golden brown and cooked through.
Don’t crowd the pan—work in batches if needed to ensure even browning. The chicken is ready to flip when it releases easily from the pan. Transfer the cooked chicken to a plate and set aside, leaving the flavorful drippings in the skillet.
Step 3: Thicken and Finish the Glaze
Pour the prepared glaze into the same skillet and bring to a gentle simmer over medium heat. In a small cup, mix the 1 tbsp cornstarch with the 0.25 cup water to create a smooth slurry. Slowly pour this into the simmering glaze while stirring constantly.
Continue cooking for 2-3 minutes until the glaze thickens enough to coat the back of a spoon. You’ll notice it transform from a thin liquid to a glossy, syrup-like consistency. This is your cue that it’s ready for the chicken.
Step 4: Coat the Chicken and Garnish
Return the cooked chicken to the skillet and turn to coat each piece thoroughly in the thickened glaze. Cook for an additional 1-2 minutes, allowing the sauce to caramelize slightly on the surface of the chicken. The glaze should cling beautifully, with a deep, rich sheen.
Transfer the chicken to a serving platter. Sprinkle with the 3 whole green onions, thinly sliced, and the 1 tbsp sesame seeds for a fresh finish and added crunch. Serve immediately while the glaze is still warm and fluid.
Pro Tips For Making Basic Chicken Teriyaki
- Seared Then Simmered: Sear the chicken thighs first in a hot pan to get that deep color and flavor—about 3-4 minutes per side—then lower the heat and simmer in the teriyaki sauce.
- Grate the Ginger: Fresh ginger can be fibrous, so grate it finely instead of mincing to guarantee it melts into the sauce without stringy bits.
- Don’t Drown the Sauce: After adding soy sauce and brown sugar, let it reduce for 2-3 minutes before adding the chicken back in—this keeps the sauce thick and glossy, not watery.
- Slice Against Grain: Once cooked, slice the thighs against the grain for shorter muscle fibers—makes each bite tender instead of chewy.
Pro Cooking Tips for Perfect Results
Perfect Pan Temperature
Get your skillet screaming hot before adding the chicken—I use medium-high heat and let the vegetable oil shimmer for 30 seconds first. This ensures a beautiful golden sear that locks in juices. A cast iron or stainless steel pan gives the best results. 🔥
Glaze Timing Trick
Start your glaze while the chicken cooks so both finish simultaneously. The 2-3 minutes for thickening is perfect for letting the chicken rest briefly before coating. I use a whisk to keep the cornstarch slurry from clumping.
Avoid Overcrowding
Cook the 1.5 lb chicken thighs in batches if your pan isn’t large enough. Overcrowding steams the meat instead of searing it. You’ll know it’s ready to flip when the edges look opaque and it releases easily from the pan.
Sauce Consistency Check
Your glaze should coat the back of a spoon but still drip slowly. If it’s too thin, simmer 1 more minute. Too thick? Add 1 tbsp water and stir. This dish is all about that perfect glossy finish.
Final Caramelization
When coating the chicken, let it sit in the glaze for 1-2 minutes to develop that sticky, caramelized coating. Don’t stir constantly—let it sizzle and develop flavor. I always garnish with sesame seeds right before serving. ✨
Nutrition Facts
Frequently Asked Questions
Can I use chicken breasts instead of thighs?
Yes, but thighs stay juicier. If using breasts, reduce cooking time to 4-5 minutes per side to prevent dryness. Brining them for 30 minutes in saltwater first helps maintain moisture.
How do I store leftovers?
Keep in an airtight container in the fridge for up to 4-5 days. Reheat gently in a pan with a splash of water to prevent the glaze from drying out. Avoid microwaving to preserve texture.
Why is my glaze too thin?
Simmer it longer! The cornstarch needs 2-3 minutes to fully thicken. If still runny, mix 1 tsp cornstarch with 1 tbsp cold water, then stir into the simmering glaze.
Can I make this gluten-free?
Swap soy sauce for tamari or coconut aminos. Ensure all other ingredients (like cornstarch) are certified gluten-free. The flavor remains just as rich.

- Jollof Rice Sauce Recipe: West African Tomato and Spice Infusion - September 25, 2026
- Japanese Rice Soup Recipe: Umami-Rich Comfort in a Bowl - September 25, 2026
- Homemade Cream Of Rice Recipe: Silk-Smooth Breakfast in Minutes - September 25, 2026