
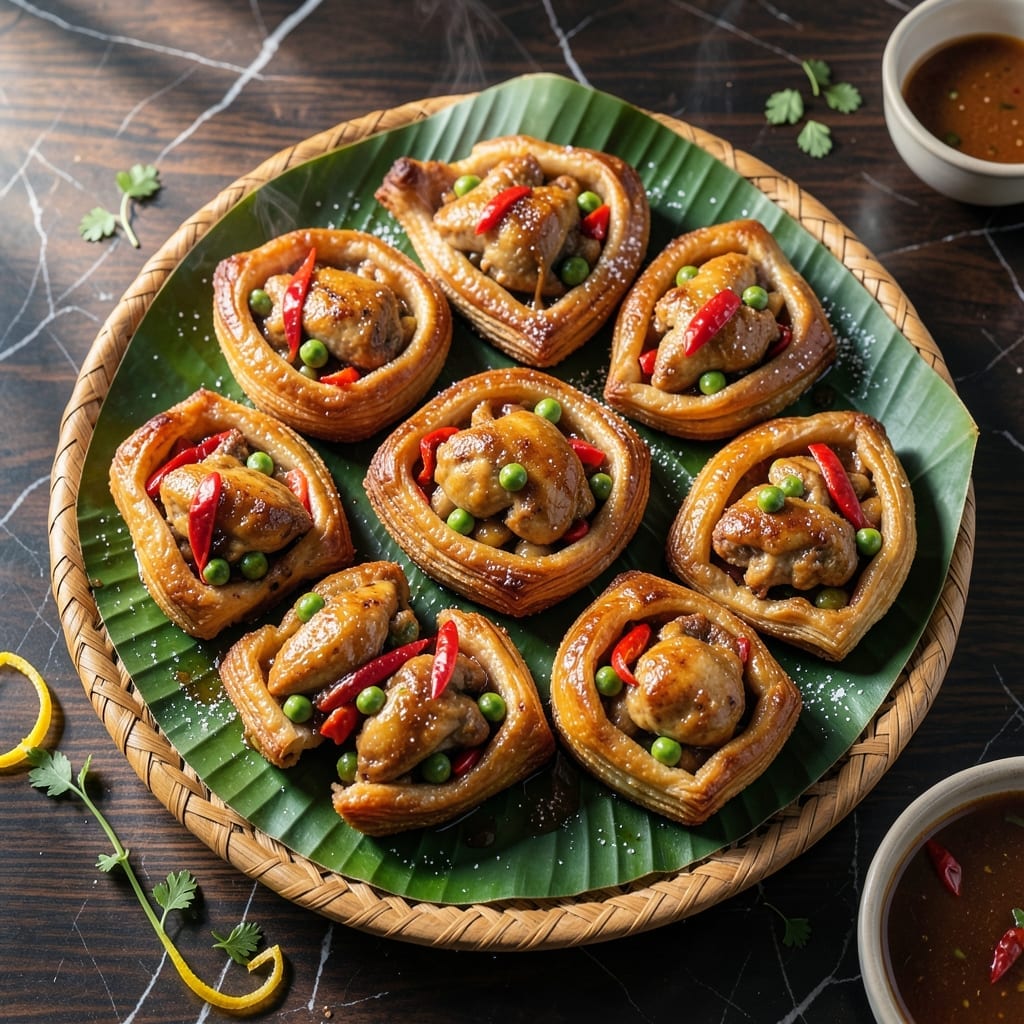
There’s something magical about biting into a perfectly baked piaya, with its flaky layers revealing a fragrant, spiced chicken filling inside. This dish brings together the best of pastry craftsmanship and bold Caribbean flavors in one satisfying package.
The dough is the foundation here, requiring patience to achieve those signature layers. I’ve refined the technique to ensure each bite delivers that coveted crispness without sacrificing tenderness. The filling, seasoned with traditional spices, complements the pastry beautifully.
What sets this apart is the balance of textures—golden, flaky pastry giving way to a moist, flavorful center. The aroma alone, as it bakes, promises a meal worth the effort.
Whether for a special occasion or a comforting dinner, this recipe delivers restaurant-quality results at home. Here’s how to make it right.
Ingredients for Chicken Piaya
Crafting this dish requires patience with the dough and bold spices for the filling. No shortcuts here.
| Ingredient | Amount | Notes |
|---|---|---|
| All-Purpose Flour 🌾 | 3 cups | Plus extra for dusting |
| Unsalted Butter 🧈 | 1 cup | Cold, cut into small cubes |
| Ice Water 💧 | ¾ cup | For dough hydration |
| Salt 🧂 | 1 tsp | Divided between dough and filling |
| Granulated Sugar 🍚 | 1 tsp | For dough flavor balance |
| Boneless Chicken Thighs 🍗 | 1 ½ lb | Diced into small pieces |
| Onion 🧅 | 1 whole | Finely diced for filling |
| Garlic Cloves 🧄 | 4 cloves | Minced for depth of flavor |
| Green Bell Pepper 🌶️ | 1 whole | Small dice for texture |
| Ground Cumin 🌿 | 1 tbsp | Toasted for warmth |
| Ground Coriander 🍃 | 1 tbsp | Balances the cumin |
| Ground Turmeric 🟡 | ½ tsp | For golden color |
| Scotch Bonnet Pepper 🌶️ | 1 whole | Seeds removed, minced |
| Fresh Cilantro 🌿 | ¼ cup | Chopped for garnish |
| Lime 🍈 | 1 whole | Juiced for brightness |
| Large Egg 🥚 | 1 whole | For egg wash finish |
The butter must be ice-cold—this is non-negotiable for achieving those flaky layers. Use European-style unsalted butter (82% fat content) for superior texture. King Arthur Flour is ideal for the pastry, but any all-purpose will work. The dough needs time to rest, so plan accordingly. For the chicken, thighs stay juicier than breasts during baking.
No Scotch bonnet? Habanero at half the amount works, but the flavor profile shifts slightly. Short on time? Pre-diced mirepoix from the grocery store saves chopping. The turmeric is for color more than heat—skip it if you prefer. Fresh cilantro can be swapped with parsley, though the Caribbean essence will be less pronounced. For extra richness, add a splash of coconut milk to the filling.
Assembled piayas freeze beautifully for up to 3 months—bake straight from frozen, adding 5-10 minutes to the time. Store cooked ones in the fridge for 3-4 days. Reheat in a toaster oven to revive the flakiness (microwave makes them soggy).
Why You’ll Love This Recipe
- No-Fuss Dough: The butter and ice water make the pastry so forgiving—I can roll it out in minutes without it sticking or tearing.
- Buttery Layers: That flaky, golden crust with just a hint of sugar? Honestly, it’s the kind of taste that makes you pause mid-bite.
- Grab-and-Go Meals: I pack these for picnics or lunchboxes, and they hold up perfectly—no soggy bottoms, just crisp edges.
- Pocket-Friendly Feast: A little flour, some butter, and stretch it to feed a crowd. Between us, it’s my secret for impressing without overspending.
Step-by-Step Instructions for Chicken Piaya
This method ensures a golden, flaky pastry with a perfectly spiced chicken filling every time.
Step 1: Prepare the Flaky Pastry Dough
In a large bowl, combine the 3 cups All-Purpose Flour, 1 tsp Salt, and 1 tsp Granulated Sugar. Add the 1 cup Unsalted Butter, cold and cut into small cubes, and work it into the flour using your fingertips or a pastry cutter until the mixture resembles coarse crumbs with pea-sized butter pieces visible.
Gradually add the 0.75 cup Ice Water, 1 tablespoon at a time, mixing gently with a fork until the dough just comes together. Avoid overworking it—visible butter streaks are essential for flakiness. Shape into a disk, wrap in plastic, and refrigerate for 30 minutes to relax the gluten and firm the butter.
Step 2: Cook the Spiced Chicken Filling
In a skillet over medium heat, sauté the finely diced Onion, minced Garlic Cloves, and small diced Green Bell Pepper until softened, about 5 minutes. Add the 1.5 lb diced Boneless Chicken Thighs and cook until no longer pink, breaking up any large pieces.
Stir in the 1 tbsp Ground Cumin, 1 tbsp Ground Coriander, and 0.5 tsp Ground Turmeric, cooking for 1-2 minutes until fragrant. Add the minced Scotch Bonnet Pepper and cook for another 2 minutes. Remove from heat and let cool completely before assembling. Season with salt to taste.
Step 3: Assemble and Seal the Piayas
On a lightly floured surface, roll out the chilled dough to ⅛-inch thickness. Using a 6-inch round cutter, cut out circles—you should get about 8. Re-roll scraps as needed. Place 2 tablespoons of the cooled chicken filling in the center of each circle, leaving a ½-inch border.
Lightly beat the Large Egg and brush the edges of the dough circles. Fold the dough over the filling to create half-moons, pressing the edges firmly to seal. Crimp the edges with a fork for a decorative finish and to ensure a tight seal, preventing filling from leaking during baking.
Step 4: Bake to Golden Perfection
Preheat the oven to 375°F. Line a baking sheet with parchment paper. Arrange the piayas on the sheet, spacing them 1 inch apart. Brush the tops with the remaining beaten egg for a golden finish.
Bake for 25-30 minutes until the pastry is deep golden brown and flaky. Rotate the baking sheet halfway through for even browning. Remove from the oven and let cool for 5 minutes before serving. Garnish with chopped Fresh Cilantro and a squeeze of Lime for brightness.
Pro Tips For Making Chicken Piaya
- Chill the Dough: After mixing, refrigerate the dough for at least 30 minutes—I learned this the hard way when my first few piayas shrank and toughened from overworking the butter.
- Use Ice-Cold Water: The water should be truly ice-cold, with a few cubes still floating in it, to keep the butter from melting before the dough hits the pan.
- Skip Warm Butter: Resist the urge to soften the butter first; cold, cubed butter cut into the flour creates the flaky layers that make piaya special.
- Roll Evenly Thin: Aim for about 1/8-inch thickness when rolling—any thicker and the piaya won’t cook through without burning, any thinner and it’ll tear when folding.
Make-Ahead Tips for This Dish
Dough Prep Ahead
The pastry dough can be made 1-2 days in advance. After mixing, wrap it tightly in plastic wrap and refrigerate. This resting time actually improves the texture, allowing the gluten to relax fully. I’ve found it rolls out smoother when prepared ahead. 💡
Filling Freezing
Cook the chicken filling completely, then cool and store in airtight containers for up to 3 days in the fridge. For longer storage, freeze for up to 1 month. Thaw overnight in the fridge before assembling your piayas.
Assemble and Freeze
Once assembled but unbaked, piayas freeze beautifully. Arrange them on a baking sheet, freeze until solid (1-2 hours), then transfer to freezer bags. They’ll keep for 3 months without losing quality.
Baking from Frozen
No need to thaw! Bake frozen piayas at 375°F for 30-35 minutes, adding 5-10 minutes to the usual time. The results are just as flaky and delicious as fresh ones. ❄️
Storage After Baking
Baked piayas stay fresh at room temperature for 1 day in an airtight container. For longer storage, refrigerate for up to 4 days. Reheat in a toaster oven to maintain crispness.
Reheating Tips
Avoid the microwave—it makes the pastry soggy. Instead, warm in a 350°F oven for 8-10 minutes until heated through. This method restores the flaky texture beautifully.
Nutrition Facts
Frequently Asked Questions
Can I use breast meat instead of thighs?
Thighs stay juicier, but breasts work if diced small and not overcooked. Add 1 tbsp extra oil to the filling to compensate for less fat.
How do I prevent the filling from leaking?
Seal edges tightly with a fork and avoid overfilling. Use 2 tbsp maximum per piaya. Chill filling completely before assembling.
What if my dough becomes sticky?
Work quickly with cold ingredients and dust your surface with flour. If it warms up, refrigerate for 10-15 minutes before continuing.
Can I bake these in an air fryer?
Yes! Cook at 350°F for 12-15 minutes, flipping halfway. Watch closely as air fryers vary in heat distribution.

- Jollof Rice Sauce Recipe: West African Tomato and Spice Infusion - September 25, 2026
- Japanese Rice Soup Recipe: Umami-Rich Comfort in a Bowl - September 25, 2026
- Homemade Cream Of Rice Recipe: Silk-Smooth Breakfast in Minutes - September 25, 2026