
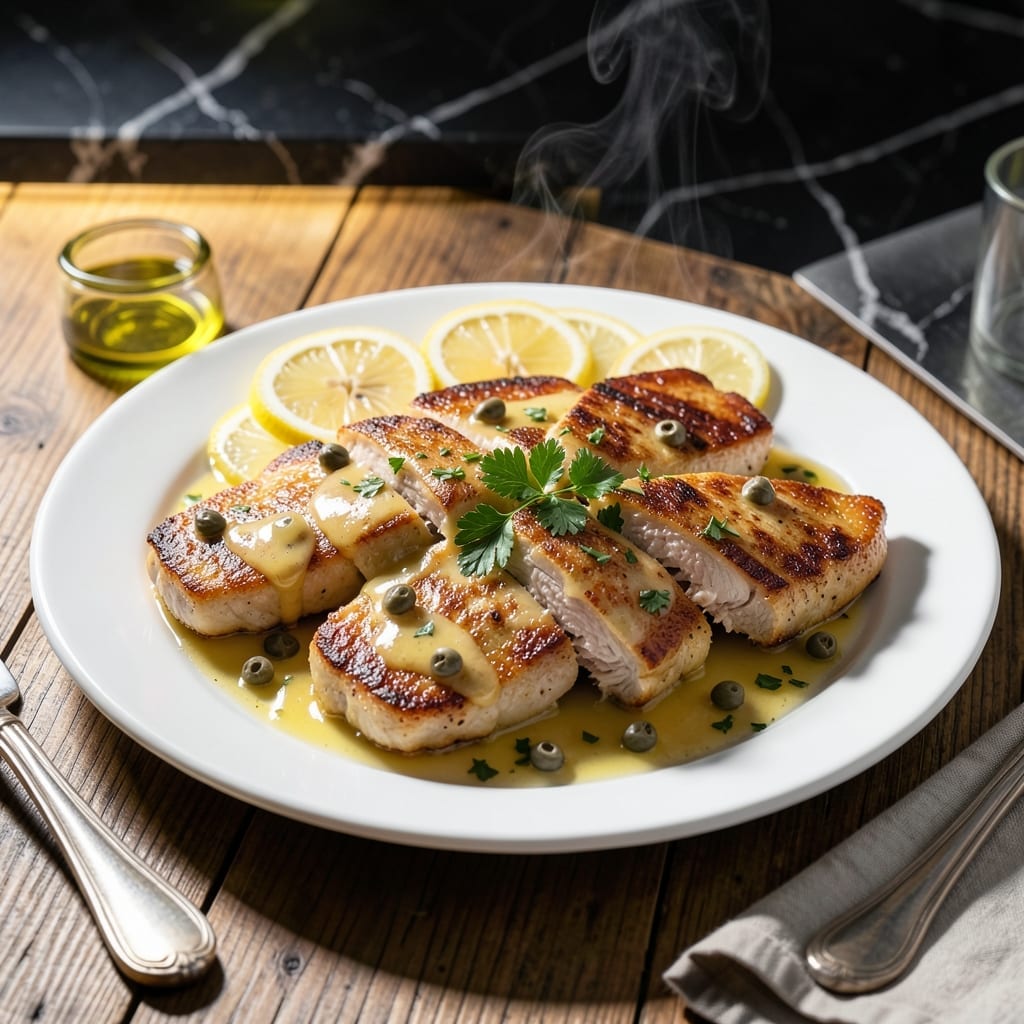
This chicken piccata delivers tender cutlets smothered in a bright lemon-caper sauce that’s both elegant and approachable. The dish balances rich and tangy flavors without overwhelming the palate.
I developed this method to ensure the chicken stays moist while the sauce achieves its signature velvety texture. A quick pan-sear locks in juices, and the sauce comes together in the same skillet for easy cleanup.
The result is a restaurant-worthy main course with minimal effort. Each bite features the perfect ratio of crisp chicken and zesty, buttery sauce with briny caper accents.
Serve over pasta or alongside roasted vegetables for a complete meal. Here’s how to make it.
Ingredients for Chicken Piccate
Elegant yet simple ingredients create bright, velvety chicken with tangy caper sauce.
| Ingredient | Amount | Notes |
|---|---|---|
| Chicken Breast 🍗 | 1 ½ lb | Boneless, skinless, pounded thin |
| All-Purpose Flour 🌾 | ½ cup | For dredging chicken |
| Salt 🧂 | 1 tsp | Kosher or sea salt |
| Black Pepper 🌶️ | ½ tsp | Freshly ground preferred |
| Unsalted Butter 🧈 | 6 tbsp | Divided for cooking and sauce |
| Olive Oil 🫒 | 2 tbsp | For searing chicken |
| Garlic Cloves 🧄 | 3 cloves | Minced for sauce |
| Dry White Wine 🍷 | ½ cup | Such as Pinot Grigio |
| Fresh Lemon Juice 🍋 | ⅓ cup | About 2-3 lemons |
| Capers 🌿 | 3 tbsp | Drained and rinsed |
| Chicken Broth 🥣 | ½ cup | Low-sodium preferred |
| Fresh Parsley 🌿 | ¼ cup | Chopped, for garnish |
The chicken is the foundation here. Boneless, skinless breasts pounded to even thickness ensure even cooking and tenderness. Whole Foods or Costco offer quality options—look for uniform size pieces. The butter matters too: unsalted lets you control the salt level in the sauce. Don’t skip pounding the chicken (worth the extra minute) for that perfect crisp exterior.
No white wine? Substitute with additional chicken broth and a splash of lemon juice. Capers can be found near the olives at most supermarkets—Trader Joe’s has a great jarred option. Fresh parsley adds brightness, but dried at one-third the amount works in a pinch. The flour is for dredging only—all-purpose is standard, but gluten-free blends work too.
This reheats well, though the chicken is best served fresh. Store leftovers in an airtight container for up to 3 days in the fridge. The sauce thickens as it cools—add a splash of broth when reheating. Not suitable for freezing due to the dairy in the sauce.
Why You’ll Love This Recipe
- One Pan Wonder: That buttery, lemony sauce comes together right in the same pan I cook the chicken in—no extra dishes.
- Crispy Meets Tangy: The flour-coated chicken gets this golden crust, then soaks up that bright, zesty piccata sauce.
- Weeknight Hero: Honestly, it’s my go-to when I need dinner on the table fast but still want it to feel special.
- Budget Stretcher: A few chicken breasts and pantry staples feed my family without breaking the bank.
Step-by-Step Instructions for Chicken Piccata
Master the technique for perfectly tender cutlets with bright, tangy lemon-caper sauce.
Step 1: Prep and Dredge the Chicken
Place the 1.5 lb chicken breast between plastic wrap and pound to an even ¼-inch thickness using a meat mallet. This ensures even cooking and maximum tenderness. Season both sides with the 1 tsp salt and 0.5 tsp black pepper.
Dredge each piece in the 0.5 cup all-purpose flour, shaking off excess. The flour creates a light crust that helps the sauce cling to the chicken. Set aside on a plate while you heat the pan—don’t stack the pieces or they’ll stick together.
Step 2: Sear the Chicken to Golden Perfection
Heat 2 tbsp olive oil and 2 tbsp unsalted butter in a large skillet over medium-high heat until the butter stops foaming. Add the chicken in a single layer, working in batches if needed. Cook for 3-4 minutes per side until golden brown and just cooked through.
Watch for the edges to turn opaque and the crust to develop a light golden color. Avoid moving the chicken too soon—let it release naturally from the pan to prevent tearing. Transfer to a warm plate and tent with foil to keep it hot while you make the sauce.
Step 3: Build the Lemon-Caper Sauce
In the same skillet, reduce heat to medium and add the 3 cloves garlic cloves (minced). Sauté for 30 seconds until fragrant but not browned. Pour in the 0.5 cup dry white wine and 0.33 cup fresh lemon juice, scraping up any browned bits from the bottom of the pan.
Add the 3 tbsp capers and 0.5 cup chicken broth, then bring to a simmer. Let it reduce by half, about 4-5 minutes. Whisk in the remaining 4 tbsp unsalted butter, one tablespoon at a time, until the sauce is glossy and slightly thickened.
Step 4: Finish and Serve
Return the chicken to the skillet and spoon the sauce over each piece. Simmer for 1-2 minutes to heat through and allow the flavors to meld. The sauce should coat the back of a spoon with a velvety texture.
Garnish with the 0.25 cup fresh parsley and serve immediately. The chicken should be tender with a bright, tangy sauce that balances the richness of the butter and the briny pop of the capers. Pair with pasta, rice, or crusty bread to soak up every last drop.
Pro Tips For Making Chicken Piccate
- Pound the Breasts: Use a rolling pin or meat mallet to evenly flatten the chicken to ½-inch thickness—this guarantees even cooking and prevents dry, overdone edges.
- Season the Flour: Mix a teaspoon each of salt and pepper right into the flour for dredging, so every bite of the crispy coating carries flavor.
- Skip the Crowding: Cook the chicken in batches if needed; cramming the pan steams the cutlets instead of browning them, and nobody wants soggy piccate.
- Brown the Butter: Let the butter foam and turn nutty golden before adding the chicken—it adds a depth of flavor that plain melted butter just can’t.
Pro Cooking Tips for Perfect Results
Even Pounding Matters
Use a meat mallet to pound chicken breasts to an exact ¼-inch thickness between plastic wrap. This prevents dry spots and ensures even cooking. I use a Norpro meat tenderizer for consistent results. 💡
Perfect Pan Temperature
Heat your 12-inch skillet over medium-high heat until a drop of water sizzles and evaporates immediately. The butter should foam but not brown. All-Clad stainless steel pans distribute heat evenly for this technique.
Single-Layer Searing
Cook chicken in batches if needed—never crowd the pan. Each piece needs 3-4 minutes per side to develop a golden crust. Overcrowding steams the chicken instead of searing, resulting in a soggy coating.
Sauce Reduction Timing
Let the wine and lemon juice reduce by exactly half (4-5 minutes) before adding butter. This concentrates flavors and prevents a thin, watery sauce. Whisk constantly as you add the 4 tbsp butter for emulsification.
Rest Before Serving
After combining chicken and sauce, let it sit off heat for 2 minutes. This allows the juices to redistribute. I always garnish with parsley just before serving to preserve its vibrant color and fresh flavor. 🌟
Nutrition Facts
Frequently Asked Questions
Can I use chicken thighs instead of breasts?
Yes, but adjust cooking time. Thighs need 5-6 minutes per side due to higher fat content. They’ll stay juicier but may have a slightly different texture than the classic version.
What if I don’t have white wine?
Substitute with 0.5 cup chicken broth plus 1 tbsp lemon juice. The acidity mimics wine’s role in balancing the sauce’s richness. Avoid red wine—it clashes with the lemon.
How do I prevent the sauce from breaking?
Whisk constantly when adding butter, and keep heat at medium. If it separates, remove from heat and whisk vigorously—it should recombine. Never boil the sauce after adding butter.
Can I make this ahead of time?
Cook chicken fully, then store in an airtight container for 2-3 days. Reheat gently in the sauce to preserve texture. The sauce may thicken—add a splash of broth to loosen.

- Jollof Rice Sauce Recipe: West African Tomato and Spice Infusion - September 25, 2026
- Japanese Rice Soup Recipe: Umami-Rich Comfort in a Bowl - September 25, 2026
- Homemade Cream Of Rice Recipe: Silk-Smooth Breakfast in Minutes - September 25, 2026