
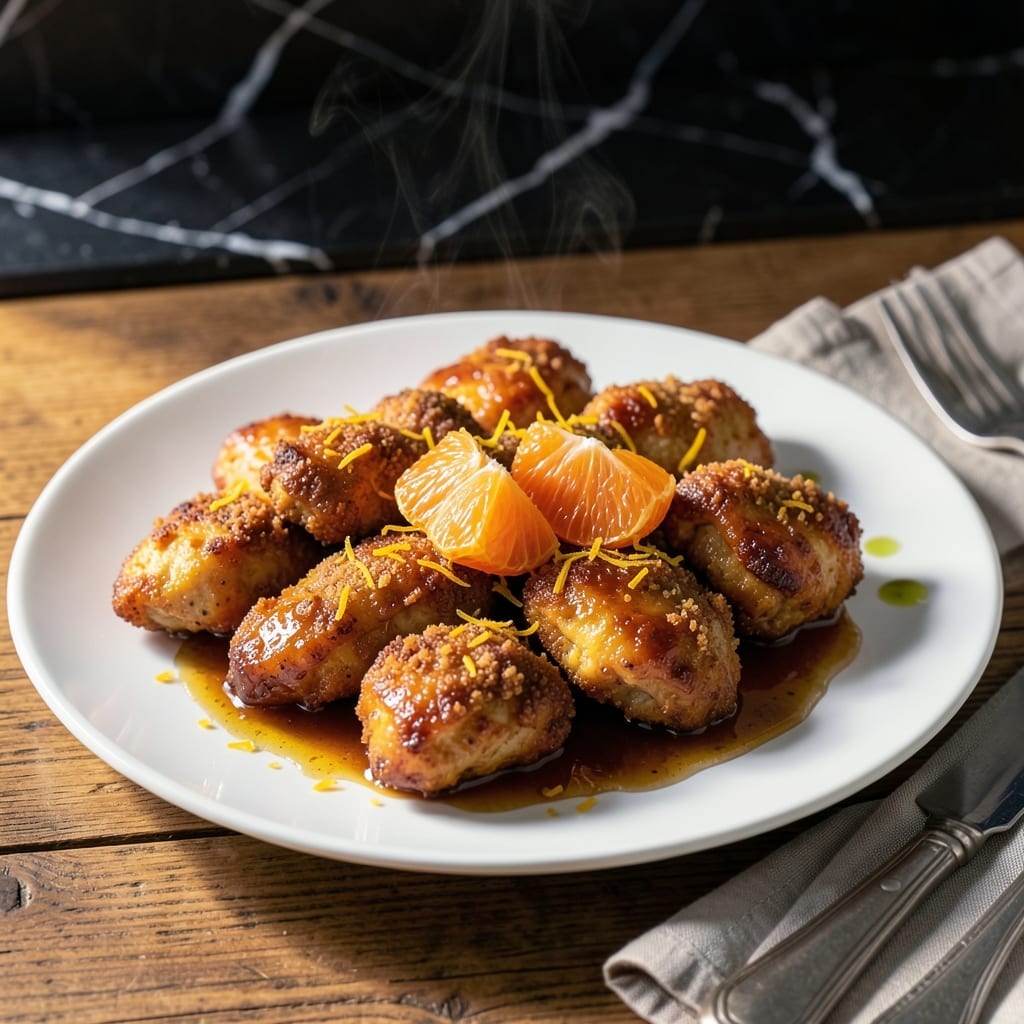
This dish transforms ordinary chicken into a restaurant-worthy meal with its signature crispy coating and bright citrus glaze. The tangerine sauce brings a perfect balance of sweet and tangy that elevates every bite.
I developed this method to ensure the chicken stays crispy even after being tossed in the sauce. The secret is frying the chicken twice—once for the initial cook, then again briefly after coating to lock in that texture.
The glaze comes together quickly with fresh tangerine juice, zest, and a touch of honey for depth. It clings beautifully to the chicken, creating that sticky, glossy finish that makes this dish irresistible.
Serve it hot with steamed rice to soak up every drop of that flavorful sauce. This is one meal that never fails to impress.
Ingredients for Tangerine Chicken
Transform everyday chicken with crispy coating and bright citrus glaze ingredients.
| Ingredient | Amount | Notes |
|---|---|---|
| Boneless Skinless Chicken Thighs 🍗 | 1 ½ lb | Cut into bite-sized pieces |
| Cornstarch 🌾 | ½ cup | For crispy coating |
| All-Purpose Flour 🌾 | ½ cup | Balances cornstarch texture |
| Large Eggs 🥚 | 2 whole | Beaten for binding |
| Fresh Tangerine Juice 🍊 | ¾ cup | About 3-4 tangerines |
| Tangerine Zest 🍊 | 1 tbsp | Finely grated for flavor |
| Honey 🍯 | ¼ cup | For sweetness in glaze |
| Soy Sauce 🫒 | 3 tbsp | Low-sodium preferred |
| Rice Vinegar 💧 | 2 tbsp | Adds tangy brightness |
| Garlic Cloves 🧄 | 3 cloves | Minced for sauce |
| Fresh Ginger 🌿 | 1 tbsp | Grated or minced |
| Neutral Oil 🫒 | 2 cups | For frying chicken |
| Green Onions 🧅 | 4 whole | Thinly sliced for garnish |
| Sesame Seeds 🌾 | 1 tbsp | Toasted for garnish |
| Salt 🧂 | 1 tsp | Kosher or sea salt |
The chicken is everything here. Thighs stay juicier than breasts after double-frying, and their higher fat content helps achieve that signature crispiness. Most supermarkets carry boneless, skinless thighs—Costco has great bulk options. For the tangerines, look for firm, heavy fruit with vibrant color; they’ll yield the most juice. Always zest before juicing (trust me on this one).
No tangerines? Mandarin oranges work identically. Out of honey? Substitute maple syrup or agave at a 1:1 ratio. If you’re gluten-free, swap the all-purpose flour for rice flour or cornstarch. The rice vinegar can be replaced with apple cider vinegar, but it’ll have a slightly different tang. For extra crunch, add 1/4 cup crushed peanuts to the coating.
The glaze thickens as it cools, so serve immediately for that perfect sticky texture. Leftovers keep 3-4 days in the fridge—reheat in a skillet to revive the crispiness. The sauce alone freezes beautifully for up to 3 months, making quick weeknight meals a breeze.
Why You’ll Love This Recipe
- One Pan Wonder: I toss the chicken in cornstarch and flour, fry it up, and the tangerine juice does the rest—minimal cleanup, maximum flavor.
- Sweet-Tangy Bite: The fresh tangerine juice gives it this bright, citrusy kick that’s way better than takeout.
- Weeknight Hero: Honestly, it’s my go-to for busy evenings—ready faster than delivery, and the leftovers taste even better the next day.
- Budget-Friendly Feast: Chicken thighs stay juicy and cheap, and a little cornstarch makes the coating crispy without breaking the bank.
Step-by-Step Instructions for Tangerine Chicken
These tested steps ensure crispy chicken coated in a glossy, balanced citrus glaze every time.
Step 1: Coat the Chicken for Maximum Crispiness
Cut the 1.5 lb boneless skinless chicken thighs into bite-sized pieces and pat them completely dry with paper towels. I can’t emphasize this enough—any moisture will prevent the coating from adhering properly and ruin your crispy texture.
In a large bowl, whisk together the 0.5 cup cornstarch, 0.5 cup all-purpose flour, and 1 tsp salt. In a separate bowl, beat the 2 whole large eggs until uniform. Dip each piece of chicken into the egg, letting excess drip off, then toss in the flour mixture until fully coated. Press gently to ensure the coating sticks.
Step 2: Fry the Chicken Until Golden and Crisp
Heat the 2 cups neutral oil in a large, heavy-bottomed pot or Dutch oven over medium-high heat to 350°F. Use a deep-fry thermometer for accuracy—oil temperature is critical for even cooking without burning.
Working in batches to avoid crowding (which lowers oil temperature), carefully add the coated chicken pieces. Fry for 4-5 minutes per side until golden brown and crispy. The coating should look blistered and deep amber. Transfer to a wire rack set over a baking sheet to drain excess oil. Keep warm in a 200°F oven while frying remaining batches.
Step 3: Prepare the Tangerine Glaze
In a small saucepan, combine the 0.75 cup fresh tangerine juice, 1 tbsp tangerine zest, 0.25 cup honey, 3 tbsp soy sauce, 2 tbsp rice vinegar, 3 minced garlic cloves, and 1 tbsp fresh ginger.
Bring to a simmer over medium heat and cook for 5-7 minutes, stirring occasionally, until the mixture reduces by about one-third and thickens enough to coat the back of a spoon. The glaze should be shiny and syrupy. Taste and adjust sweetness or acidity if needed, but remember it will mellow when tossed with the chicken.
Step 4: Toss and Garnish for Serving
Place all the crispy chicken in a large bowl. Pour the warm tangerine glaze over the chicken and toss gently but thoroughly to ensure every piece is evenly coated. The glaze should cling to the crispy surface, creating a beautiful contrast of textures.
Transfer to a serving platter and immediately garnish with the thinly sliced 4 whole green onions and 1 tbsp sesame seeds. Serve while hot and crispy—the contrast between the crunchy exterior, tender chicken, and tangy-sweet glaze is what makes this dish irresistible. The sesame seeds add a nutty finish that complements the citrus perfectly.
Pro Tips For Making Tangerine Chicken
- Double Dredge: Dip the chicken in the egg wash, then the flour-cornstarch mix, then back in the egg and dredge again—this builds a thicker, crispier crust that holds up to the tangerine sauce.
- Zest the Tangerines: After juicing, grate the zest from the tangerines and add it to the sauce. I learned this the hard way—it adds a bright, citrusy depth that juice alone can’t.
- Skip Overcrowding: Fry the chicken in batches with space between pieces, or the coating steams instead of crisps. Sounds obvious, but I still have to remind myself every time.
- Thighs Over Breasts: Boneless skinless thighs stay juicier than breasts in this dish. I was skeptical until I tried it—now I never go back.
Essential Equipment for Perfect Results
Deep Fryer or Dutch Oven
For frying, I use my 5.5-quart Le Creuset Dutch oven—it’s heavy enough to maintain steady 350°F oil temperature. A deep fryer works too, but I prefer stovetop control. Ensure your pot is deep enough to submerge chicken with 2 inches of oil above it. 🔥
Thermometer is Non-Negotiable
A deep-fry thermometer is essential for perfect results. I use the OXO Good Grips model—it clips to the pot and gives instant readings. Without one, you risk undercooked chicken or burnt coating from temperature fluctuations.
Wire Rack for Draining
After frying, place chicken on a wire rack set over a baking sheet. This setup lets oil drain completely while keeping the coating crispy. Paper towels work in a pinch, but they can make the bottom soggy.
Saucepan for Glaze
Use a 2-quart saucepan for the tangerine glaze to prevent splattering. I prefer All-Clad stainless steel for even heat distribution. The wider base helps the glaze reduce faster and more evenly.
Mandoline for Zesting
A microplane grater is perfect for finely grating tangerine zest. I’ve tried box graters, but they don’t capture the oils as effectively. The fine zest melts beautifully into the glaze for maximum flavor.
Tongs for Tossing
Use 12-inch locking tongs to safely flip chicken in hot oil and toss with glaze. I recommend OXO’s silicone-tipped tongs—they grip well without scratching your cookware. They also help coat every piece evenly with sauce.
Nutrition Facts
Frequently Asked Questions
Can I use chicken breast instead of thighs?
Yes, but thighs stay juicier. If using breasts, reduce frying time to 3-4 minutes per side to prevent dryness. The coating still gets crispy, but the meat may be less tender.
How do I keep the coating crispy after adding sauce?
Serve immediately after tossing with glaze. For leftovers, reheat in a 375°F oven for 5-10 minutes to restore crunch. Avoid microwaving as it makes the coating soggy.
Can I make the glaze ahead of time?
Prepare the glaze up to 3 days in advance and refrigerate. Reheat gently before tossing with chicken. The flavors actually deepen over time.

- Jollof Rice Sauce Recipe: West African Tomato and Spice Infusion - September 25, 2026
- Japanese Rice Soup Recipe: Umami-Rich Comfort in a Bowl - September 25, 2026
- Homemade Cream Of Rice Recipe: Silk-Smooth Breakfast in Minutes - September 25, 2026