
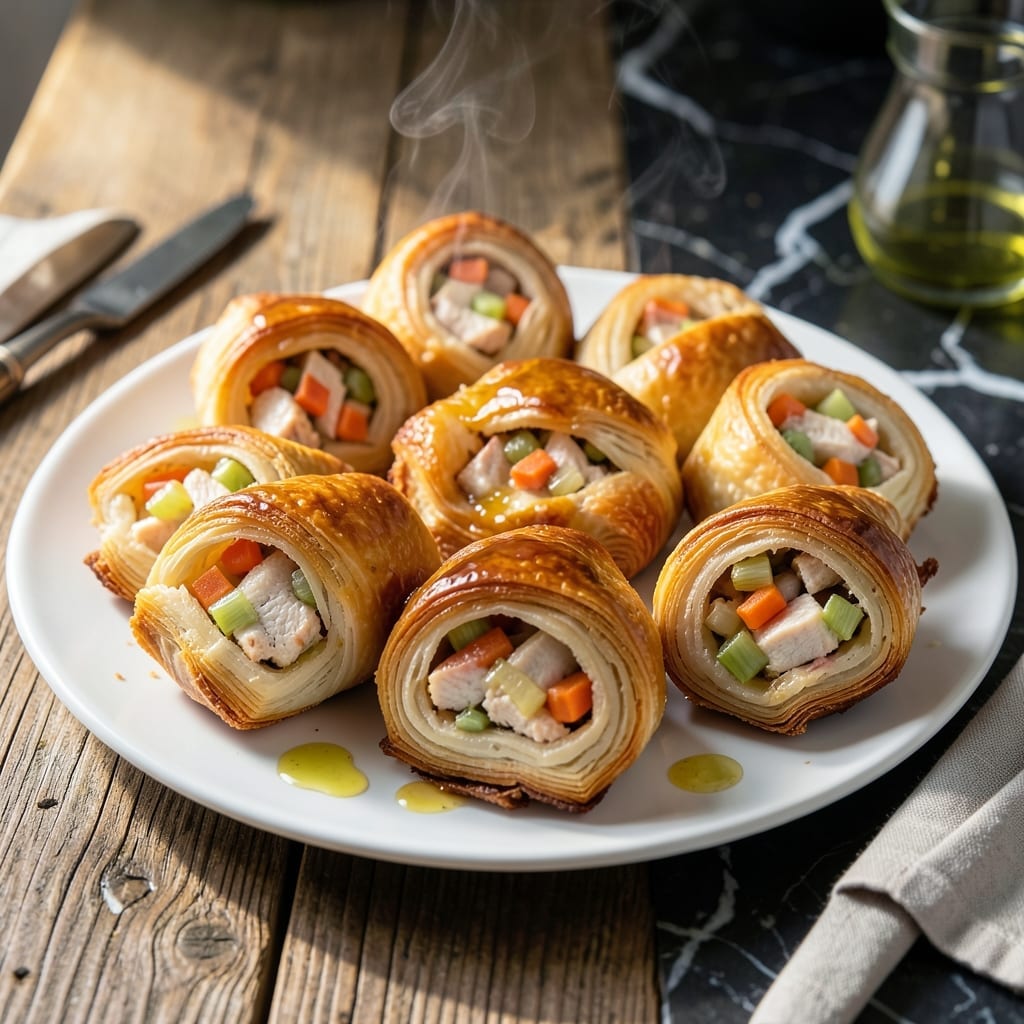
These golden pastry pockets deliver a satisfying crunch with every bite, thanks to a crispy exterior that gives way to a flavorful chicken filling. I developed this method after testing multiple dough options to find the perfect balance of flakiness and structure.
The filling combines tender chicken with aromatic herbs and vegetables, creating a savory center that complements the buttery pastry. Each pocket is carefully sealed to prevent leaks, ensuring the filling stays intact during baking.
Baked until golden brown, these hand-held delights emerge from the oven with a crispy shell and a moist, flavorful interior. The contrast between the textures makes them irresistible.
Perfect for parties, lunches, or a quick dinner, this dish is as practical as it is delicious. Here’s how to make them at home.
Ingredients for Chicken Pockets
Flaky pastry meets savory chicken filling in every golden, crispy bite.
| Ingredient | Amount | Notes |
|---|---|---|
| Puff Pastry Sheets 🥮 | 2 sheets | Thawed according to package |
| Boneless Skinless Chicken Breast 🍗 | 1 ½ lb | Diced into small pieces |
| Yellow Onion 🧅 | 1 whole | Finely diced for filling |
| Garlic Cloves 🧄 | 3 cloves | Minced for depth of flavor |
| Carrots 🥕 | 2 whole | Peeled and finely diced |
| Celery Stalks 🌿 | 2 whole | Finely diced for texture |
| Fresh Thyme 🌿 | 1 tbsp | Chopped, or 1 tsp dried |
| Fresh Rosemary 🍃 | 1 tbsp | Chopped, or 1 tsp dried |
| Dijon Mustard 🟡 | 2 tbsp | For tangy binding in filling |
| Heavy Cream 🥛 | ¼ cup | For creamy filling consistency |
| All-Purpose Flour 🌾 | 2 tbsp | For dusting work surface |
| Large Egg 🥚 | 1 whole | Beaten, for egg wash |
| Salt 🧂 | 1 tsp | Divided for seasoning layers |
| Black Pepper 🌶️ | ½ tsp | Freshly ground preferred |
| Olive Oil 🫒 | 1 tbsp | For sautéing vegetables |
The puff pastry is non-negotiable for that perfect crisp—Pepperidge Farm is my go-to (the all-butter kind, obviously). Most grocery stores stock it in the freezer aisle near the pie crusts. For the chicken, thighs actually work better than breasts if you want extra juicy filling (they’re more forgiving if you overcook). The veggies can be whatever you’ve got—just keep the dice small so everything cooks evenly.
No fresh herbs? Dried at one-third the amount works fine. Out of Dijon? Whole-grain mustard gives a nice texture too. The heavy cream can be swapped for half-and-half (or omit entirely if you’re feeling virtuous). No egg for wash? Milk or cream brushed on top still gives a decent golden finish. Just don’t skip the egg wash if you want that magazine-cover shine.
Puff pastry needs to stay cold until baking—keep it in the fridge until you’re ready. The filling can be made 1 day ahead and stored separately. Baked pockets keep 3-4 days in the fridge (reheat in the oven to keep them crisp). They freeze beautifully for 1 month too.
Why You’ll Love This Recipe
- One Pan Magic: I just roll out the puff pastry, fill with chicken and veggies, and bake—no extra dishes, no fuss.
- Garlic Butter Bliss: That golden pastry wrapped around juicy chicken and garlic-kissed carrots? Ridiculously good.
- Weeknight Hero: Between us, I’ve served these for dinner parties and last-minute lunches with equal success.
- Stretches Further: One batch makes plenty, and leftovers reheat beautifully for quick meals later in the week.
Step-by-Step Instructions for Chicken Pockets
Here’s how I get that perfect flaky crust with a rich, creamy filling every time.
Step 1: Sauté Vegetables and Cook Chicken
Heat the 1 tablespoon olive oil in a large skillet over medium heat. Add the 1 whole yellow onion, 2 whole carrots, and 2 whole celery stalks—all finely diced—and cook for 5-6 minutes until softened and just starting to brown.
Stir in the 3 cloves garlic cloves, 1 tbsp fresh thyme, and 1 tbsp fresh rosemary, cooking for 30 seconds until fragrant. Add the diced 1.5 lb boneless skinless chicken breast and cook for 6-8 minutes until no longer pink. Season with ½ tsp salt and 0.5 tsp black pepper.
Step 2: Create the Creamy Filling
Reduce the heat to low and stir in the 2 tbsp Dijon mustard and 0.25 cup heavy cream. Mix well to combine, and let it simmer for 2-3 minutes until the sauce thickens slightly. This is where the filling gets its rich, velvety texture.
Remove the skillet from heat and let the mixture cool for 10 minutes. You want it warm but not hot when assembling—this prevents the puff pastry from getting soggy. The filling should be thick enough to hold its shape when spooned.
Step 3: Assemble the Pockets
Unfold the 2 sheets puff pastry sheets on a lightly floured surface (use the 2 tbsp all-purpose flour for dusting). Cut each sheet into 4 equal squares. Spoon the chicken mixture onto the center of each square, dividing it evenly—about 2-3 tablespoons per pocket.
Fold each square diagonally to form a triangle, pressing the edges firmly with a fork to seal. Make sure there are no gaps where filling could escape during baking. Place the assembled pockets on a parchment-lined baking sheet.
Step 4: Bake to Golden Perfection
Preheat your oven to 400°F. Beat the 1 whole large egg and brush it lightly over the top of each pocket. This egg wash gives them that beautiful golden brown finish. Sprinkle the remaining ½ tsp salt on top for extra flavor.
Bake for 20-25 minutes until the pastry is puffed and deep golden brown. You’ll know they’re done when the edges look crisp and flaky. Let them cool for 5 minutes before serving—the filling will be extremely hot straight out of the oven.
Pro Tips For Making Chicken Pockets
- Chill the Pastry: After rolling out the puff pastry, let it rest in the fridge for 10-15 minutes before assembling—this prevents shrinking and keeps the pockets tightly sealed.
- Dry the Chicken: Pat the boneless chicken breasts completely dry before cooking; excess moisture makes the pastry soggy and ruins the crisp.
- Seal the Edges: Press the pastry edges firmly with a fork and brush with egg wash—this creates a tight seal so the filling doesn’t leak out during baking.
- Pre-Cook the Veggies: Sauté the onion, garlic, and carrots until soft before adding to the chicken; raw veggies release too much liquid and turn the pastry gummy.
Dietary Considerations for chicken pockets
Gluten-Free Option
For a gluten-free version, I recommend using Schar puff pastry—it’s the only brand I’ve found that delivers flaky layers comparable to traditional puff pastry. Follow the same assembly method, but handle the dough gently as it can be more delicate. 💪
Dairy-Free Adaptation
Swap the heavy cream for full-fat coconut milk to keep the filling rich and creamy. Use olive oil or dairy-free butter for the egg wash instead of a traditional egg. The flavor will have a slight coconut undertone, which pairs well with the herbs.
Lower-Carb Version
Replace puff pastry with large portobello mushroom caps for a low-carb alternative. Brush them with olive oil, fill with the chicken mixture, and bake at 375°F for 15-20 minutes. The mushrooms add a meaty texture that complements the filling beautifully.
Nut Allergy Note
This recipe is naturally nut-free, but always check labels on your puff pastry and other ingredients for potential cross-contamination warnings. I use Pepperidge Farm puff pastry, which is produced in a nut-free facility for peace of mind.
Make It Lighter
Use chicken breast and low-fat Greek yogurt instead of heavy cream to reduce calories. The yogurt adds tanginess that works well with the Dijon mustard. Bake as directed for a lighter but still flavorful pocket. 🌟
Vegetarian Twist
Swap the chicken for 1.5 cups cooked quinoa or chickpeas for a plant-based version. Add 1 tsp smoked paprika to the filling for depth. The texture will be heartier, but the crispy pastry remains the star.
Nutrition Facts
Frequently Asked Questions
Can I use chicken thighs instead of breasts?
Chicken thighs stay juicier and are more forgiving if overcooked. Just dice them into small pieces like the breasts.
How do I prevent the pastry from getting soggy?
Let the filling cool for 10 minutes before assembling. Also, avoid overfilling each pocket to maintain crispiness.
Can I make these ahead of time?
Yes! Assemble and refrigerate for up to 1 day before baking, or freeze for 1 month. Bake from frozen, adding 5-10 minutes to the time.
What if my edges won’t seal?
Dip your fingers in water and press the edges again. A fork works best for crimping. Ensure no filling is near the edges.

- Jollof Rice Sauce Recipe: West African Tomato and Spice Infusion - September 25, 2026
- Japanese Rice Soup Recipe: Umami-Rich Comfort in a Bowl - September 25, 2026
- Homemade Cream Of Rice Recipe: Silk-Smooth Breakfast in Minutes - September 25, 2026