
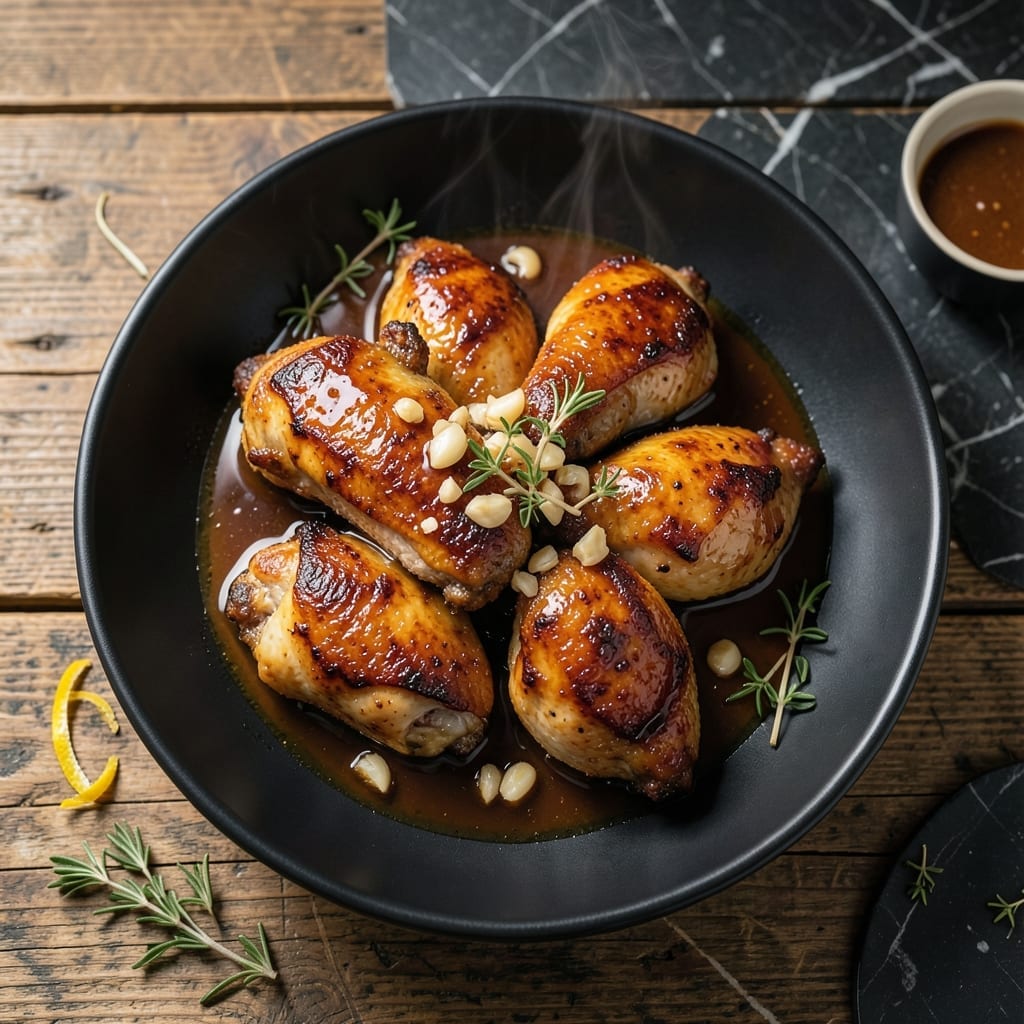
This oven-baked delight proves that achieving restaurant-quality glazed chicken at home requires just a few simple steps. The secret lies in the balance of sweet and savory, creating a sticky coating that caramelizes beautifully under heat.
I developed this method after testing countless variations, focusing on a technique that ensures the glaze clings perfectly to each piece. The result is chicken that’s tender inside, with a glossy, sweet exterior that’s impossible to resist.
What sets this dish apart is its simplicity. No complicated ingredients or techniques—just a foolproof approach that delivers consistent results. The oven does most of the work while you prepare the rest of the meal.
The final product is juicy, flavorful chicken with a glaze so good, you’ll want to lick the pan clean. Serve it with rice or roasted vegetables for a complete, crowd-pleasing dinner.
Ingredients for Glazed Chicken
Restaurant-quality chicken starts with these carefully selected ingredients for maximum flavor and texture.
| Ingredient | Amount | Notes |
|---|---|---|
| Chicken Thighs 🍗 | 2 lb | Boneless, skin-on for crispiness |
| Honey 🍯 | ½ cup | Pure, unprocessed for best flavor |
| Soy Sauce 🫒 | ⅓ cup | Low-sodium preferred for balance |
| Dijon Mustard 🟡 | 2 tbsp | Smooth, not whole grain |
| Garlic Cloves 🧄 | 4 cloves | Minced finely for even distribution |
| Fresh Ginger 🌿 | 1 tbsp | Peeled and grated |
| Apple Cider Vinegar 🍏 | 1 tbsp | For tangy brightness |
| Olive Oil 🫒 | 1 tbsp | Extra-virgin for richness |
| Brown Sugar 🥤 | ¼ cup | Light or dark, packed |
| Kosher Salt 🧂 | 1 tsp | Diamond Crystal preferred |
| Black Pepper 🌶️ | ½ tsp | Freshly ground for best flavor |
| Sesame Seeds 🌰 | 1 tsp | Toasted for garnish |
| Green Onions 🧅 | 3 whole | Thinly sliced for topping |
The chicken thighs are non-negotiable here—skin-on, bone-in delivers the juiciest results with that perfect crispy exterior. I source mine from Whole Foods or a trusted local butcher, ensuring they’re uniformly sized for even cooking. For the honey, raw, local varieties (like those from Savannah Bee Company) add depth that processed versions can’t match. Avoid pre-minced garlic; fresh cloves make a noticeable difference in the glaze’s aromatic quality.
No honey? Maple syrup or agave works in a pinch, though the flavor profile shifts slightly. Tamari or coconut aminos can replace soy sauce for gluten-free needs. If you’re out of Dijon, whole-grain mustard at half the quantity adds texture but maintains the tang. For a spicier kick, add a pinch of red pepper flakes to the glaze. The brown sugar can be swapped for coconut sugar, but it may darken faster under heat.
The glaze can be prepped 2 days ahead and stored in the fridge—just whisk before using. Leftover chicken keeps for 4 days in an airtight container, though it’s best served fresh. To reheat, warm in the oven at 350°F to preserve the sticky coating’s integrity.
Why You’ll Love This Recipe
- One Pan Wonder: I toss everything in, let the oven do the work, and end up with juicy thighs coated in that sticky honey-soy glaze.
- Sweet & Tangy: The honey and Dijon balance each other so well—sweet with just the right kick from the mustard.
- Weeknight Winner: Honestly, it’s my go-to for busy evenings when I need dinner fast but still crave restaurant-quality flavor.
- Budget Stretcher: Chicken thighs stay cheap, and this recipe turns them into something special without breaking the bank.
Step-by-Step Instructions for Glazed Chicken
Master this technique for perfectly caramelized, fall-off-the-bone chicken with minimal effort required.
Step 1: Prepare the Chicken Thighs
Pat the 2 lb Chicken Thighs dry with paper towels to ensure maximum crispiness. This step removes excess moisture that would otherwise steam the skin instead of allowing it to brown properly in the oven.
Season both sides generously with 1 tsp Kosher Salt and 0.5 tsp Black Pepper. I use Diamond Crystal kosher salt for its clean flavor and even distribution. Place the thighs skin-side up on a wire rack set over a baking sheet—this elevation allows air to circulate and promotes even cooking.
Step 2: Create the Glaze Mixture
In a medium bowl, whisk together 0.5 cup Honey, 0.33 cup Soy Sauce, 2 tbsp Dijon Mustard, 1 tbsp Fresh Ginger, 1 tbsp Apple Cider Vinegar, and 0.25 cup Brown Sugar until fully combined. The brown sugar may need a firm press to break up any lumps.
The vinegar adds necessary acidity to balance the sweetness, while the ginger provides a subtle warmth. Use low-sodium soy sauce to control the salt content—this allows the other flavors to shine without overpowering the dish.
Step 3: Sear and Begin Glazing
Heat 1 tbsp Olive Oil in a large oven-safe skillet over medium-high heat. When the oil shimmers, add the chicken thighs skin-side down. Sear undisturbed for 5-6 minutes until the skin is deep golden brown and crisp.
Flip the thighs and cook for 2-3 minutes on the other side. Pour half of the glaze mixture over the chicken, then transfer the skillet to a preheated 375°F oven. The initial sear creates a flavorful fond that will incorporate into the glaze as it reduces.
Step 4: Finish in the Oven
Bake for 20-25 minutes, basting the chicken with the remaining glaze halfway through. The glaze should thicken and develop a glossy, sticky consistency, coating the thighs completely. You’ll know it’s done when the internal temperature reaches 165°F and the sauce has reduced to a syrupy texture.
If the glaze begins to darken too quickly, tent the skillet loosely with foil. This prevents burning while allowing the chicken to cook through. The thighs should be tender enough to pull apart with a fork when fully cooked.
Step 5: Garnish and Serve
Transfer the glazed chicken to a serving platter. Drizzle any remaining pan sauce over the top and sprinkle with 1 tsp Sesame Seeds and 3 whole Green Onions, thinly sliced. The sesame seeds add a nutty crunch, while the green onions provide a fresh, oniony bite that cuts through the richness.
Let the chicken rest for 5 minutes before serving to allow the juices to redistribute. The skin should have a glossy sheen and a satisfying stickiness that clings to your fingers—this is the hallmark of a perfectly executed glaze.
Pro Tips For Making Glazed Chicken
- Sear Skin First: Crank the heat to medium-high and render the chicken thigh fat for 4-5 minutes until the skin is deep golden—this builds flavor and keeps the meat juicy. I learned this the hard way after my first few batches came out soggy.
- Mince the Garlic: Finely mince the garlic cloves instead of crushing them, so they distribute evenly in the glaze and don’t burn. After burning three batches, I finally figured out that smaller pieces cook more evenly.
- Reduce the Glaze: Simmer the honey, soy sauce, and Dijon together for 3-4 minutes until slightly thickened—this prevents a watery sauce. Sounds weird, but it works: the glaze clings better when it’s not runny.
- Rest Before Serving: Give the chicken a solid 5 minutes to rest after glazing, so the juices redistribute. My grandmother swore by this, and she was right: it keeps the meat tender, not dry.
Perfect Pairings for These Flavors
Starch Sides
Steamed jasmine rice is my go-to—its mild sweetness complements the glaze perfectly. For extra flavor, cook the rice in chicken broth with 1 crushed garlic clove. Alternatively, try coconut rice for a tropical twist. 🥗
Vegetable Pairings
Roasted broccoli with a drizzle of sesame oil and a sprinkle of red pepper flakes adds color and crunch. I toss 4 cups florets with 1 tbsp oil and roast at 400°F for 20 minutes until crisp.
Wine Pairings
A slightly sweet Riesling from Washington state balances the sticky-sweet glaze beautifully. For red lovers, Pinot Noir with its bright acidity and red fruit notes works surprisingly well. Serve both slightly chilled. 🍷
Beer Options
An American wheat beer like Blue Moon or Shock Top offers citrus notes that cut through the richness. For darker beers, amber ales provide caramel undertones that echo the glaze.
Fresh Finishes
Add a quick cucumber salad with rice vinegar and a pinch of sugar for refreshing contrast. Or serve with pickled radishes—their tangy crunch is the perfect counterpoint to the sweet chicken.
Nutrition Facts
Frequently Asked Questions
Can I use chicken breasts instead of thighs?
Yes, but they cook faster and may dry out. Reduce baking time to 15-18 minutes and check internal temp reaches 165°F. Thighs stay juicier with the glaze.
Why is my glaze runny?
It needs more reduction time. Uncover and bake 5-10 minutes longer at 400°F, stirring occasionally. The glaze thickens as moisture evaporates.
How do I prevent burning?
Tent with foil if it darkens too quickly. Use medium-high heat for searing, not high. Baste frequently to distribute heat evenly.
Can I make this ahead?
Prepare the glaze 2 days ahead. Cooked chicken keeps 4 days refrigerated. Reheat at 350°F to revive the sticky coating.

- Jollof Rice Sauce Recipe: West African Tomato and Spice Infusion - September 25, 2026
- Japanese Rice Soup Recipe: Umami-Rich Comfort in a Bowl - September 25, 2026
- Homemade Cream Of Rice Recipe: Silk-Smooth Breakfast in Minutes - September 25, 2026