
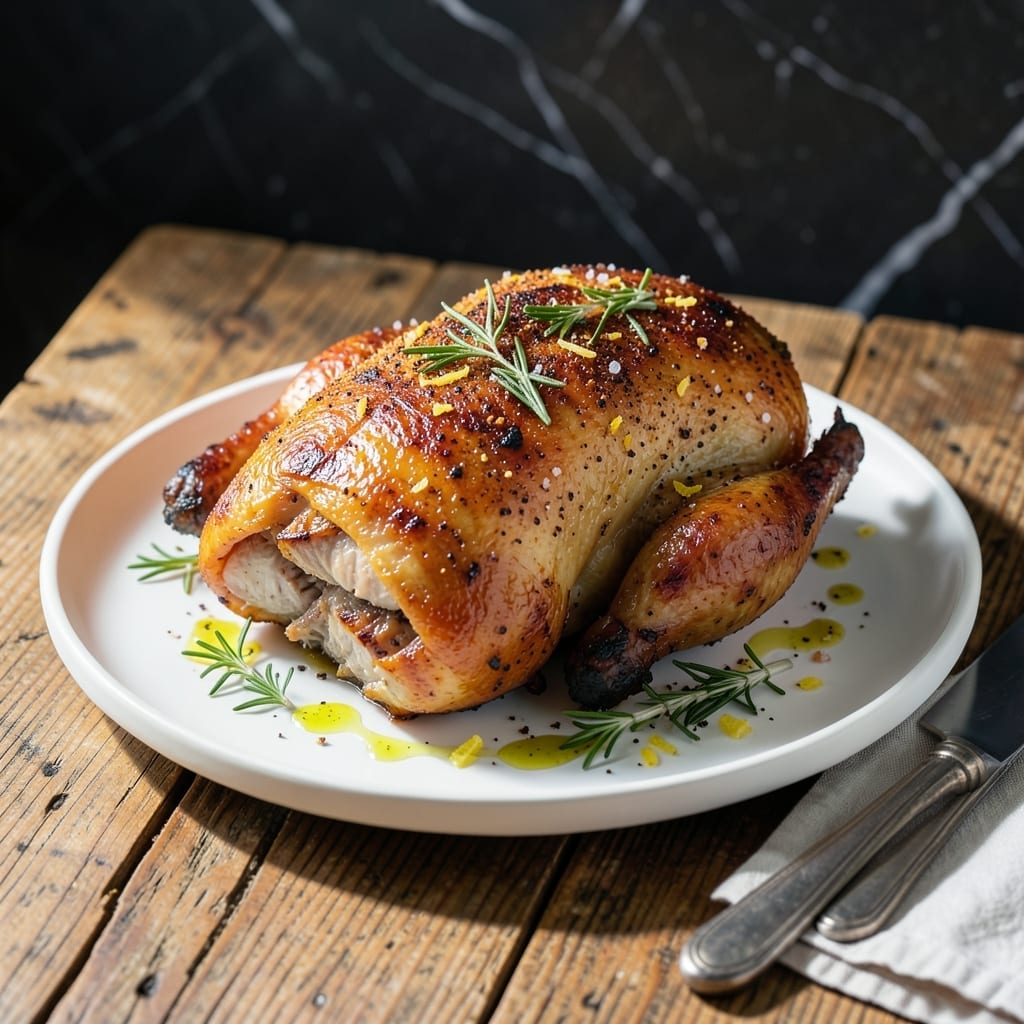
This spatchcocking method guarantees perfectly crispy skin and even cooking every time. Removing the backbone allows the chicken to lay flat, exposing more surface area to direct heat and ensuring uniform doneness throughout.
The technique is simpler than it sounds. With a sharp pair of kitchen shears, you can prepare the chicken in under two minutes. Season generously, then roast at high heat for golden, crackling skin and juicy meat.
What results is a bird that cooks faster and more evenly than traditional methods. The breast and thighs finish at the same time, eliminating dry meat or undercooked portions.
Serve this as the centerpiece for Sunday dinner or a special occasion. The presentation is impressive, and the flavor delivers on its promise.
Ingredients for Spatchcocked Chicken
One whole bird and a handful of seasonings deliver crispy, even results every time.
| Ingredient | Amount | Notes |
|---|---|---|
| Whole Chicken 🍗 | 1 whole | 3-4 lb, backbone removed |
| Kosher Salt 🧂 | 1 ½ tbsp | Diamond Crystal preferred |
| Black Pepper 🌶️ | 1 tsp | Freshly ground |
| Garlic Powder 🧄 | 1 tsp | Not garlic salt |
| Onion Powder 🧅 | 1 tsp | Dried, fine powder |
| Smoked Paprika 🌶️ | 1 tsp | Sweet or hot variety |
| Dried Thyme 🌿 | ½ tsp | Rubbed between fingers |
| Olive Oil 🫒 | 2 tbsp | Extra-virgin for richness |
| Lemon 🍋 | 1 whole | Zested and juiced |
| Fresh Rosemary 🌿 | 2 sprigs | Chopped, stems discarded |
| Butter 🧈 | 2 tbsp | Unsalted, melted |
The chicken is the star here. Opt for a 3-4 lb bird—smaller ones dry out, larger ones need adjusting. Whole Foods and Costco carry quality options with good fat marbling. Remove the backbone with sharp kitchen shears (worth the $15 investment if you don’t own a pair). Pat the skin dry before seasoning—this is non-negotiable for crispiness.
No smoked paprika? Regular paprika plus a pinch of cayenne works. Fresh out of thyme? Dried oregano at half the amount is fine. The olive oil can be any neutral oil in a pinch, but extra-virgin adds depth. If you skip the butter, the skin won’t brown as deeply (trust me on this). Lemon can be swapped for lime—same acidity, slightly different brightness.
Seasoned bird can rest in the fridge overnight for deeper flavor. Leftovers keep 3-4 days refrigerated. Reheat gently to avoid drying the meat. The carcass? Perfect for stock—simmer with veggie scraps for 2 hours.
Why You’ll Love This Recipe
- One Pan Wonder: I love that I just flatten the chicken, season it, and let the oven do the work—one sheet pan, minimal cleanup.
- Crave-Worthy Skin: The garlic and onion powder make the skin so crispy and flavorful, I catch myself sneaking bites straight off the pan.
- Meal Prep Hero: It cooks fast and evenly, so I can roast it Sunday and use the leftovers for tacos, salads, or sandwiches all week.
- Budget Stretcher: A whole chicken costs less than pre-cut pieces, and spatchcocking ensures every bite is juicy and perfectly seasoned.
Step-by-Step Instructions for Spatchcocked Chicken
This method ensures even cooking and perfectly crispy skin every time.
Step 1: Prepare and Season the Chicken
Pat the whole chicken completely dry inside and out with paper towels. This step is crucial for achieving crispy skin. I use a clean kitchen towel to ensure I get into all the nooks and crannies, especially under the wings and in the cavity.
Combine the kosher salt, black pepper, garlic powder, onion powder, smoked paprika, and dried thyme in a small bowl. Rub this mixture evenly all over the chicken, including under the skin and inside the cavity. The 1.5 tbsp kosher salt ensures every bite is well-seasoned without being overpowering.
Step 2: Add Aromatics and Truss
Zest the lemon and chop the fresh rosemary. Mix these with the olive oil and melted butter. Rub this aromatic mixture all over the chicken, including under the skin. This step infuses the meat with bright, herbal flavors that complement the crispy exterior.
Tuck the wings behind the back and tie the legs together with kitchen twine to help the chicken cook evenly. This compact shape allows for more even heat distribution in the oven.
Step 3: Roast at High Heat
Preheat your oven to 425°F. Place the chicken breast-side up on a wire rack set in a rimmed baking sheet. The rack elevates the chicken, allowing hot air to circulate underneath for all-over crispiness.
Roast for 45-55 minutes, or until the internal temperature reaches 165°F in the thickest part of the thigh. The skin should be deep golden brown and crisp to the touch. If the skin starts to darken too quickly, tent loosely with foil.
Step 4: Rest and Serve
Transfer the chicken to a cutting board and let it rest for 10-15 minutes before carving. This resting period allows the juices to redistribute throughout the meat, ensuring every slice is moist and flavorful.
Carve the chicken into pieces and serve immediately. The combination of crispy skin, juicy meat, and aromatic herbs makes this dish a standout. Squeeze any remaining lemon juice over the top just before serving for an extra burst of freshness.
Pro Tips For Making Spatchcocked Chicken
- Pat It Dry: I learned this the hard way—skip this and the skin steams instead of crisps. Use paper towels to thoroughly dry the chicken inside and out before seasoning.
- Start Hot, Finish Moderate: Crank the oven to 425°F for the first 20 minutes to get that skin blistered, then drop to 375°F to cook through without burning the spices.
- Season Under the Skin: Sounds weird, but it works: Slide a little garlic and onion powder under the loosened skin before cooking—the flavor goes straight into the meat, not just the surface.
- Rest Before Carving: After burning three batches, I finally figured out the juices need 10 minutes to redistribute—cover loosely with foil and resist the urge to cut early.
Essential Equipment for Perfect Results
Kitchen Shears
A sharp pair is essential for cleanly removing the backbone. I recommend OXO Good Grips kitchen shears with their comfortable handles and durable blades. Look for shears that can be taken apart for thorough cleaning. 💪
Rimmed Baking Sheet
Use a half-sheet pan (13×18 inches) with a wire rack to elevate the chicken. This setup allows hot air to circulate underneath for even crisping. Nordic Ware makes excellent heavy-duty options.
Wire Rack
A stainless steel cooling rack works perfectly for this purpose. The elevation is key to achieving crispy skin all over. I use one that fits snugly inside my baking sheet.
Instant-Read Thermometer
Accurate temperature reading is non-negotiable for perfectly cooked chicken. I swear by my ThermoWorks ThermoPop for its speed and precision. Check the thickest part of the thigh for 165°F. 🌡️
Kitchen Twine
For trussing the legs, 100% cotton kitchen twine is ideal. It’s strong enough to hold the chicken securely and won’t melt in the oven. I buy mine in bulk from restaurant supply stores.
Mixing Bowls
Have a small bowl for your dry rub and another for the oil-butter mixture. Stainless steel bowls from Winco are my go-to—they’re lightweight, durable, and nest for easy storage.
Nutrition Facts
Frequently Asked Questions
Why remove the backbone first?
It lets the bird lay flat, exposing more surface to direct heat. This ensures even cooking throughout and crispy skin all over. The breast and thighs finish at the same time.
Can I use a smaller or larger chicken?
A 3-4 lb bird works best. Smaller ones may dry out, while larger ones need adjusted cooking times. Always check internal temp reaches 165°F.
How do I prevent the skin from burning?
Tent loosely with foil if it darkens too quickly. Roast at 425°F for 45-55 minutes, checking often near the end.
What can I substitute for smoked paprika?
Use regular paprika plus a pinch of cayenne. This maintains the color and adds a subtle kick similar to smoked.

- Jollof Rice Sauce Recipe: West African Tomato and Spice Infusion - September 25, 2026
- Japanese Rice Soup Recipe: Umami-Rich Comfort in a Bowl - September 25, 2026
- Homemade Cream Of Rice Recipe: Silk-Smooth Breakfast in Minutes - September 25, 2026