
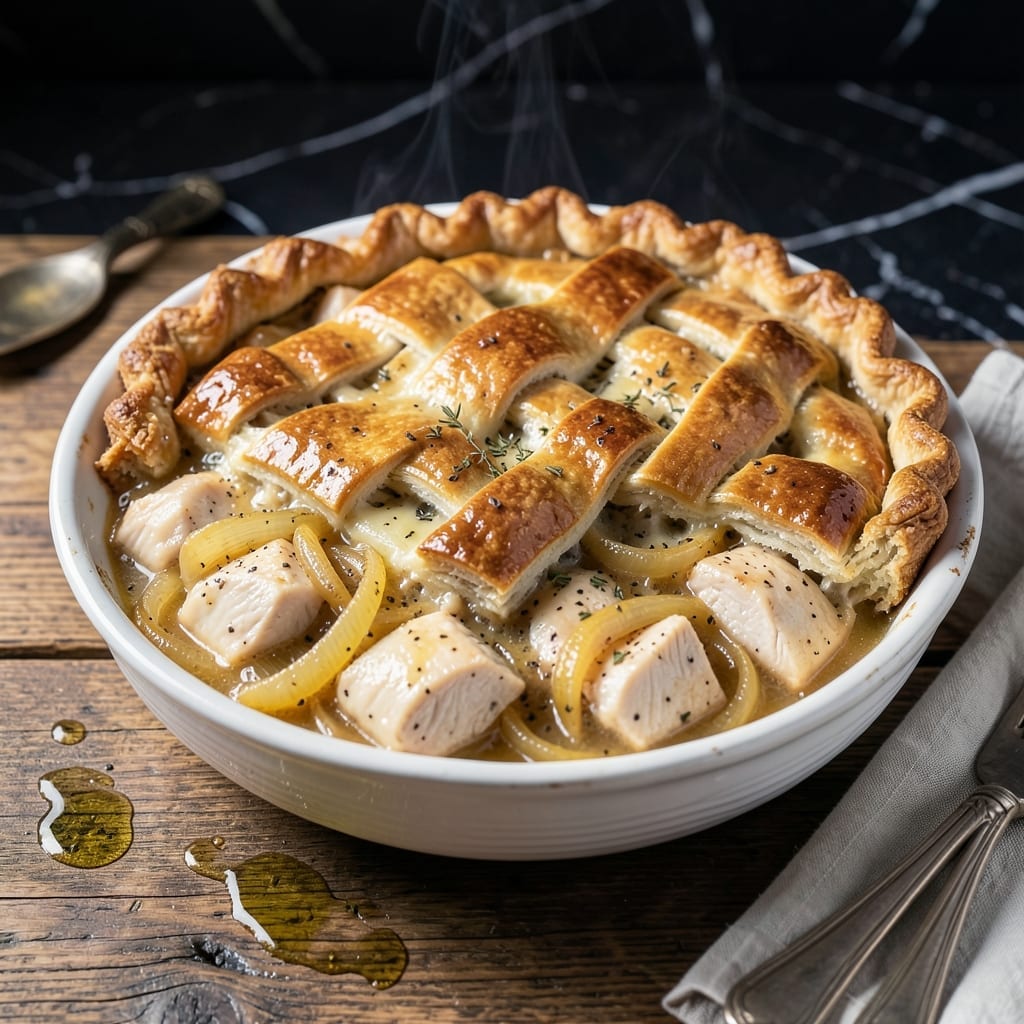
There’s a reason chicken pot pie remains a timeless comfort food—its buttery crust and hearty filling deliver satisfaction in every bite. This version elevates the classic with a flaky, golden top and a rich, creamy vegetable and chicken mixture that’s both nourishing and indulgent.
The key lies in a well-balanced filling, where tender chicken meets a medley of fresh vegetables in a velvety sauce. The crust, made from scratch, bakes to a perfect golden brown, encasing the filling in a way that’s both sturdy and delicate.
What sets this dish apart is its ability to transform simple ingredients into something extraordinary. The aroma alone as it bakes is enough to gather the family around the table, eager for that first warm, comforting bite.
Perfect for cozy dinners or special occasions, this pie promises a meal that’s as rewarding to make as it is to eat.
Ingredients for Chicken Pot Pie Recipe Xi
Classic comfort meets culinary excellence with these carefully selected ingredients for a timeless dish.
| Ingredient | Amount | Notes |
|---|---|---|
| All-Purpose Flour 🌾 | 2 ½ cups | Divided for crust and filling |
| Unsalted Butter 🧈 | 1 cup | Cold, cubed for flaky crust |
| Ice Water 💧 | ½ cup | For pie dough hydration |
| Salt 🧂 | 1 tsp | Divided for dough and filling |
| Boneless Skinless Chicken Breasts 🍗 | 1 ½ lb | Diced into bite-sized pieces |
| Yellow Onion 🧅 | 1 whole | Medium, finely diced |
| Carrots 🥕 | 2 whole | Peeled, diced into small cubes |
| Celery Stalks 🌿 | 2 pieces | Diced, leaves included |
| Garlic Cloves 🧄 | 3 cloves | Minced for depth of flavor |
| Frozen Peas 🌱 | 1 cup | No need to thaw |
| Chicken Broth 🍲 | 1 ½ cups | Low-sodium for controlled seasoning |
| Heavy Cream 🥛 | ½ cup | Full-fat for creamy texture |
| Fresh Thyme Leaves 🌿 | 1 tbsp | Or 1 tsp dried thyme |
| Fresh Rosemary 🌿 | 1 tbsp | Finely chopped for aroma |
| Black Pepper 🌶️ | ½ tsp | Freshly ground preferred |
The butter is non-negotiable here. Plugrá or Kerrygold deliver the flakiest crust, and their higher fat content creates that coveted golden-brown finish. For the flour, King Arthur all-purpose is the gold standard—consistent protein content means reliable results every time. Source your chicken from Whole Foods or a trusted local butcher for tender, evenly sized pieces (boneless, skinless thighs work too).
Short on time? Use rotisserie chicken for the filling—shred about 4 cups. No fresh herbs? Dried at one-third the amount works, but add them during cooking to bloom the flavors. Heavy cream can be swapped with half-and-half for a slightly lighter texture. For a vegetarian twist, mushrooms and white beans mimic the chicken’s heartiness surprisingly well.
The unbaked pie can be refrigerated for 24 hours or frozen for 1 month (thaw overnight before baking). Leftovers keep 3-4 days in the fridge—reheat individual portions in the microwave. For the flakiest crust, keep your butter ice-cold until ready to use (freeze the cubes if your kitchen is warm).
Why You’ll Love This Recipe
- One Bowl Magic: I make the crust right in the same bowl I use for the filling—just flour, butter, ice water, and salt, mixed and ready in minutes.
- Buttery Heaven: The flaky, golden crust made with real butter melts in your mouth, and the tender chicken breasts soak up all that rich flavor.
- Weeknight Hero: Honestly, I throw this together after work and it still feels like a special meal.
- Leftovers? Yes Please: It reheats beautifully, so I pack it for lunch the next day. My coworkers always ask for the recipe.
Step-by-Step Instructions for Chicken Pot Pie
Here’s the method. Straightforward, tested, works every time.
Step 1: Prepare the Flaky Pie Crust
In a food processor, combine 2.5 cups all-purpose flour with 1 tsp salt. Pulse briefly to aerate the dry ingredients. This creates a lighter, more tender crust by preventing overworking of the gluten.
Add 1 cup cold unsalted butter, cubed, and pulse in 1-second bursts until the mixture resembles coarse crumbs with pea-sized butter pieces visible. The key is maintaining those cold butter chunks for flakiness. Slowly drizzle in 0.5 cup ice water while pulsing until the dough just begins to come together. It should hold when pressed but not form a solid ball.
Turn the dough onto a lightly floured surface and gently shape into two equal discs. Wrap in plastic and refrigerate for at least 1 hour or up to 24 hours. Chilling relaxes the gluten and ensures the butter stays solid, which creates those perfect flaky layers during baking.
Step 2: Create the Savory Filling Base
In a large skillet over medium heat, cook the diced 1.5 lb boneless skinless chicken breasts in batches until no longer pink, about 5-6 minutes per batch. Transfer to a plate and set aside. This prevents overcrowding and ensures proper browning rather than steaming.
In the same skillet, add the finely diced yellow onion, 2 carrots, and 2 celery stalks. Cook for 6-8 minutes until the vegetables soften and the onion becomes translucent. Add the minced 3 cloves garlic cloves, 1 tbsp fresh thyme leaves, and 1 tbsp fresh rosemary, cooking for an additional 1 minute until fragrant.
Sprinkle 1 tsp salt and 0.5 tsp black pepper over the vegetables, dividing as needed between the dough and filling. This layered seasoning builds depth of flavor throughout the dish.
Step 3: Build the Creamy Sauce and Finish the Filling
Pour in 1.5 cups chicken broth, scraping the bottom of the skillet to deglaze and incorporate all the browned bits. These fond bits contain concentrated flavor that will enrich your sauce. Bring to a simmer and cook for 3-4 minutes until the liquid reduces slightly.
Return the chicken to the skillet along with any accumulated juices. Stir in the 1 cup frozen peas—no need to thaw—and 0.5 cup heavy cream. Simmer for 2-3 minutes until the mixture thickens enough to coat the back of a spoon. The sauce should be rich and velvety, with the peas heated through.
Remove from heat and let cool completely before assembling the pie. This prevents the crust from becoming soggy as it bakes.
Step 4: Assemble and Bake to Golden Perfection
On a lightly floured surface, roll out one disc of dough to a 12-inch circle. Transfer to a 9-inch pie dish, pressing gently into the bottom and up the sides. Trim the edges, leaving a ½-inch overhang. Roll out the second disc to the same size for the top crust.
Pour the cooled filling into the crust-lined dish. Moisten the edges of the bottom crust with water, then place the top crust over the filling. Crimp the edges to seal, then cut 4-5 slits in the top to allow steam to escape. This prevents the filling from boiling over and ensures even baking.
Bake at 375°F for 45-50 minutes until the crust is golden brown and the filling is bubbling through the slits. If the edges brown too quickly, cover them with foil. Let rest for 10 minutes before serving to allow the filling to set slightly.
Pro Tips For Making Chicken Pot Pie Recipe Xi
- Chill the Dough: Work the butter into the flour until pea-sized crumbs form, then rest the dough for 30 minutes in the fridge—I learned this the hard way after my first few pies turned out tough and flat.
- Dry the Chicken: Pat the boneless skinless chicken breasts completely dry before cooking; even a little moisture makes them steam instead of sear, and nobody wants rubbery chicken in their pie.
- Vent the Top: Cut a few small slits in the top crust before baking so steam can escape, or you’ll end up with a soggy bottom and a messy oven—yes, I cleaned that up more times than I’d like to admit.
- Use Ice-Cold Water: Measure out the ice water first and keep it in the freezer until you’re ready to mix; warm water melts the butter, and melted butter means a dense, sad crust instead of a flaky one.
Pro Cooking Tips for This Dish
Butter Temperature Control
Keep your 1 cup unsalted butter ice-cold until the very last moment. I freeze my butter cubes for 15 minutes before processing to ensure maximum flakiness. Warm butter blends into the flour, creating a dense crust instead of those coveted layers.
Dough Resting Time
Don’t rush the 1-hour chill for your pie dough. This rest period lets the gluten relax and the butter firm up, which prevents shrinking during baking. I’ve found that 2 hours of chilling yields an even flakier result if you have the time. 💡
Prevent Soggy Bottoms
To avoid a soggy crust, blind-bake the bottom crust for 10 minutes at 375°F before adding the filling. Alternatively, brush the unbaked bottom crust with a thin layer of beaten egg white to create a moisture barrier. This step makes a noticeable difference.
Thickening the Filling
If your filling seems too thin after simmering, mix 1 tbsp cornstarch with 1 tbsp cold water and stir it into the hot mixture. Simmer for an additional 1-2 minutes until it reaches the perfect creamy consistency. This trick saves the day when needed.
Venting the Top Crust
Cut 4-5 decorative slits in the top crust to allow steam to escape. Without proper venting, the filling can boil over and the crust may not cook evenly. I use a small cookie cutter for creative shapes that still serve the same purpose. 🔥
Baking Surface
Place your pie dish on a preheated baking sheet to ensure the bottom crust cooks through completely. This prevents the dreaded undercooked, doughy bottom. Bake at 375°F for 45-50 minutes until the crust is a beautiful golden brown.
Nutrition Facts
Frequently Asked Questions
Can I use store-bought pie crust?
Yes, but homemade tastes better. Store-bought works in a pinch—just ensure it’s thawed if frozen. For best results, brush the bottom crust with egg wash to prevent sogginess.
How do I keep the crust flaky?
Use ice-cold butter and don’t overwork the dough. Chill for 1 hour before rolling. These steps ensure those coveted flaky layers.
Can I make this ahead of time?
Assemble the pie, cover tightly, and refrigerate for 24 hours or freeze for 1 month. Bake from chilled or thawed as directed.
Why is my filling runny?
Simmer the filling until thickened before baking. If needed, mix 1 tbsp cornstarch with 1 tbsp water and stir in. This ensures a creamy texture.

- Jollof Rice Sauce Recipe: West African Tomato and Spice Infusion - September 25, 2026
- Japanese Rice Soup Recipe: Umami-Rich Comfort in a Bowl - September 25, 2026
- Homemade Cream Of Rice Recipe: Silk-Smooth Breakfast in Minutes - September 25, 2026